

3 Day Pizza Dough: Ratios, Timeline, and Bake
Most pizza advice treats a longer ferment as an automatic upgrade. Wait three days, the claim goes, and the crust will taste better, stretch easier, and sit lighter in the stomach. That promise is only half true. A 3 day pizza dough can be excellent, but only when the refrigerator and the yeast are managed together. The clock is a guide. The dough's condition is the decision.
Three days sits at the far end of a known cold-fermentation window, not past it. Independent food-science guidance places cold fermentation at about 24 to 72 hours, with roughly 72 hours at the upper end, against room-temperature fermentation of about 1.5 to 24 hours. A typical fridge near 40°F (4°C) is far slower than a counter near 72°F (22°C). That gap is why dough can develop over days instead of hours. It is also why copying a same-day yeast amount into a three-day mix usually overshoots.
Table of Contents
- Why a 3 Day Pizza Dough Tastes Better
- Baker Percentages for a Reliable Cold Dough
- Mixing and the Three-Day Cold Ferment
- Warming Shaping and Final Proof
- Baking on a Stone or Steel at Home
- Fixing Dough That Is Not Ready
- Hydration Variations Storage and Next Bake
Why a 3 Day Pizza Dough Tastes Better
A 3 day pizza dough is a cold-fermentation method, not one fixed formula. The cold does not invent flavor by itself. It changes the pace of the organisms and enzymes already in the bowl.
Time and temperature, not extra hours
Yeast makes carbon dioxide and the by-products that smell like bread. Enzymes nibble starches and proteins, which can improve extensibility, browning, aroma, bubbling, and a softer, chewier crust. At refrigerator temperature, yeast slows sharply while enzymes keep working. A baker on a 72-hour schedule generally uses less yeast than a same-day baker, because those by-products have much longer to accumulate.
That is the useful part of waiting. It is not proof that hour 80 beats hour 60. Past the practical window, dough can turn slack, alcoholic, or hard to open. Flour, hydration, yeast quantity, the actual temperature inside the fridge, and whether the dough ferments in bulk or as balls still decide the result.
Practical rule: Three days is a benchmark inside a known range. Judge the ball, not the calendar.
A cooler fridge and a tiny yeast dose can look underdone at 72 hours. A warmer fridge and a generous pinch can look finished at 36. The colder method is often described as giving more complex flavor, better bubbling, and a softer chew than a fast counter ferment. Those traits show up when the dough is still strong, not when it has already collapsed.
Keep the lesson small before the numbers arrive. You are choosing a slow path so enzymes have time and yeast does not race ahead. You are not signing up for a recipe that works in every kitchen on the same clock.
Baker Percentages for a Reliable Cold Dough
Percentages let you scale without guessing. For a reliable cold dough, start with 100% flour, 60–65% water, 2.5–3% salt, and instant yeast at roughly 0.08–0.15% of flour weight, held near 3–6°C (38–43°F), as laid out in this cold-fermentation pizza dough guide. The main control is actual dough temperature. A few degrees can change speed enough to miss the bake.
One 500 g batch
On 500 g of flour, the baseline looks like this.
| Ingredient | Baker's percentage | Example for 500 g flour |
|---|---|---|
| Flour | 100% | 500 g |
| Water | 60–65% | 300–325 g |
| Salt | 2.5–3% | 12.5–15 g |
| Instant yeast | 0.08–0.15% | 0.4–0.75 g |
That yeast range is tiny next to a same-day dough. 0.4 g is a scant pinch. If your scale only reads whole grams, mix a larger batch or accept that a heavy hand will push the dough past its best point before day three.
What to set out before you mix
Have these ready before the flour hits the bowl.
- A scale: Volume measures cannot hit a yeast dose this small.
- Covered containers or dough boxes: Lids stop a skin from forming while the balls sit.
- A bake time about three days later: Mix when you can warm the dough for several hours before that meal.
Stay at moderate hydration on the first try. Higher-hydration doughs ferment faster because nutrients move more easily. Lower-hydration doughs hold their shape better across a long cold hold. Salt in the 2.5–3% band seasons the crust and tightens the gluten so the ball does not turn slack too soon.
The dial on the fridge door is not the dough temperature. Put a thermometer in the same spot the containers will sit.
Write the batch down: flour weight first, then water, salt, and yeast in proportion. Next time you change only one thing, usually the yeast or the shelf, so you can see what your fridge really does.
Mixing and the Three-Day Cold Ferment
Weights are set. What follows is handling across the days.
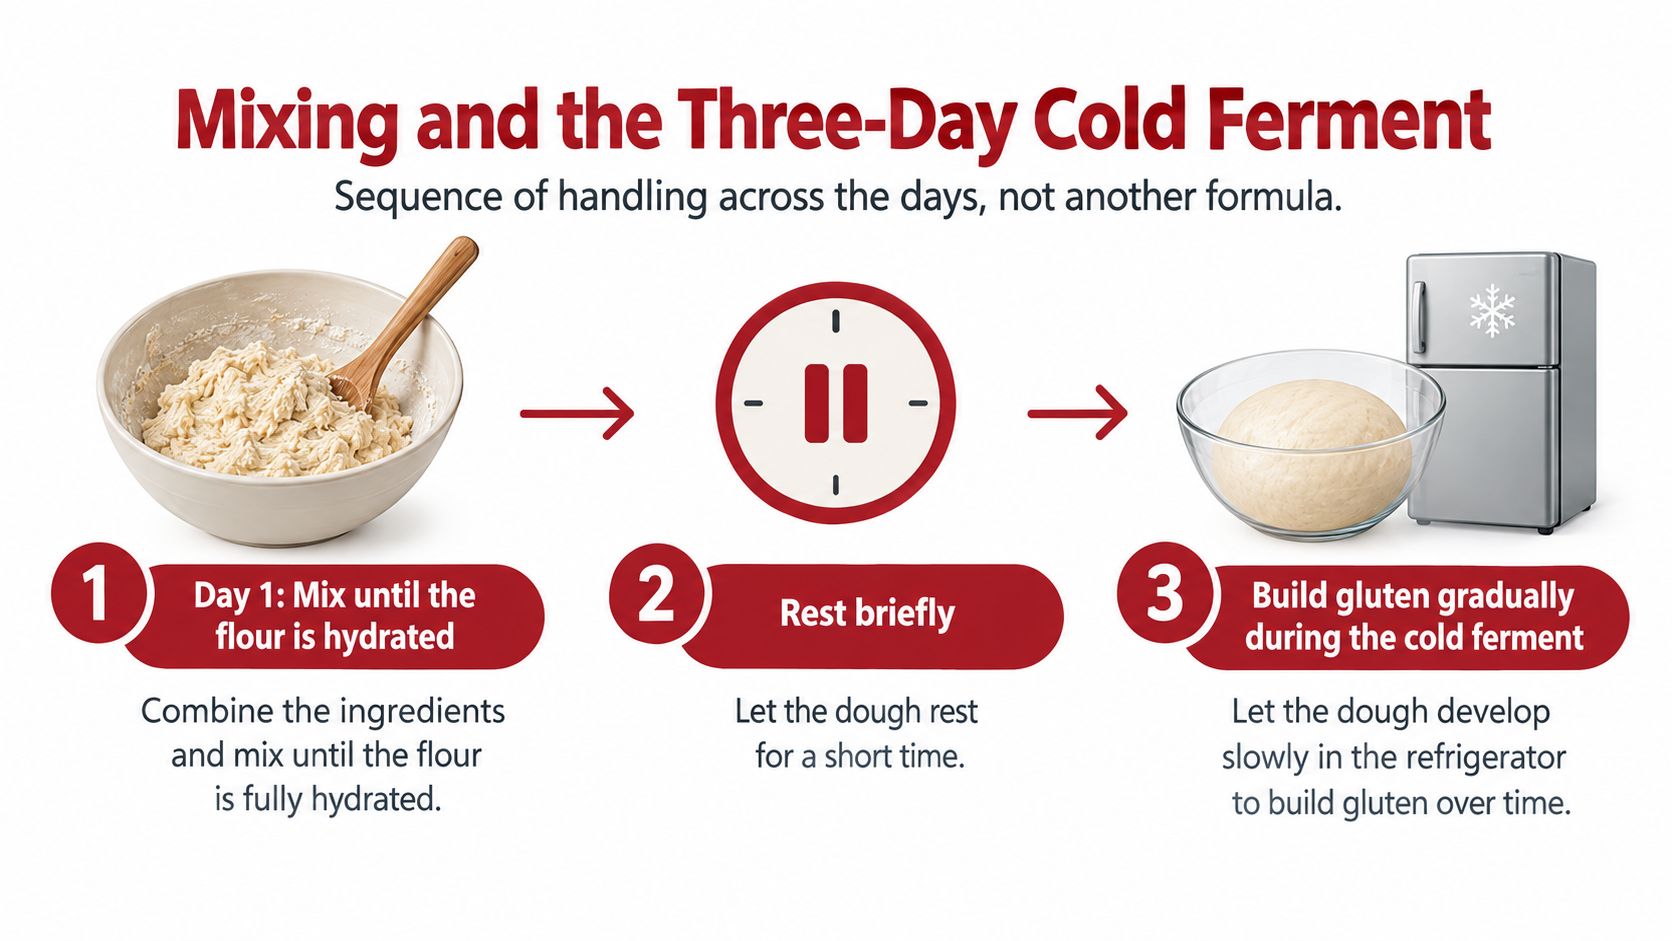
The sequence below is the handling path, not a second formula.
Evening one
Mix until every bit of flour is hydrated. A shaggy mass is fine. Cover it and rest it briefly so the flour can drink before you ask it to build strength.
Then build moderate gluten. A few folds, or a short knead, is enough. Stop when the dough feels cohesive and slightly elastic. Working it to exhaustion makes a tight ball that fights you on bake day and does not gain much from the cold hold.
Give the dough a brief bulk rest at room temperature, then divide and ball. Move the balls into covered containers and refrigerate them. Oil or a light flour dust on the container keeps them from welding to the plastic. Do not seal them so tightly that you cannot see the surface later.
The middle day and the bake day
Leave the dough cold through the middle day. Do not punch it down to "check" it. Opening the lid and pressing out the gas undoes the structure you are trying to keep. A healthy cold ball tends to show a modest rise and some bubbles under the skin. It should not look like it has doubled the way a warm dough does in an hour.
Plan the bake on the third day. Three days sits near the upper end of the common 24–72 hour cold window, so the dough is still alive in the fridge. Cold slows yeast. It does not stop it.
A simple calendar
- Start evening: Mix, rest, fold or knead lightly, ball, and chill.
- Middle day: Leave the covered balls alone. Glance at volume if you open the fridge, then close it.
- Bake day: Warming, shaping, and the hot deck are a separate job. Do not start them while the dough is still refrigerator-cold and tight.
If a ball looks quiet on the middle day, that is often normal at this yeast level. Wait for bake-day warmth before you decide it failed.
Warming Shaping and Final Proof
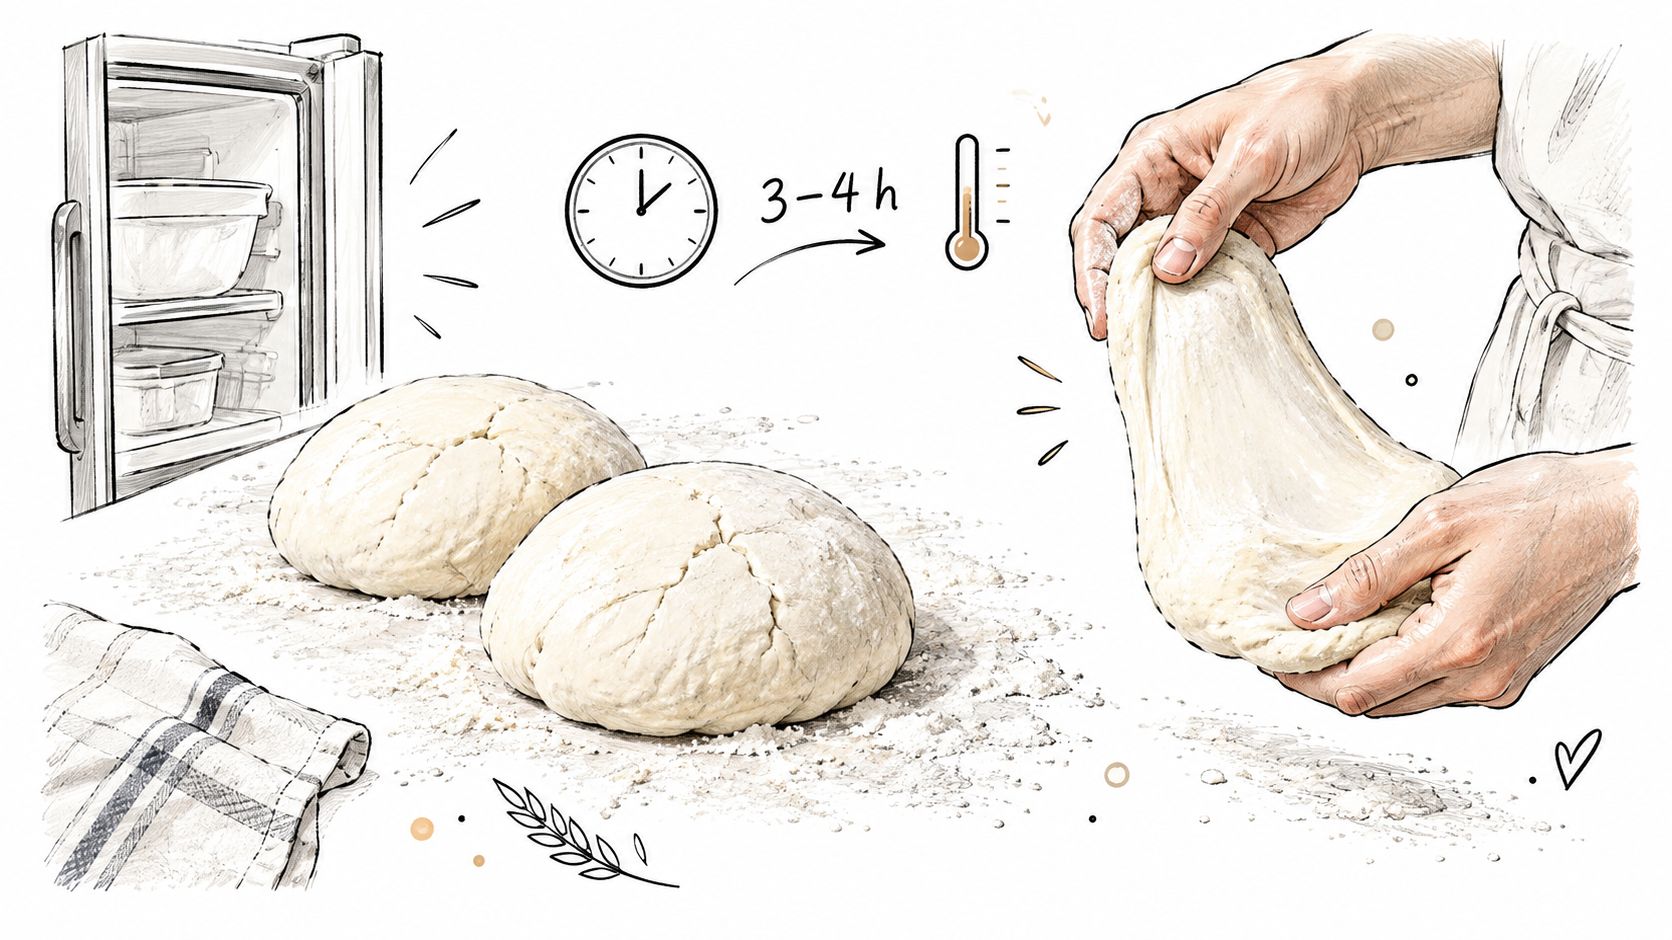
Cold dough is tighter and tears more easily. Take the balls out about 3–4 hours before baking and let them warm until they feel extensible. That counter time is there to regain stretch, not to start a brand-new fermentation.
How to tell a ball is ready
Check four cues before you open the dough. A useful deeper look at warmth and timing sits in this note on pizza dough proofing temperature.
- Volume: Some increase from the chilled size, not a balloon.
- Bubbles: A few visible pockets, especially near the edge.
- Elasticity: The dough yields when you press it.
- Spring-back: A slow return, not a snap into a tight ball.
A ball that is still dense needs more time on the counter. A ball that already feels soft can be opened. If it fights your hands, pause. Forcing a thin center on cold gluten is how holes start.
Opening without wrecking the rim
Dust lightly. Press from the center outward with your fingertips, leaving the outer rim alone. That rim holds much of the bubble structure from the cold ferment. Lift the dough onto your knuckles only after the center has thinned, and let gravity do the last stretch.
This path is aimed at a crisp, relatively thin home pizza, not a pan style. You want a round that will sit on a peel without tearing and still carry an intact rim into the oven or onto the grill. If the center looks translucent, you have gone too far. Patch it by folding a little rim dough inward rather than stretching again.
Baking on a Stone or Steel at Home
Fermentation is finished once the round is shaped. The bake is a heat problem. A fully preheated, high-thermal-mass surface is what turns a sound three-day dough into a crisp base. A cold or barely warm stone hides good fermentation behind a pale, soft bottom. Pizza Blab's fermentation comparison notes that cold dough can need far more time for comparable flavor, about 20 hours at 8°C versus 2 hours at 32°C in one yeast condition, and roughly 3–12 times longer depending on temperature. That slow path still fails on a deck that was never properly hot.

Oven or grill
Both a home oven and a backyard grill can work when the deck is hot and the dough is not overloaded. Choose the setup you can preheat thoroughly. An oven that only reaches a moderate setting needs a long preheat and a lighter topping load. A grill can run hotter, but the deck still has to sit in that heat until it is saturated, not merely warmed on the surface.
Stone or steel
Cordierite spreads heat evenly and suits a golden base without constant rotation. A high-thermal-mass steel stores more heat and sets the underside faster and firmer. If you are new to steel, this walk-through on how to use a pizza steel covers placement and preheat habits that transfer to any heavy plate.
Hans Grill makes a Rectangular Pizza Stone in cordierite, a Pizza Stone PRO XL Set, a Pizza Steel PRO, and pizza dough proofing boxes, all food-safe and meant for ovens and BBQs. Purchases on Amazon or the website carry a 1-year warranty, 30-day returns, and free US shipping on orders $49+. The brand cites 11K+ customers and 16,000+ verified Amazon reviews averaging 4.6/5. Pick the surface that matches the heat you can actually hold, then learn that one tool.
A short look at deck heat and launch timing:
Keep sauce thin so the center does not flood. Launch promptly. Judge doneness by color and a crisp underside, not by a timer alone.
Fixing Dough That Is Not Ready
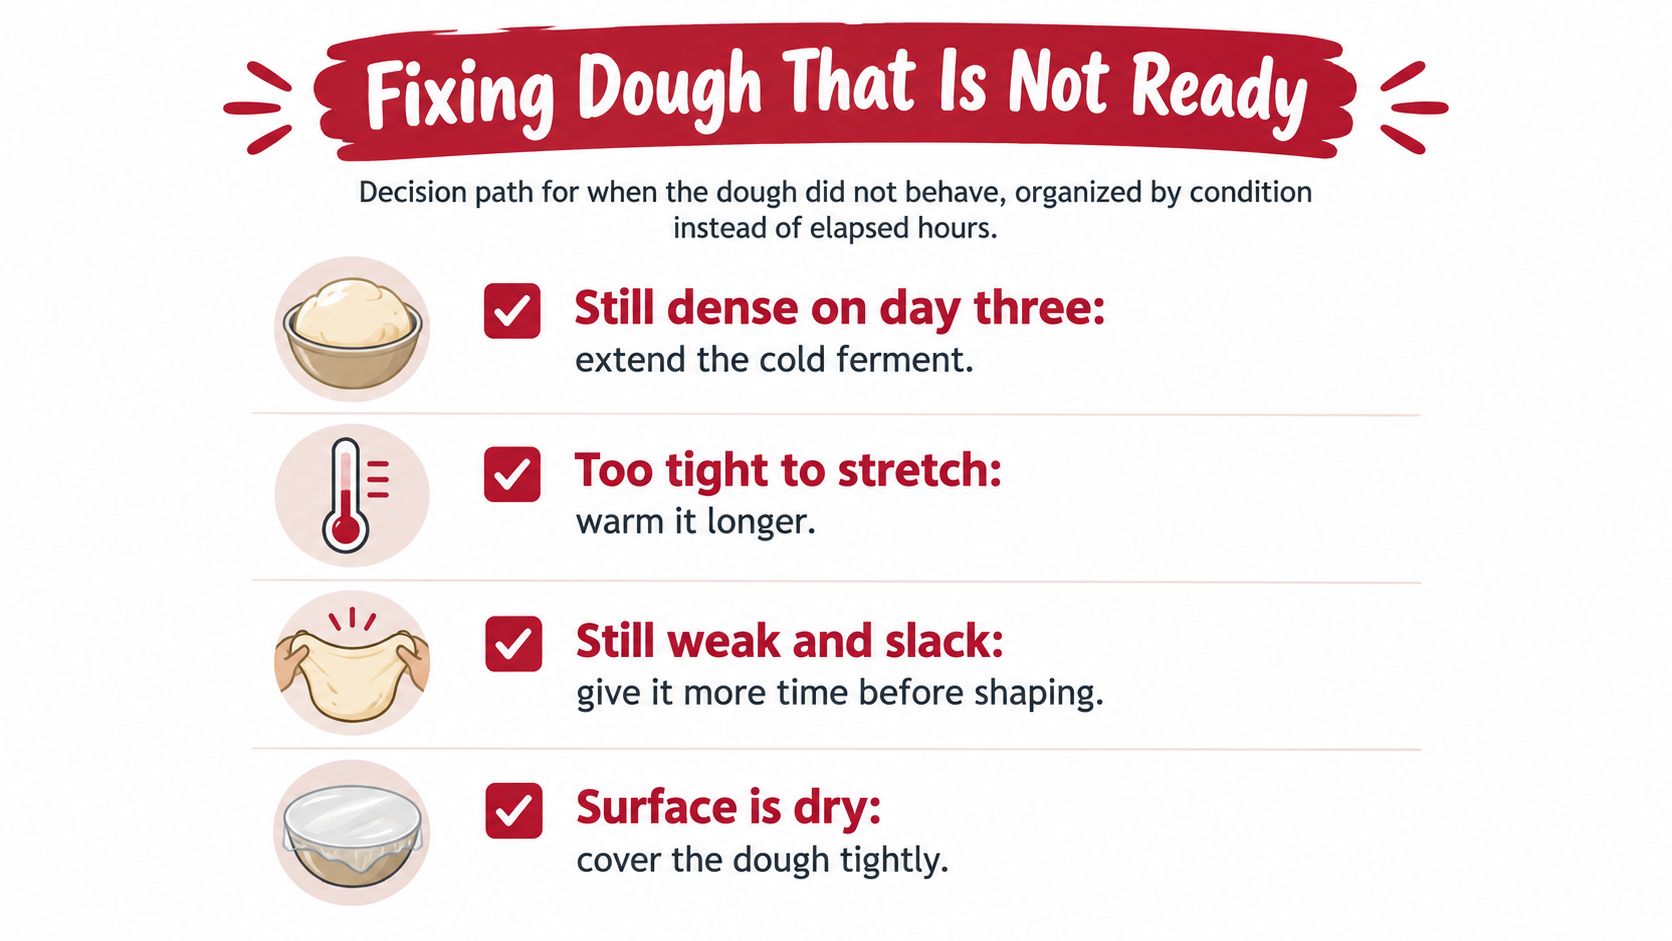
When the ball misbehaves, sort it by condition. Elapsed hours will not tell you what to do next.
Use the dough in front of you, not the hour on the clock.
Cold fermentation slows yeast but does not stop it. As yeast-handling guidance makes clear, a dough that is fine in a 35°F refrigerator may over-proof in a warmer 40°F one. Higher-hydration doughs ferment faster. Lower-hydration doughs stay more stable.
Still dense
If the ball is tight and quiet on day three, extend the room-temperature proof. Do not force a stretch. Next batch, you can sit a little higher in the low yeast range, or finish the warm-up in a slightly warmer spot. Stay inside that small yeast band. Do not jump to a same-day dose.
Collapsed, sharp, or soupy
A collapsed ball, a sharp alcoholic or solvent-like smell, or a slack, sticky feel means the dough has likely over-fermented. Cool the next batch sooner. Use less yeast next time. If this ball is already fragile, bake it from a partially chilled state rather than giving it a full warm-up that makes it weaker.
Do not degas aggressively while you inspect the container. Pressing the gas out will not fix an over-proofed ball.
Match the fix to the pizza
A thin, crisp style on stone or steel wants a dough that opens without turning soupy. A softer, higher-hydration style ferments faster and is less forgiving over three days. If you want that wetter dough, shorten the cold hold or drop the yeast before you blame the oven.
Useful cues stay the same: volume, bubbles, elasticity, and a slow spring-back. Fixes stay short. More counter time for a dense ball. Less yeast or an earlier chill next time. A partial chill at the bake if the dough is already weak. You can still get a pizza tonight, and the next batch gets one deliberate change.
Hydration Variations Storage and Next Bake
Once the baseline behaves, scale it instead of rewriting it. Change the flour weight first. Water, salt, and yeast follow in the same percentages. A bigger pizza night is a bigger batch, not a wetter one.
Whole wheat and sourdough
Whole wheat drinks more water and feels less stretchy. Keep the long, cold, low-yeast idea, and raise hydration only a little. A very wet dough will ferment faster and fight you by day three.
A culture that includes lactic-acid bacteria is a different process from commercial yeast held in the fridge. Do not assume the two schedules swap.
Digestion, stated carefully
A 2025 peer-reviewed study reported that extended fermentation, particularly with lactic-acid-bacteria sourdough, produced a notable reduction in FODMAPs. That may matter for some people sensitive to those carbohydrates. It does not show that every conventional three-day dough made with commercial yeast is equally easy to digest, and it does not remove gluten-related risk. FODMAP sensitivity is not celiac disease or wheat allergy. If you are testing personal tolerance, start with a small portion. This is not a medical claim.
Where the dough waits
Keep covered balls in the refrigerator and check them by condition. Do not leave a slack ball because the calendar still says day three. Storage habits for the days after mixing are covered in this guide to pizza dough storage.
Choose the bake night first. Mix the baseline batch, hold it covered and cold, then preheat a Hans Grill stone or steel in the oven or on the grill so the dough meets a hot deck.
Hans Grill builds cordierite stones, high-mass steels, and dough proofing boxes for home ovens and backyard grills, the gear that finishes a carefully chilled 3 day pizza dough on a deck that is properly hot. If you are ready to pick a surface and proof your next batch with more control, visit Hans Grill.


