

Baking a Pizza on a Pizza Stone Like a Pro
You've preheated the oven until it beeps, slid on a pizza loaded with sauce and mozzarella, and waited for the promised crisp base. Instead, the rim is browned while the center stays pale, soft, or stuck to the stone. The problem usually isn't a lack of oven heat. It's that the stone never stored enough heat, or the dough reached it too slowly to make a clean launch.
Baking a pizza on a pizza stone becomes far more repeatable once you treat the stone as a thermal battery rather than a slab that merely sits inside a hot oven. The preheat, the dough's moisture, the peel motion, and the cooling routine all matter because they control how heat enters and leaves the pizza.
Table of Contents
- The Science of a Crisp Bottom Crust
- Preheating and Launching the Dough
- Adapting the Technique for Backyard Grills
- Managing Toppings and Dough Hydration
- Preventing Thermal Shock and Cleaning Safely
- Maximizing Energy Efficiency for Pizza Night
The Science of a Crisp Bottom Crust
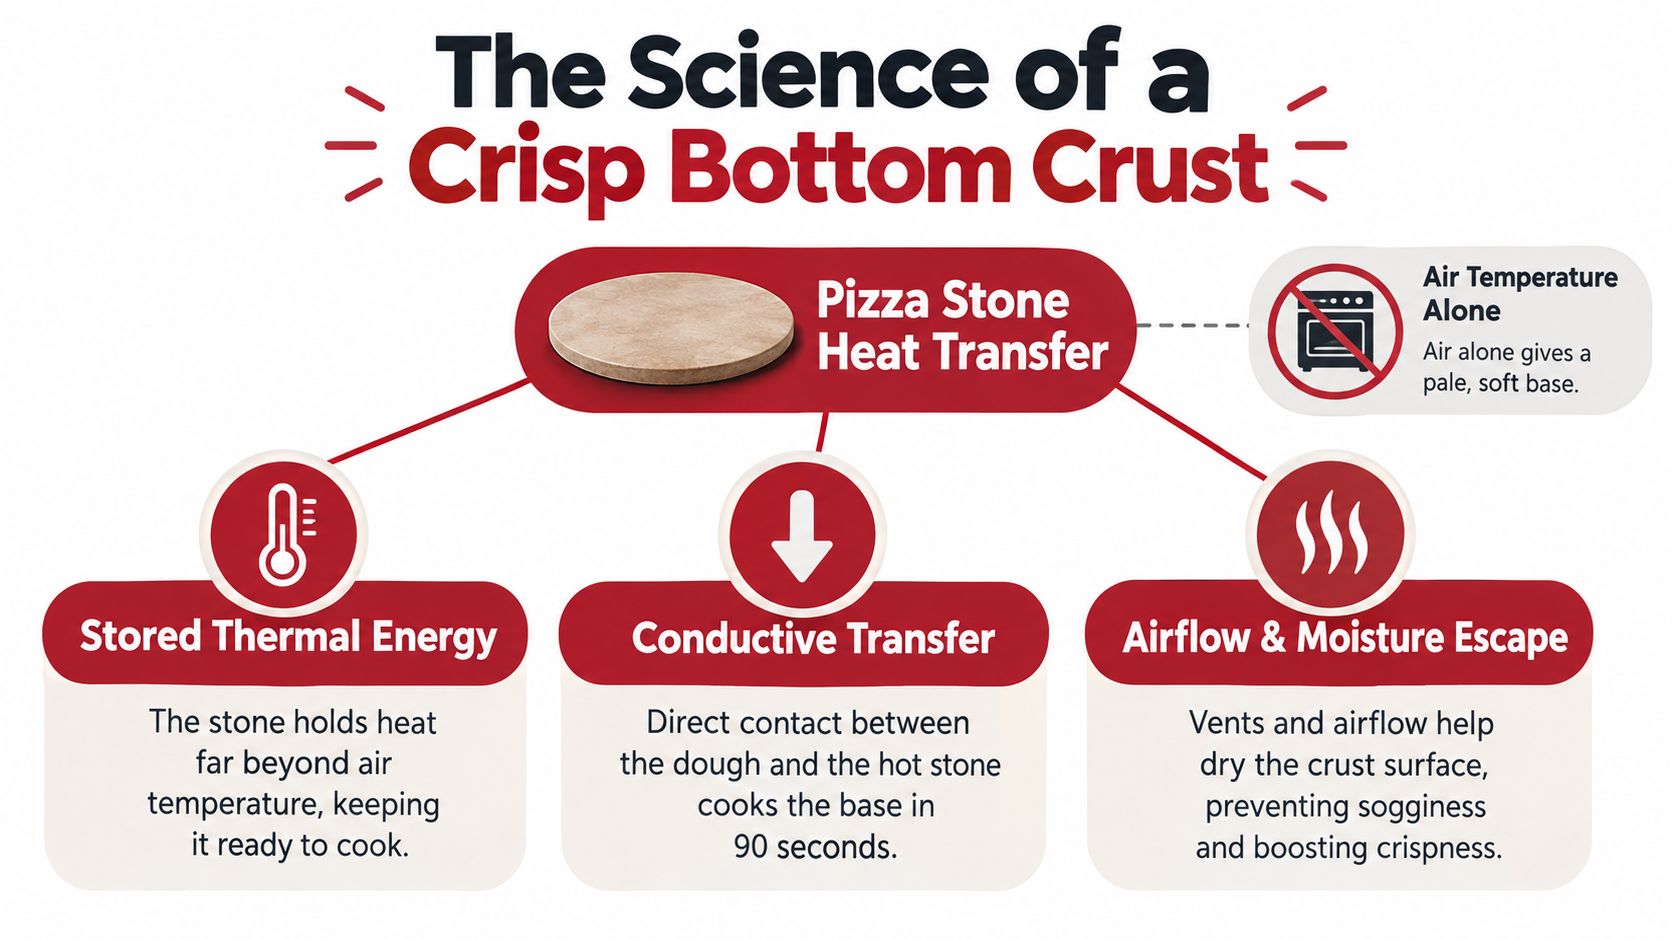
A pizza can brown on top while its underside stays pale because the oven air and the stone do different jobs. Conduction from the stone, convection from hot air, and radiation from the oven cavity all heat the pizza, but direct contact controls how quickly the base sets, dries, and develops a crisp crust. Opening the door also lowers the surrounding heat, while the stone's stored energy keeps working at the dough.
A published analysis of Neapolitan pizza measured a traditional wood-fired oven floor at 439 ± 3°C, approximately 822 ± 37°F, and found that its temperature remained practically constant during baking (published pizza-baking analysis). The area beneath the pizza cooled faster as the pizza's mass increased. Thick dough and generous toppings therefore draw more energy from the contact zone, which can leave the center soft even when the oven is very hot.
Why thermal mass matters
A fully heated stone transfers energy into the dough immediately after launch. That contact heat sets the bottom and supports browning, while hot air cooks the top and removes moisture. The stone cannot match the flame radiation of a wood-fired dome, but it does reproduce the heated-floor part of the process.
Stone thickness and material affect how steadily that heat reaches the dough. Cordierite is widely used because it changes dimensions very little during heating. Its low expansion in some directions and contraction in another help limit stress through repeated heating and cooling (cordierite material research summary).
The practical lesson: a high oven setting does not guarantee a ready baking surface. Give the stone time to absorb and stabilize heat before launching.
For a practical explanation of why a pizza stone works through stored thermal energy and heat transfer, focus on the difference between air temperature and surface energy. A one-hour preheat matters because the stone, not the oven display, supplies the first decisive burst of heat to the crust. A clean, confident peel launch matters for the same reason: the dough must contact that hot surface promptly and evenly, without folding or shedding toppings that create cool, wet patches.
Preheating and Launching the Dough
A stone can sit in a hot oven and still be underheated. Place it in a cold oven, on a lower or lower-middle rack with space around the walls and heating elements. Set the oven to its highest practical pizza setting, usually 500 to 550°F, or 260 to 290°C, then let the stone heat for 45 to 60 minutes after the oven reaches its programmed temperature (America's Test Kitchen testing). The display measures air temperature, not the heat stored inside the stone or available at its surface.
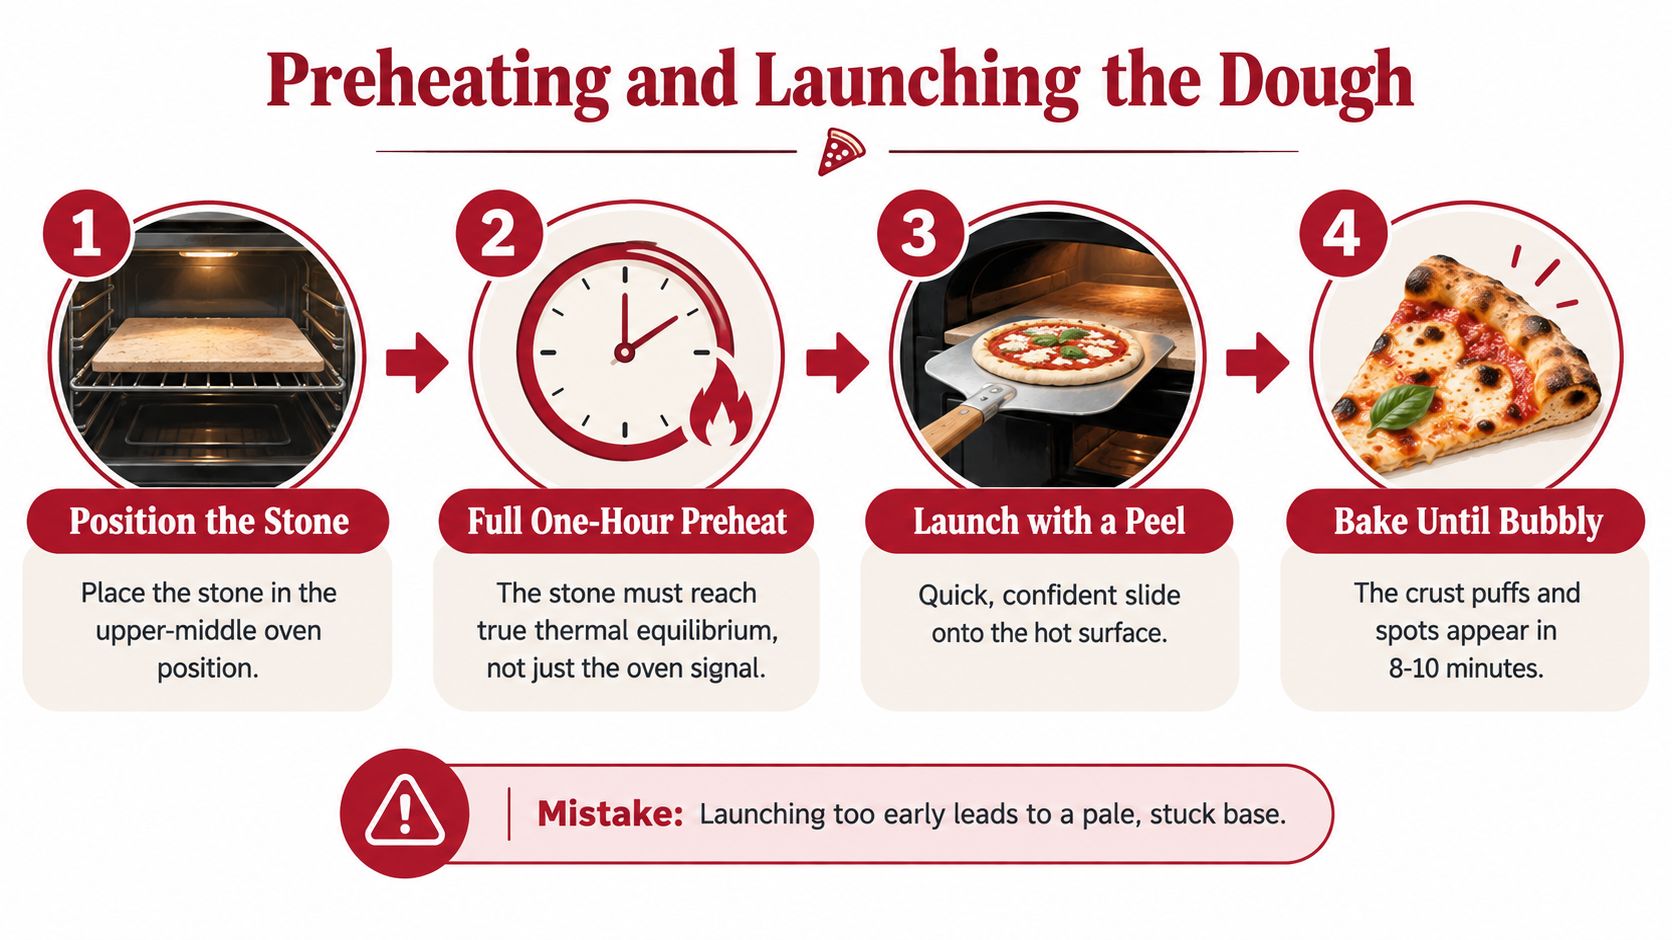
An infrared thermometer can help confirm that the baking surface is ready. Aim at a clean section of stone. Flour, oil, and sauce residue can distort the reading, so avoid measuring a patch covered with loose material.
Prepare the peel before the pizza
Use a dry peel with a light dusting of flour or semolina. The coating should help the dough slide, not create a loose layer that burns on the stone. Assemble quickly because sauce and toppings add moisture as they sit.
Shake the peel briefly before opening the oven. The dough should move freely. If an edge catches, lift it carefully and add a small amount of flour underneath. Stop decorating once the dough starts sticking. A delayed launch can fold the rim, shift the toppings, and leave a damp, poorly heated patch on the stone.
Make the launch decisive
Open the oven and bring the peel close to the stone. Point the front edge at the intended landing spot, then make a short forward motion followed immediately by a quick retreat. The forward movement sends the pizza onto the stone; withdrawing the peel lets the dough release cleanly.
Keep the launch brief. Do not push the peel far into the oven or lift it sharply while withdrawing. If the pizza lands slightly off-center, leave it there. Trying to move a soft base can tear the dough or disturb the toppings.
For a traditional crust, a food-science study reported a benchmark of 260°C, or 500°F, for 12 minutes, while recognizing that thickness, toppings, airflow, and stone temperature alter the result (traditional-crust pizza study). Use the rim and underside as your working cues rather than relying on the timer alone. If the peel motion feels uncertain, practice the pizza-peel technique with an untopped dough round.
Adapting the Technique for Backyard Grills
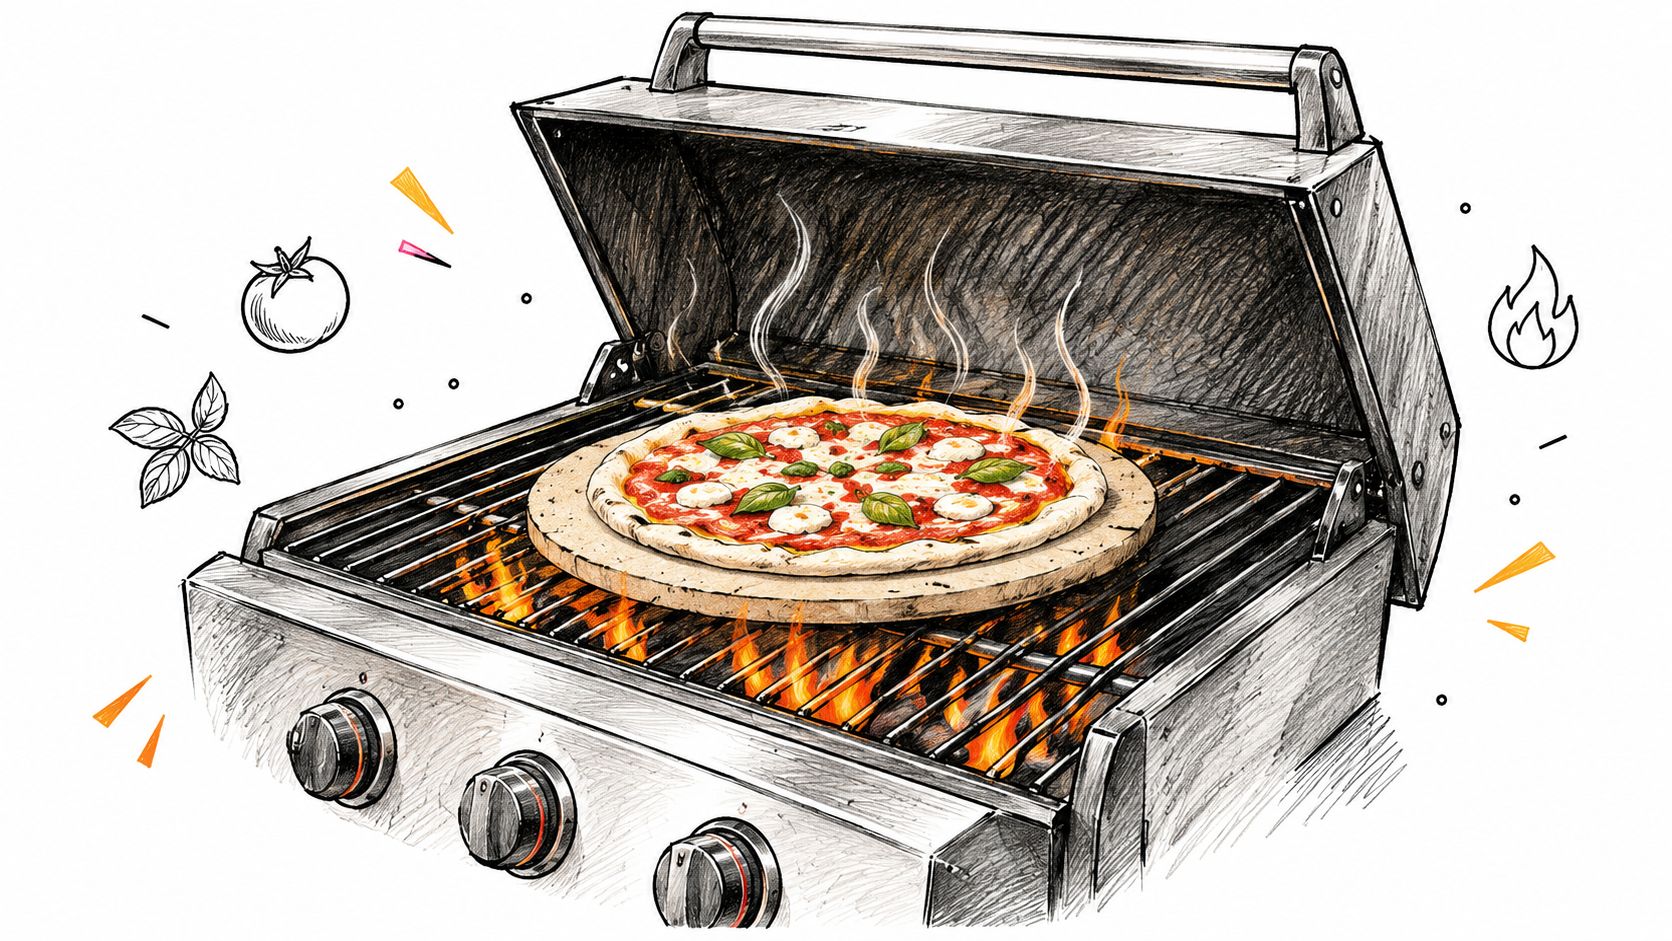
A grill can bake excellent pizza, but the lid becomes part of the oven. Indoors, the stone sits in an enclosed cavity with managed heating elements. Outdoors, direct flame, gaps around the lid, wind, and uneven burners can create a fierce underside while the cheese remains cool.
Gas grills offer easier heat adjustment. Preheat the stone with the burners running, then position it where the underside receives strong heat without sitting directly over an aggressive flame. If the bottom colors too quickly, move the stone away from the hottest burner and keep the lid closed so the upper heat has time to catch up.
Charcoal grills need more attention to coal placement. A bed of coals concentrated directly beneath the stone can scorch the base before the top cooks. Bank the fuel to create a hot zone and a gentler zone, then use the lid to retain heat and regulate airflow.
Build a stable heat chamber
Keep the lid closed during the preheat and bake except when you must launch, rotate, or check the underside. Every opening releases the hot air that cooks the toppings. The stone continues providing contact heat, but it can't compensate indefinitely for a lid that stays open.
A grill setup works best when the stone has room around it for hot air to circulate. Don't wedge it against the lid or place it where flames can lick its edges. The stone needs support across its surface, especially if it's large or rectangular.
The grill lid isn't just a cover. It's the upper heating element and the convection chamber.
Launch with the same clean forward-and-back motion used indoors, then close the lid immediately. If the top is lagging behind the base, reduce the direct heat beneath the stone or shift the stone toward indirect heat. If the top browns while the underside stays soft, improve the stone's contact with the hot zone and check that the stone had enough preheating time.
Let the stone cool completely on the grill or in the oven before moving it indoors. A hot stone moved through cooler air and placed on a cold surface faces the same thermal-shock risk as one exposed to water. See the grill-specific pizza-stone method before switching between appliances.
Managing Toppings and Dough Hydration
A hot stone cannot rescue a pizza carrying more water than the bake can remove. Wet sauce, fresh mozzarella, and watery vegetables release steam above the dough, slowing browning and leaving the center pale, soft, or leathery.
Control the moisture before launch. Spread a thin, even layer of sauce instead of pooling it in the middle. Drain fresh mozzarella, and blot vegetables that release liquid. Mushrooms, zucchini, spinach, and similar toppings often bake better after brief cooking or draining.
Match the load to the crust
Thin dough heats quickly because it contains less mass, but it also loses texture when overloaded. A thicker base can support more topping, though its center needs longer exposure to the stone before it sets.
As established in the preheating section, 500°F for 12 minutes is a traditional-crust starting point, not a universal formula (pizza-baking study). Adjust the bake to the dough's thickness and the topping load.
| What you change | What usually happens | Practical response |
|---|---|---|
| More wet sauce or cheese | The center produces more steam | Use less, drain it, or extend the bake |
| Thicker dough | The stone must heat more mass | Bake longer and keep the top moderate |
| More vegetables | Moisture escapes during baking | Pre-cook or drain watery ingredients |
| Lighter topping load | The base dries and browns sooner | Watch the underside closely |
The peel also affects hydration. A dressed pizza left sitting on the peel gives sauce time to soak into the dough, making launch harder and the base softer. Build quickly, shake once to confirm movement, and launch immediately. Use only enough flour or semolina to prevent sticking, since excess particles can burn before the crust finishes.
Steel changes the timing rather than only making the same bake hotter. Its strong contact heat can set the underside rapidly, so a heavily topped pizza may need a slightly gentler launch temperature or a shorter contact period before the top catches up. Stone surfaces usually give you more time to correct the balance. If the base is crisp but dry, shorten the bake or add a modest amount of topping. If it stays soft, reduce moisture before changing the baking surface (pizza-stone testing).
Preventing Thermal Shock and Cleaning Safely
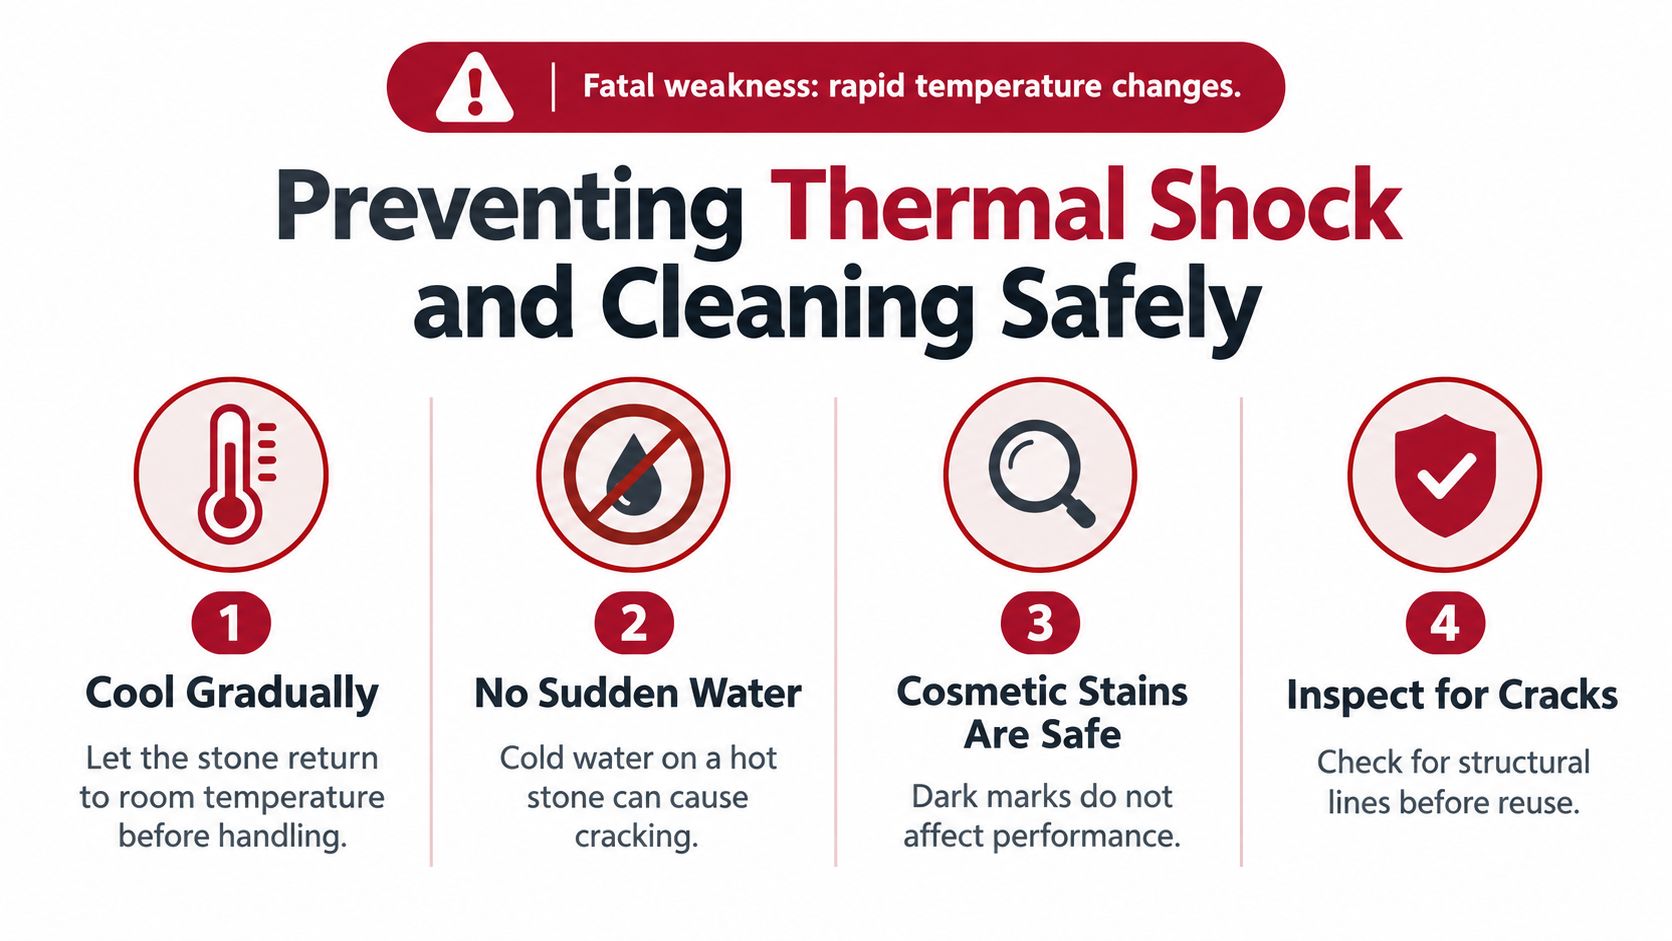
The most serious stone failure usually comes from thermal shock, not from ordinary high-temperature baking. A hot ceramic surface exposed to cold liquid or a rapid temperature change develops uneven internal stresses. Dropping the stone or striking it creates separate mechanical damage.
Never place a room-temperature stone into an already-hot oven. Don't put a frozen or very cold stone on a hot grill, and don't cool a hot stone with water. Start the stone and oven together, then leave the stone undisturbed until it has cooled fully.
Stains aren't the same as cracks
Dark marks and baked-on patches are normal signs of use. They don't automatically mean the stone is contaminated or unsafe. A structural crack, flaking area, sharp fracture, or piece that shifts under pressure is different and warrants replacement.
After cooling, scrape away loose residue with a bench scraper or blunt tool. Wipe the surface only as necessary, and never soak a porous stone. Soap and absorbed water can remain in the material, then expand during a later bake and encourage cracking.
- Cool gradually: Leave the stone in the switched-off oven or grill until it returns to room temperature.
- Keep water away from heat: Don't place a hot stone on a cold or wet countertop.
- Inspect before reuse: Check for structural cracks, loose fragments, and damaged edges.
- Store with support: Keep the stone flat where it won't be struck or dropped.
The natural darkening of the surface is less important than the stone's structure. A stained stone can still bake well. A cracked one can fail during handling or heating.
Maximizing Energy Efficiency for Pizza Night
A long preheat makes more sense when you use the stored heat for more than one pizza. Research on pizza's environmental impact identifies the cooking stage as material, while the ingredient mix can matter even more (life-cycle analysis of pizza). Separate analysis cited in that work found that a home gas oven can have nearly three times the cooking impact of a commercial wood-fired oven because the household appliance serves only one or a few pizzas, while commercial heat is shared across many pizzas.
That doesn't make a stone pointless. It means you should plan the session rather than repeatedly heat an oven for a single pie.
Prepare several dough portions before the oven is ready. Set up sauce, drained cheese, and toppings in advance so each pizza moves from shaping to launching without leaving the door open. Once the first pizza bakes, assemble the next one while the stone recovers.
Batch-baking rule: preheat once, then keep the oven working continuously.
A single pizza may not justify the full energy cost of a high-temperature preheat for every household. Several pizzas, followed by bread or roasted vegetables while the stone and oven remain warm, make better use of the stored heat. On a grill, stable lid management matters just as much. Avoid repeatedly opening the lid or restarting the fire for separate small sessions.
For a durable cordierite option that works in an oven or on a gas or solid-fuel barbecue, Hans Grill offers a rectangular pizza stone, plus sets that pair a stone with a tapered peel. You can compare the available tools and baking accessories at Hans Grill, then plan your next pizza session around one thorough preheat, clean launches, and consecutive bakes rather than chasing heat from a cold stone.
Visit Hans Grill to choose pizza stones, steels, peels, and proofing tools suited to oven or backyard-grill baking. Set up your equipment before the preheat starts, then use the technique here to turn stored heat into a crisp, repeatable crust.


