

Pizza Dough Thickness: The Guide to Crisp, Chewy Crusts
“Thinner is better” is one of the most persistent pieces of pizza advice, and it's incomplete. A pizza can be too thin for its toppings, its hydration, or the heat source beneath it. The right target isn't a single measurement. It's a thickness profile, shaped by the relationship between the center, the rim, the raw dough, the baked crust, and the appliance doing the cooking.
A thin center may crisp quickly on a thoroughly heated surface, yet dry out or crack in a longer home-oven bake. The same measured center can also stay flexible and floppy if sauce, cheese, and wet toppings put more weight on it than the structure can support. Good pizza dough thickness gives you a base that cooks through, carries the toppings, and still has the texture you intended.
Table of Contents
- Why Dough Thickness Is More Than a Number
- The Neapolitan Baseline and Why It Still Matters
- Thickness Ranges by Pizza Style
- Measuring and Rolling Dough to Target Thickness
- How Thickness Interacts with Heat, Hydration, and Toppings
- Troubleshooting Thickness Problems
- Building Your Personal Thickness Recipe
Why Dough Thickness Is More Than a Number
Think of a pizza like a credit card with a raised frame around it. The middle is thin and flexible, while the outer edge supplies strength and volume. A pizza that has been flattened to one uniform thickness loses that contrast. It may bake evenly in theory, but it won't deliver the crisp center and airy rim many people want.
The first distinction is center versus rim. The center determines how quickly heat reaches the interior and how much moisture must escape. The rim affects lift, chew, and handling. You can stretch the middle thin without pressing the outer ring flat, which creates different zones for different jobs.
The second distinction is raw thickness versus baked thickness. Dough changes as it heats. Water turns to vapor, the crumb sets, and fermentation gases expand the rim. A piece of dough that looks delicate before baking won't necessarily finish as a cracker, especially when the perimeter remains thicker.
Why thinner can fail
A very thin center has less material to protect it from intense heat. On a hot stone or steel, that can be useful because the base sets quickly. In a conventional oven with a longer bake, however, the same thin center may lose too much moisture before the toppings finish. It can become brittle, pale but dry, or cracked under the weight of cheese.
The opposite problem occurs when the center is too thick for the available heat. The surface may brown while the interior remains soft. Thick dough also needs more time for heat to travel inward and for moisture to leave, so adding thickness without changing the bake creates a mismatch.
Practical rule: Choose thickness together with heat, hydration, and topping weight. Never choose it in isolation.
The profile matters more than the label
“Thin crust” covers several eating experiences. One pizza may have a delicate, crisp center and a puffy rim. Another may be uniformly thin from edge to edge. A third may be thin at the center but heavily topped, leaving the middle flexible rather than crisp.
That's why two pizzas with the same measured center can feel completely different. One may have a dry, crisp base and a light rim, while the other has more water in the dough, heavier toppings, or a cooler bake that leaves the crumb tender. The measurement is useful, but the baking environment determines what that measurement becomes.
The Neapolitan Baseline and Why It Still Matters
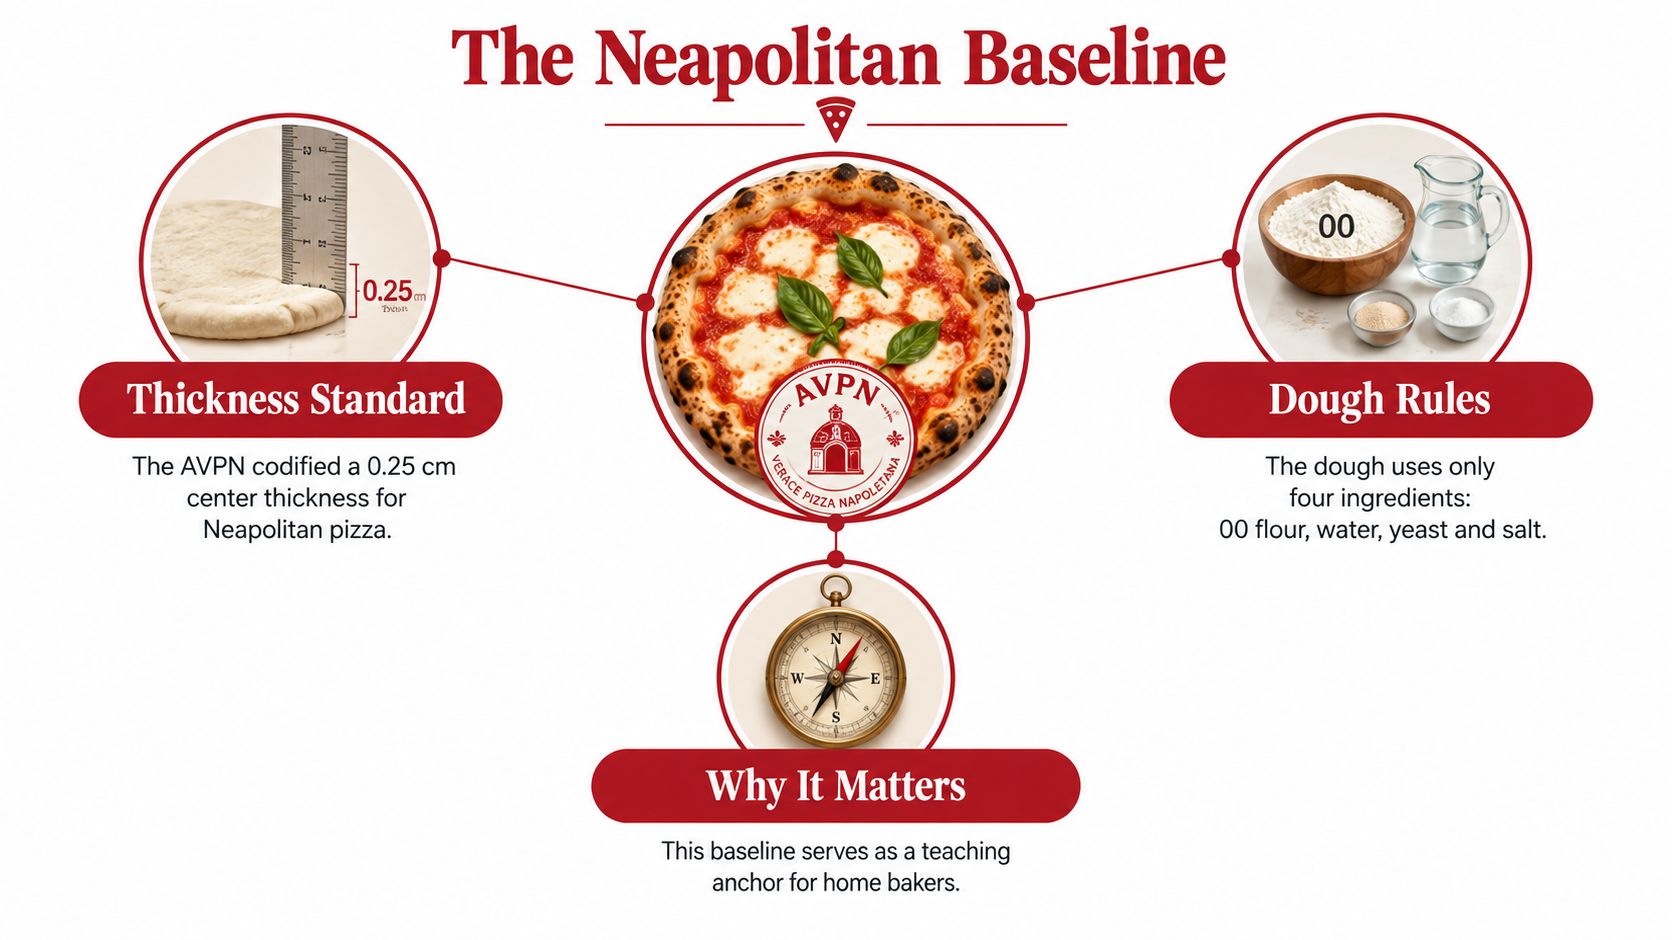
Authentic Neapolitan pizza provides one of the clearest references for learning pizza dough thickness. The Associazione Verace Pizza Napoletana specification, codified in 1984 by Antonio Pace and Lello Surace, describes a shaped dough whose center is pressed outward rather than flattened across the entire disk.
Under that specification, the center should be no more than 0.25 cm, or approximately 2.5 mm, with a permitted tolerance of ±10%. That creates an acceptable target of roughly 2.25 to 2.75 mm. The outer edge, called the cornicione, should be much thicker, approximately 1 to 2 cm.
Read the specification as a profile
The important lesson isn't that every home pizza must reach the Neapolitan measurement. The useful lesson is the contrast between zones:
- Center: Very thin, so it cooks quickly and develops a tender-crisp base.
- Rim: Substantially thicker, so it gains volume, chew, and handling strength.
- Transition: Gradual, rather than an abrupt ridge between the center and edge.
To create that profile, a baker presses and stretches outward from the center while leaving the perimeter largely untouched. Rolling the whole dough ball flat works against the design because it removes the thicker border that gives the pizza its characteristic texture.
What home bakers should borrow
Home cooks can borrow the vocabulary and the shaping principle without copying every condition of a specialist pizzeria. A high-temperature pizza oven can bake a delicate center quickly. A domestic oven may need a slightly different target because it usually provides a longer bake and less intense heat transfer.
Use millimeters when comparing results. “Thin” is too vague to diagnose a floppy middle or a dry base. Saying that your center is around a particular baked-thickness class gives you a practical starting point for changing the dough, toppings, or heat.
The Neapolitan model also prevents a common mistake: treating thin crust as a uniformly thin disk. The better question is, how thin should the center be, and how much structure should remain at the rim for this bake?
Thickness Ranges by Pizza Style
Pizza styles use thickness to create different textures, not merely different appearances. A delicate center, a chewy New York-style slice, a soft pan base, and a cracker-thin crust each need a different balance of dough mass, moisture, and heat.
Published pizza research distinguishes several baked-thickness bands, including approximately 3 to 4 mm for thin crust, 5 to 7 mm for Neapolitan-style crust, and 6 to 8 mm for New York-style crust. These figures describe baked crust classes, so they shouldn't be confused with the thickness of raw dough before baking. See the published research on pizza crust structure and thickness for the technical distinction.
| Style | Baked center thickness | Texture target |
|---|---|---|
| Neapolitan-style | About 5 to 7 mm in the research classification, with the AVPN center specification serving as a separate traditional reference | Tender center with a raised, airy rim |
| Thin-crisp | About 3 to 4 mm | Crisp, light, and quick to set |
| New York-style | About 6 to 8 mm | Foldable, chewy, and more substantial |
| Pan or deep-dish | Thicker than thin-crust classes | Soft interior, oil-fried base, and strong support |
The table isn't a rigid recipe. Style names often describe shaping, fermentation, toppings, and baking method as well as thickness. A pan pizza needs enough dough to support its soft interior and contact with an oiled pan. A cracker-style base needs far less mass and moisture.
Texture preferences complicate the target
Consumer preference data also shows why a single thickness recommendation won't satisfy everyone. In a nationwide Harris Poll commissioned by General Mills Foodservice, 2,097 U.S. adults were surveyed online from February 2 to 6, 2024, with reported sampling precision of ±2.5 percentage points at a 95% confidence level. The General Mills Foodservice survey found that 91% agreed bad crust can ruin a pizza.
Among respondents, 51% cited thickness as an attribute of a favorite crust, behind taste or flavor at 58% but ahead of texture at 38%, golden-brown color at 35%, and char at 12%. Preferred textures were divided too. 29% selected thin crust, 26% selected thick crust, 33% preferred a dual texture with a crispy outside and airy inside, and 32% preferred a crispy crust, all from the same survey.
That pattern supports a more useful decision. Choose the eating experience first, then select the thickness profile that can produce it. If you want a crisp center with an airy rim, don't flatten the edge just to make the middle thinner. If you want a foldable slice, keep more baked thickness in the center and control the topping load so the crust doesn't collapse.
Measuring and Rolling Dough to Target Thickness
You don't need laboratory equipment to control pizza dough thickness. Your hands, your eyes, and a consistent shaping routine can get you close. Measurement tools become useful when you're trying to repeat a result or compare two bakes.
Hand-stretching by feel
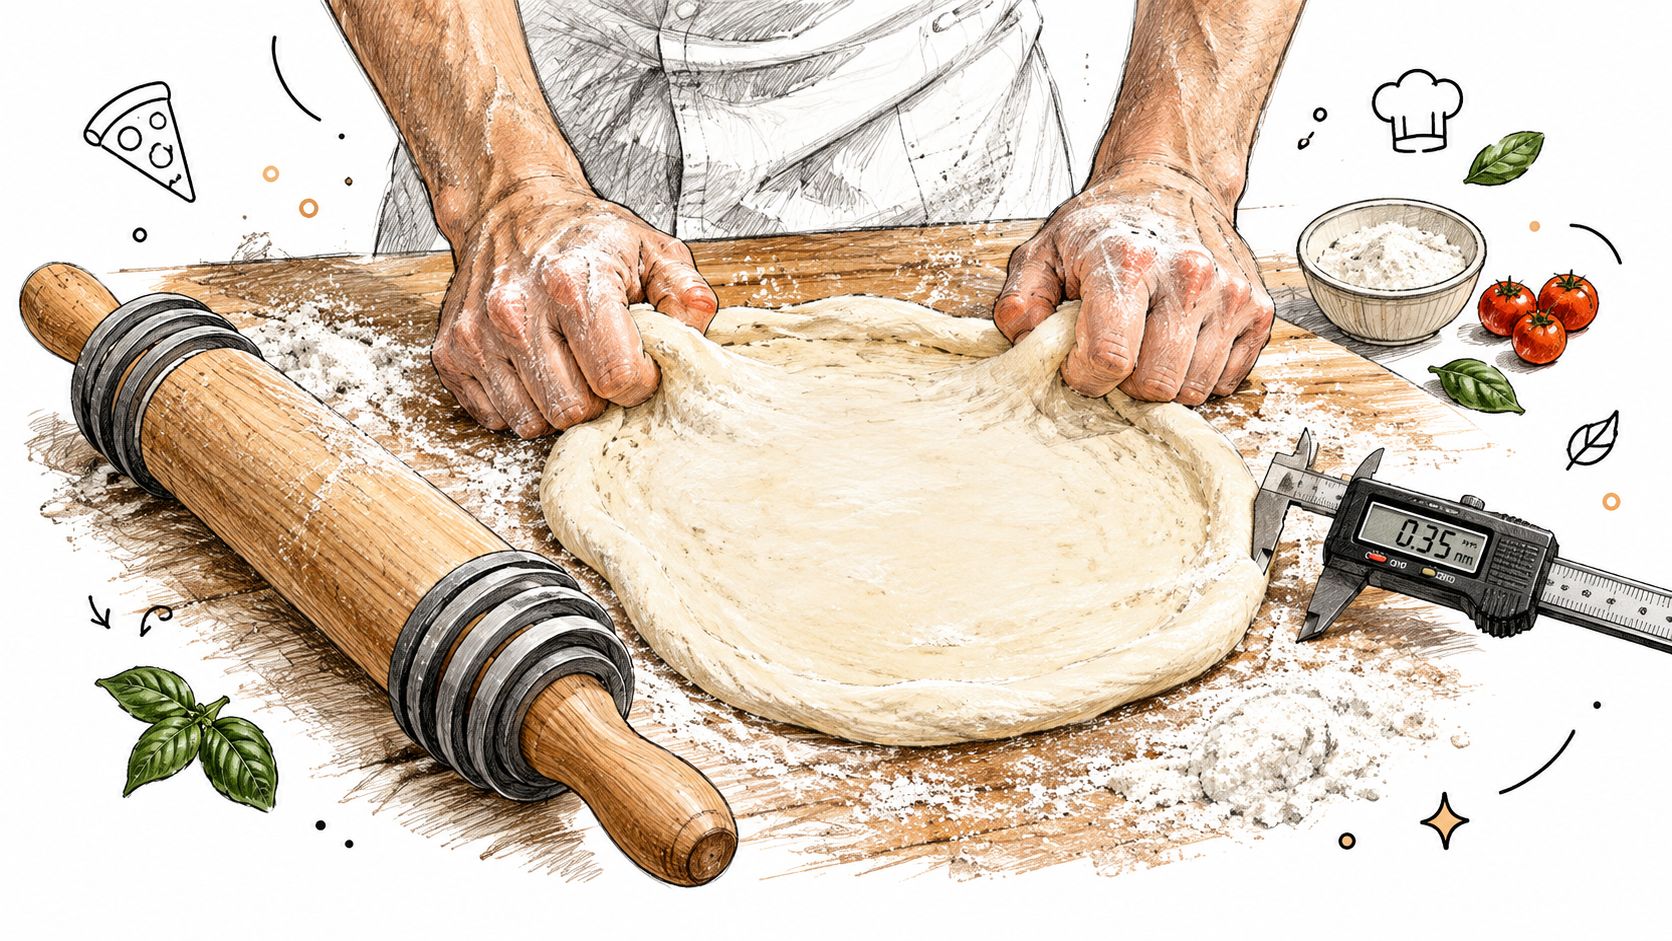
Start by pressing the dough gently from the center outward. Stop before your fingers reach the outer rim, then lift the dough and stretch it over your knuckles. Rotate it as gravity helps the center extend.
Hold the dough toward a light source. For a thin center, you should be able to see a soft shadow of your hand through the middle, while the rim remains visibly fuller. Don't chase perfect transparency. If the center feels fragile before toppings are added, you've gone too far for your appliance or topping plan.
Rolling with a controlled stop
A rolling pin gives you a more uniform center, especially when you're making several pizzas. Thickness rings or spacer guides can prevent the pin from compressing the dough below your chosen target. Roll from the middle outward, then leave a deliberate border untouched if you want a raised rim.
A wooden rolling pin can also help when dough repeatedly springs back or when hand-stretching produces uneven patches. This guide to using a wooden rolling pin is relevant for cooks who want more control without flattening the edge.
Look across the dough at table level. Thin spots often reveal themselves as darker or lighter patches, depending on the flour and work surface. The practical checkpoint is simple: the center should look even, with no small translucent holes or visibly thick islands.
The following demonstration shows how hand shaping and measuring can work together:
Verifying with calipers
Digital calipers are useful for testing the baked crust rather than guessing from raw dough. Measure the center after the pizza has cooled enough to handle, and record the result beside the appliance, bake time, hydration, and topping style.
Take several readings across the middle because one measurement can land on a bubble or an unusually thin patch. You're looking for a consistent range, not a false sense of precision. Once your hands learn what that range feels like, you may no longer need the calipers for every bake.
How Thickness Interacts with Heat, Hydration, and Toppings
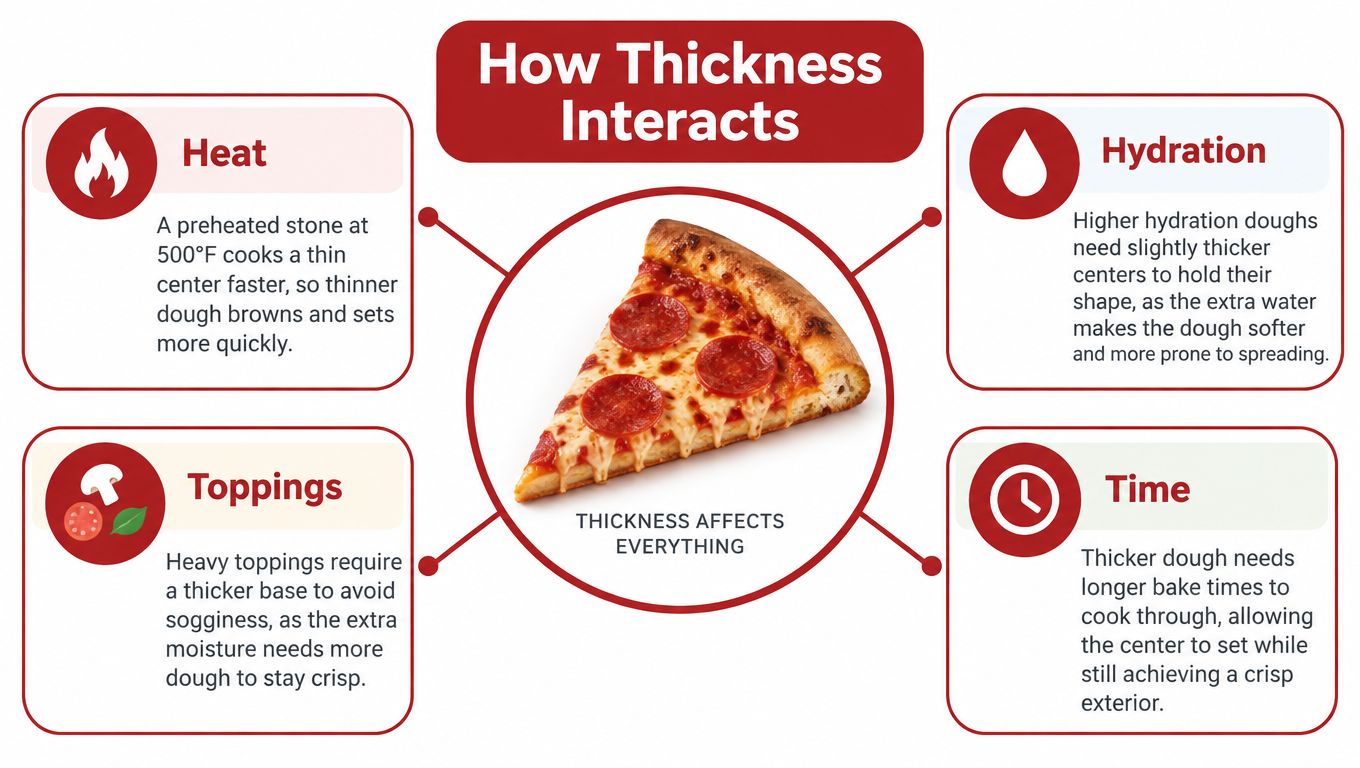
Dough thickness is a heat-management profile, not a single measurement. Heat must reach the base, moisture must escape, and the crust must support whatever covers it. A center that works on a preheated steel may dry out in a conventional oven, while that same target can remain soft on a very hot stone if the bake finishes before enough moisture leaves.
Heat reaches the underside mainly through conduction from the cooking surface. The top receives radiation and moving hot air. Water travels through the dough as liquid and vapor, so a thinner center gives heat and moisture a shorter route. That can help the crumb set evenly, but it can also push the crust from tender to dry before the toppings are ready.
Match thickness to the appliance
A fully heated stone or steel transfers heat into the underside quickly. Steel usually delivers more direct conductive heat, while a domestic oven still relies on surrounding air and upper heat to finish the toppings. This pizza steel thickness guide helps show why the cooking surface belongs in the thickness decision.
A backyard grill can brown the base through strong radiant heat before the top has finished. A high-temperature pizza oven shortens the bake further, allowing wetter dough and a delicate center to stay flexible instead of drying into a cracker.
A thinner center is not automatically safer in a cooler appliance. If it dries before the toppings finish, adding a little thickness can preserve moisture and flexibility. If the middle remains wet while the rim burns, reduce the center thickness or remove moisture from the toppings.
Hydration and structural support
Thin dough has less capacity to absorb moisture and resist bending. Testing by the Pizza Research Institute reported that thin-crust specimens below 62% hydration experienced structural failures when topping loads exceeded approximately 180 g on a standard 12-inch pizza. The same research found a strong linear relationship between crust thickness and resistance to deflection, with r = 0.97, as described in the pizza crust structural integrity research.
For home baking, the practical lesson is restraint. A thin center needs toppings that match its strength. Watery vegetables, generous sauce, and heavy cheese can turn a crisp target flexible even when the dough was shaped evenly.
The rim can stay substantially thicker than the center and provide handling strength. A measured baked rim of about 2.2 ± 0.1 cm sits near the upper end of the AVPN's 1 to 2 cm cornicione range, illustrating why a pronounced edge can support a thin middle better than a uniformly thin disk.
Troubleshooting Thickness Problems
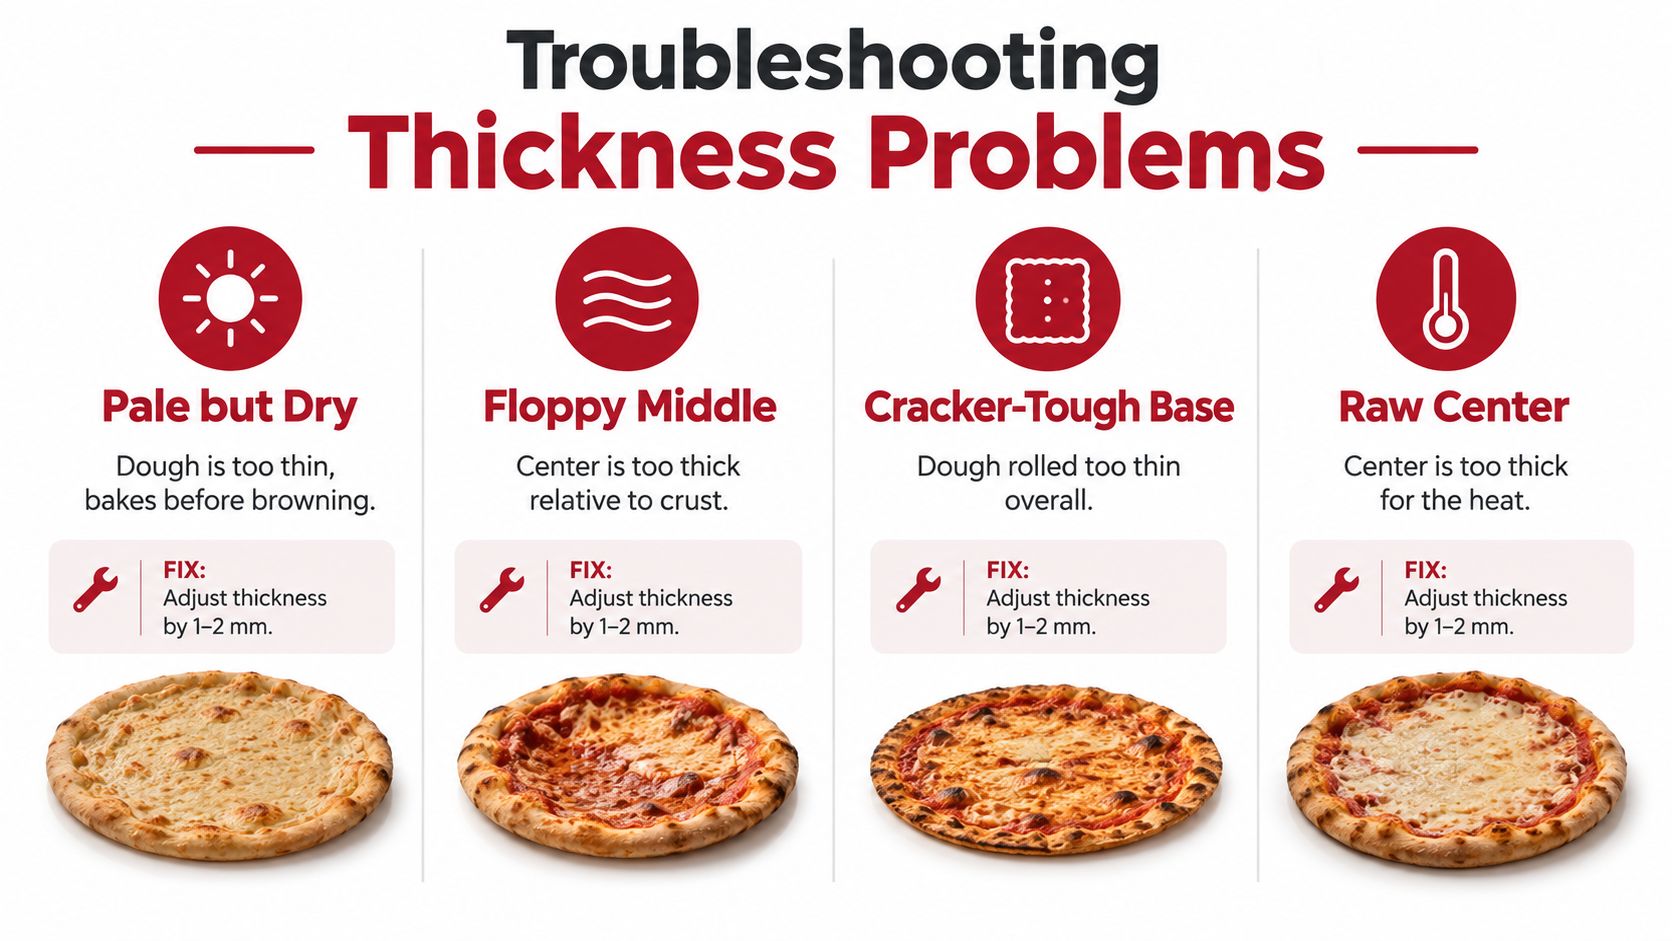
A pizza can look underbaked, overbaked, or weak for very different reasons. Read the center, rim, baked base, and topping moisture together before changing the dough thickness. The right target is a profile matched to the appliance, not one number applied everywhere.
Pale but dry center
A pale center that feels brittle has dried before it developed much color. The dough may be too thin for the bake time, or the appliance may be removing moisture faster than the base can brown. This often appears in a home oven where the surface heat is modest but the bake runs long.
Try a slightly thicker center first. If the base has already set, shorten the bake. Increasing surface heat can also help browning catch up with moisture loss. Extra toppings are a poor fix because they may soften the middle without giving it better structure.
Browned but floppy base
Is the center too thick, or are the toppings too wet? A browned underside shows that the base received enough bottom heat, while the flexible middle suggests that the crust cannot carry its load after baking. Sauce, cheese, and vegetables can create the same symptom as insufficient thickness.
Keep the rim intact and make a small center adjustment. You can:
- increase the center thickness slightly;
- reduce sauce or heavy toppings;
- drain wet ingredients before topping;
- raise hydration modestly if the dough is unusually dry.
The crust still needs enough structure to support the pizza, even when added water improves flexibility.
Diagnosis matters: Before rolling thinner, check whether the toppings or the bake, rather than the dough, caused the flop.
Burnt underside
A blackened base with an underfinished top means the lower heat is moving faster than the rest of the bake. An extremely hot stone or steel, or a position close to a strong lower element, can produce this imbalance. The dough profile may be reasonable for the top, yet too thin for the surface receiving it.
Move the pizza farther from the strongest underside heat, lower the surface temperature, or increase the center thickness slightly. A little more center depth gives the top longer to catch up. It cannot compensate for a wet or overloaded topping layer, so adjust that separately if needed.
Crisp edge with a wet middle
The diagnosis begins with one question: is the center too thick, or are the toppings holding excess water? A browned rim with a wet middle means the edge has received enough exposure to set while the denser center remains moist. A cooler home oven can over-dry the rim before the middle finishes, while a very hot stone may set the edge quickly and leave a thick center underbaked.
Stretch the center thinner while preserving the rim. Use less sauce, drain wet ingredients, and fully heat the cooking surface before launching. If the middle remains raw, try a longer, gentler bake rather than adding more top heat.
Building Your Personal Thickness Recipe
A home cook aiming for a crisp Neapolitan-style pizza in a 500°F oven might begin with a center around 3 mm as a practical trial point. If the finished pizza is browned underneath but floppy in the middle, the next bake could move closer to 2.5 mm, while keeping the rim intact and reducing wet toppings.
If that second pizza becomes dry or cracks, the answer isn't automatically more thickness. The cook might retain the thinner center and adjust hydration, topping moisture, or bake timing. The useful record includes the center measurement, rim shape, dough hydration, surface used, oven setting, and the texture after cooling.
A repeatable recipe eventually sounds specific: thin center, pronounced rim, moderate hydration, restrained toppings, and a known bake surface. Fermentation also affects how the dough stretches and sets, so a cold-ferment pizza dough method can become part of that personal baseline.
Keep changing one variable at a time. Your ideal pizza dough thickness belongs to your oven, your stone or steel, your dough formula, and the texture you want to eat.
Hans Grill offers pizza stones, pizza steels, proofing boxes, and related tools designed for home ovens and backyard grills, giving you more consistent heat transfer while you refine your dough thickness. Visit Hans Grill to explore the equipment and pizza-making guidance that can help turn your measured target into a repeatable crust.


