

Pizza Stone on Pellet Grill
The pellet grill says it's hot, the pizza is ready on the peel, and everyone's waiting for dinner. Then you lift the finished pie and find a pale, floppy base, or a scorched bottom under cheese that hasn't quite melted. Using a pizza stone on a pellet grill works best when you cook to the stone's surface temperature, not just the display. Start with the stone installed before ignition, measure what it's doing, and adjust the bake to match.
Table of Contents
- Why a Pellet Grill and Pizza Stone Work So Well Together
- Gear, Stone Choice, and First-Time Grill Setup
- The Cold-to-Hot Preheat Protocol That Actually Works
- Launching the Pizza and Baking to a Crisp Base
- Why the Grill Reading Is Lying to You
- Keeping the Stone Alive Through Transitions and Cleaning
- Pulling It All Together and Quick Answers for First-Time Users
Why a Pellet Grill and Pizza Stone Work So Well Together
You already own a grill that can cook with the lid closed. Adding a pizza stone gives that cooking space something the bare grate doesn't provide: a continuous surface underneath the dough. Instead of balancing a soft pizza over gaps between metal bars, you can launch it onto a prepared baking surface.
The distinction matters most when you want a crisp base rather than grilled flatbread. Direct-grate cooking is a different technique, with its own handling demands. For a topped pizza assembled on a peel, a stone makes the transition from preparation to baking much more manageable.
This is the basic arrangement you're aiming for.
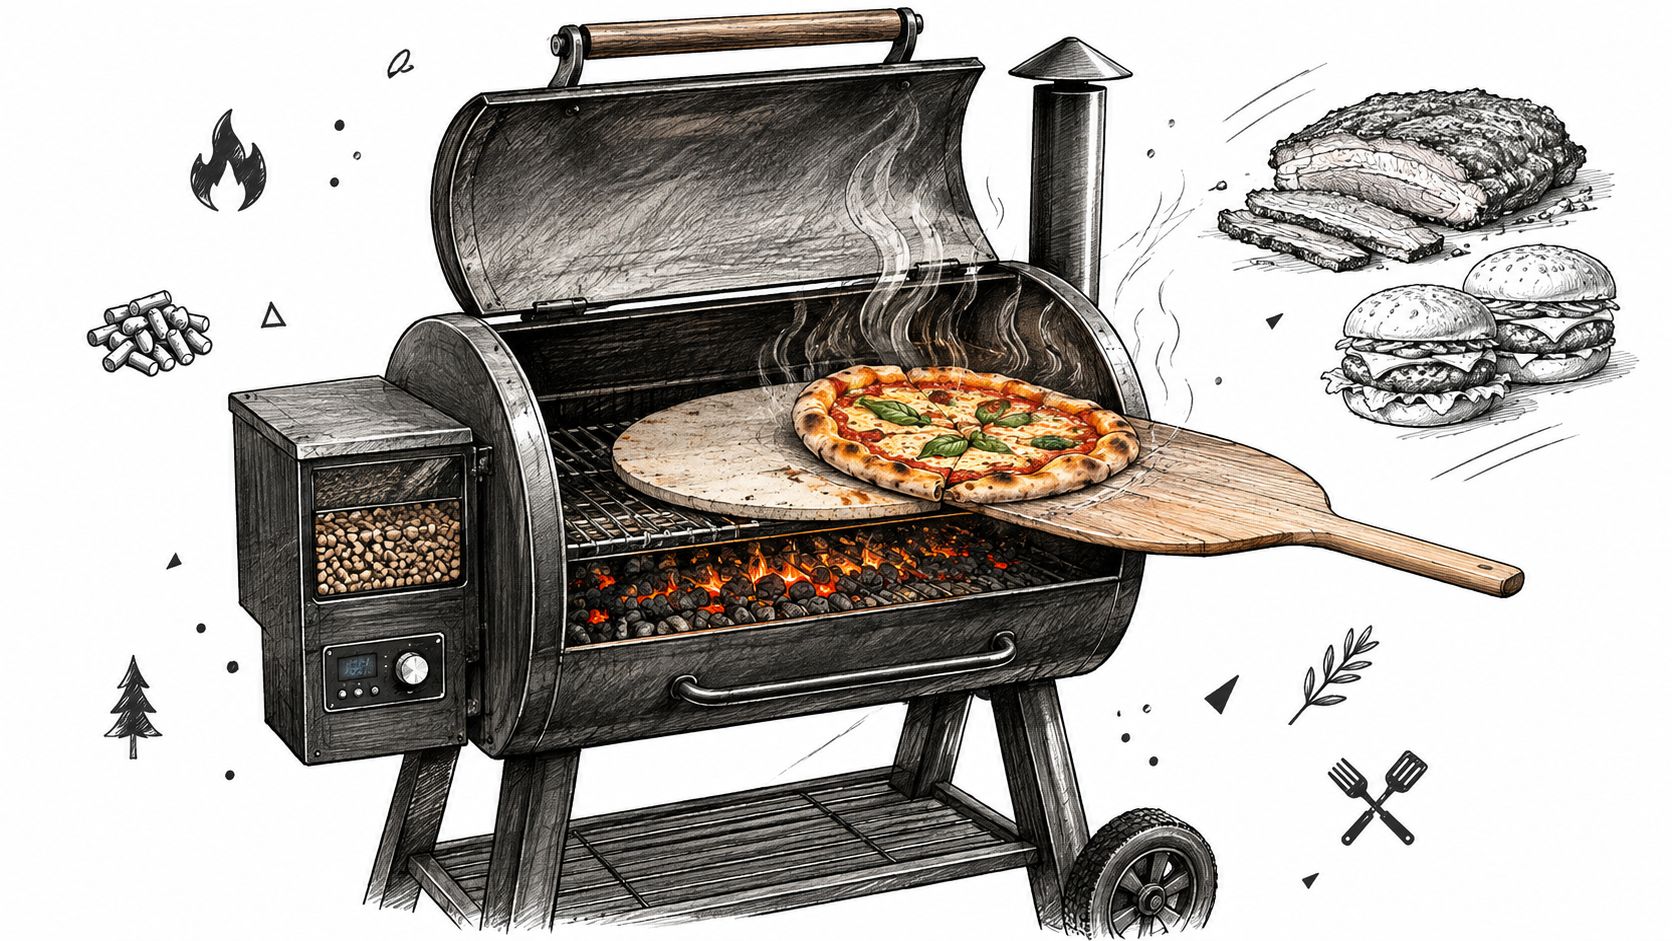
Aim for balance, not maximum heat
Think of the bake as two jobs happening together. You need enough heat underneath to finish the base, while the grill's cooking environment finishes the rim and toppings. A beautifully browned underside isn't much of a victory if the center above it is still heavy and underdone.
That's why chasing the hottest possible setting can be counterproductive. For a lightly topped, thin pizza, a more aggressive bake can make sense. For a thicker pie carrying a generous layer of toppings, you need a setup that lets the center finish before the underside becomes bitter.
Practical rule: Choose a pizza your grill can finish evenly, rather than forcing your grill to imitate a different oven.
A pellet grill and stone are a useful home-pizza combination, but don't make a particular crust pattern your only measure of success. A crisp underside, a cooked center, and toppings that finish together are better targets than dramatic spotting alone.
Start with a straightforward pizza you can repeat. Keep the dough style and topping load consistent while you learn the grill, then change one part of the bake at a time. That's a more useful approach than changing the recipe, placement, and temperature after every disappointing pie.
Gear, Stone Choice, and First-Time Grill Setup
A stone explicitly rated for grill use is the starting point. Don't assume that an oven-safe baking stone is suitable for your pellet grill's heat exposure, or that a high advertised temperature rating answers every durability question.
Cordierite is a sensible material to look for. Its crystal structure produces unusually low, direction-dependent thermal expansion, making it useful for grill baking, although it's not immune to fracture; ordinary ceramic and clay stones are more vulnerable to pellet-grill heat cycles, as explained in the cordierite material and care guidance.
Choose fit before buying extra surface area
A rectangular stone can suit a rectangular grate, but the largest stone that fits isn't automatically the right choice. You still need room to maneuver the peel, close the lid normally, and position the stone according to the grill and stone manufacturers' instructions.
As one option, the Hans Grill Rectangular Pizza Stone is a cordierite product designed for oven and BBQ use. Compare it with other grill-rated cordierite stones by usable dimensions and handling requirements; if you're considering a pizza steel instead, follow its own instructions rather than treating steel and stone as interchangeable.
Thickness belongs in that comparison, too. Consider the weight you'll be handling and the product's stated preheating requirements, rather than assuming a thicker slab will solve uneven baking.
Use the setup illustration as a shopping and placement checklist.
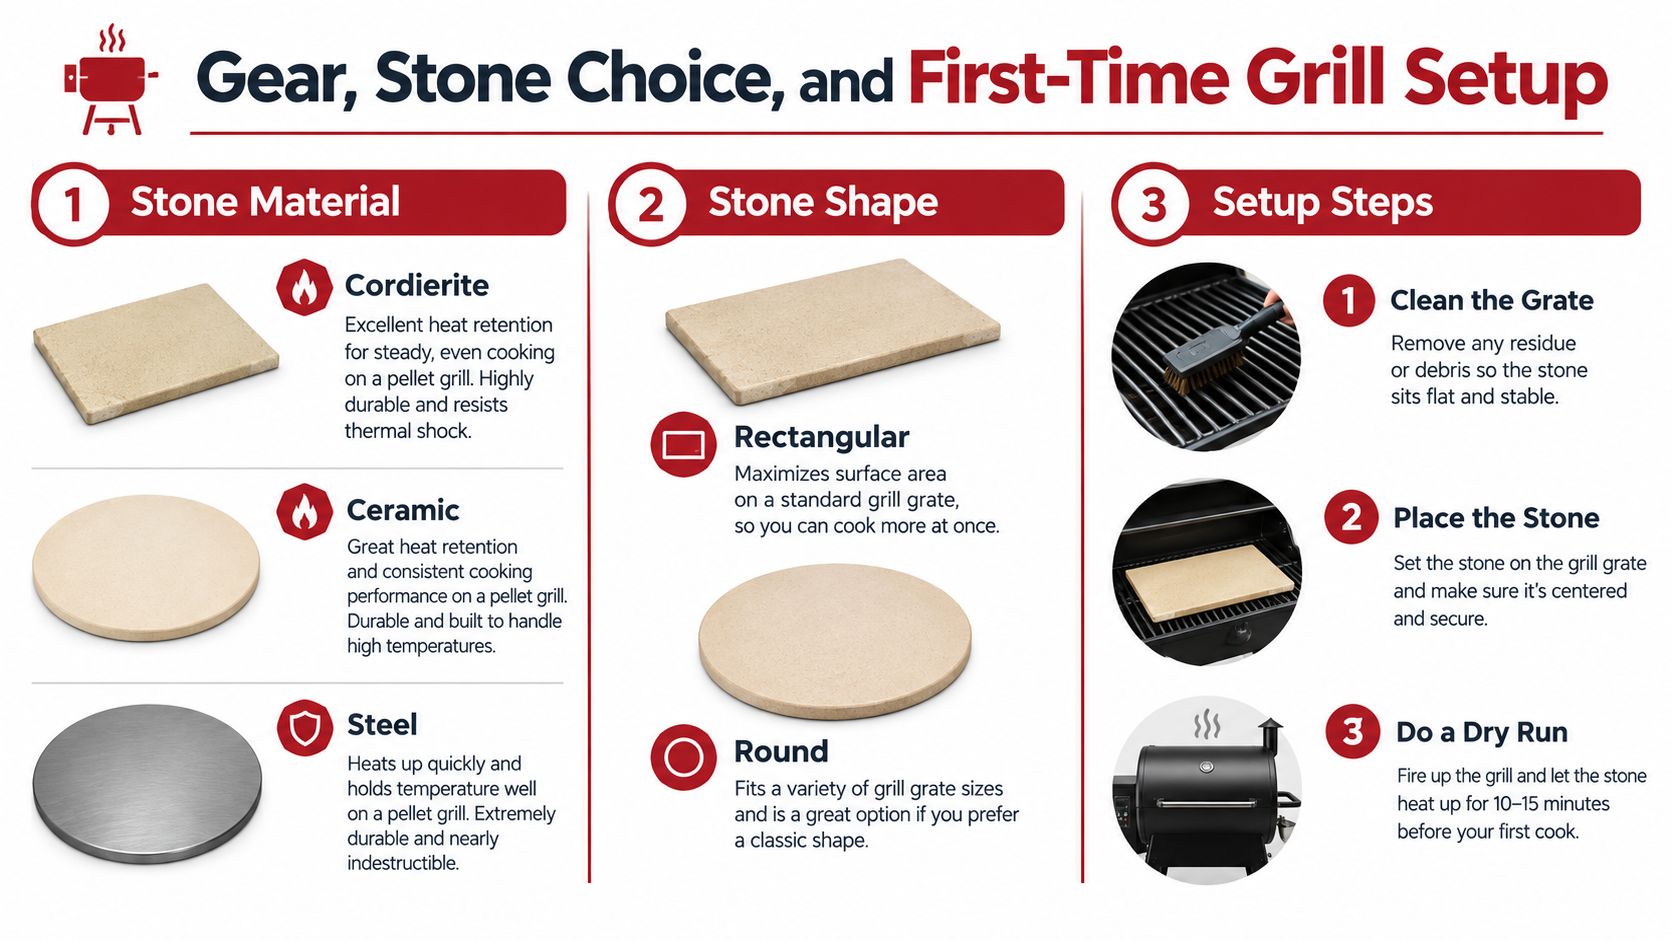
- Clear the cooking area. Clean the grate and check that the stone sits securely, without rocking or interfering with the lid.
- Respect the heat path. Keep the grill's prescribed diffuser arrangement in place and avoid direct flame exposure unless the equipment instructions expressly allow it.
- Check peel access. Rehearse the approach with everything cold. An awkward launch won't get easier over a hot grill.
Your useful accessories are straightforward: a pizza peel, an infrared thermometer, and a grate-cleaning tool. A food thermometer serves a separate safety purpose. You don't need an elaborate accessory collection before your first bake, but you do need tools that let you place the pizza, inspect it, and measure the relevant temperatures.
The Cold-to-Hot Preheat Protocol That Actually Works
The controller reaches its setpoint while the stone's center is still warming. Launching now risks an uneven bake; putting a cold stone into an already-hot grill creates an abrupt temperature change that can cause cracking. Install it while both the stone and grill are cold, then let them heat together.
The cold ramp protects the stone. The surface check determines when to bake.
For a conventional pellet-grill setup, Pelletly's pizza preheating guidance recommends a 450–500°F grill setting and at least 15–30 minutes at the target setting, with an infrared thermometer confirming an approximate 500–550°F surface target for thin or hand-tossed pizza; it also gives 10–12 minutes for a 12-inch pizza at about 500°F as a baking benchmark.
Those figures are starting conditions. The grill setting controls the heat supplied, while the stone reading checks the surface that will cook your base. Allow more preheating if needed, but stay within the equipment's instructions rather than chasing a surface target by exceeding the grill's approved range.
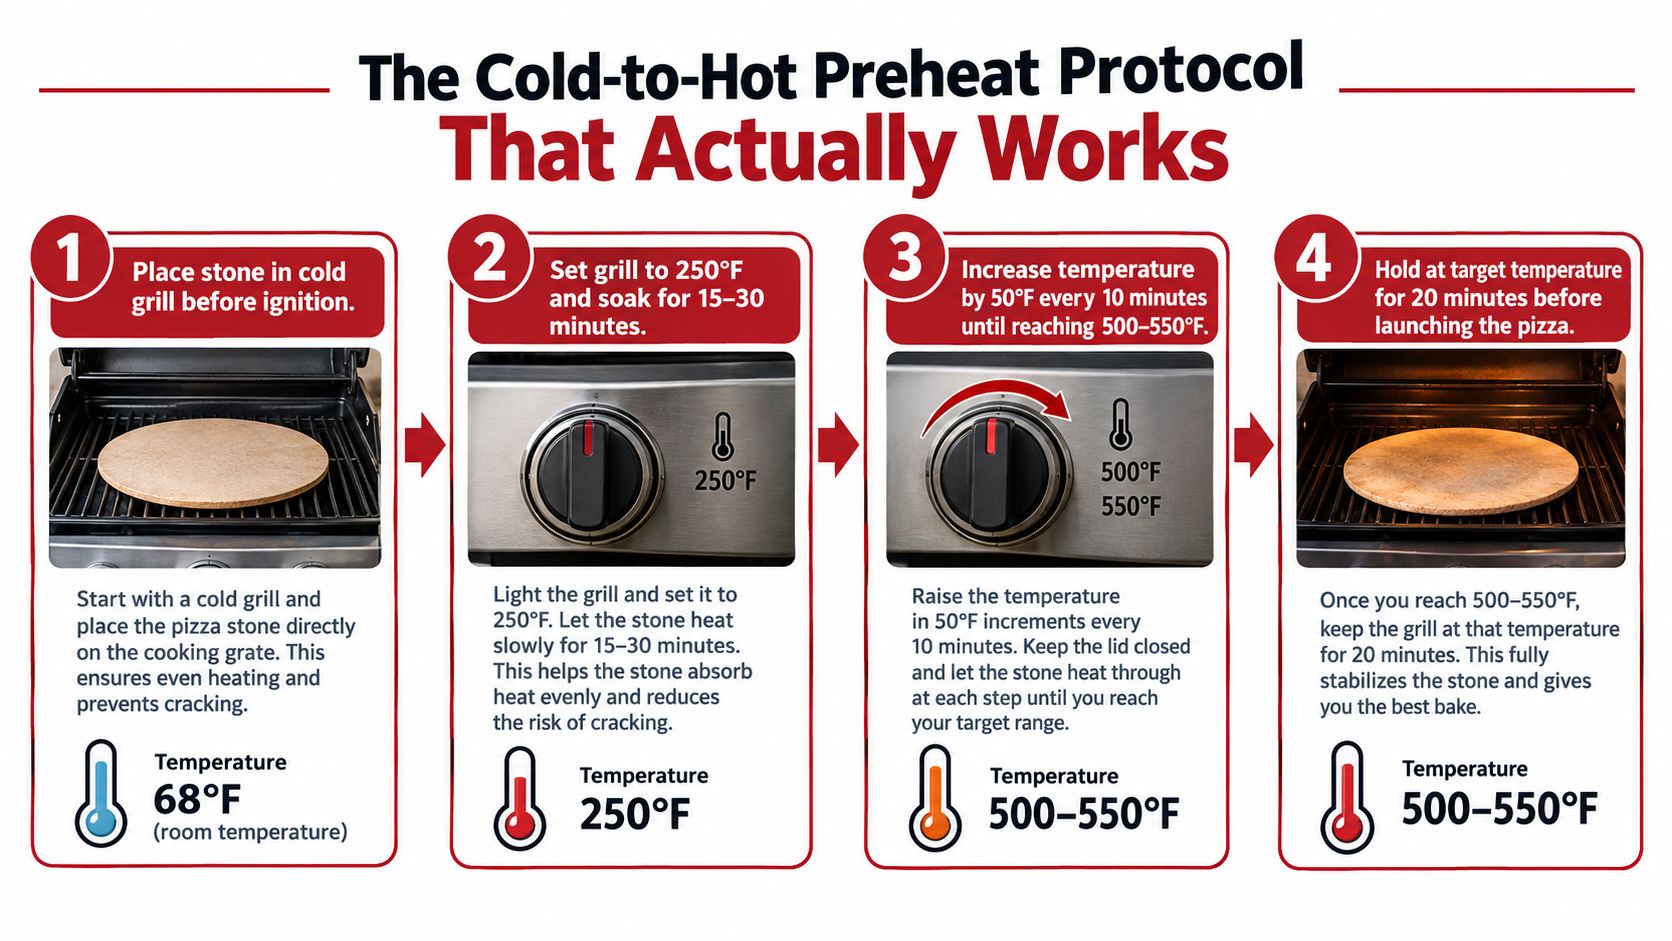
Use the illustration for the cold-start sequence. Its staged dial settings aren't a universal recipe.
After the initial ramp and hold, measure the exposed stone where the pizza will land, then compare other usable areas. Follow your infrared thermometer's instructions for distance and measurement area. Keep clear of hot surfaces and never aim its laser toward anyone's eyes. An isolated hot-edge reading leaves the center's readiness unresolved.
If the surface is still climbing, close the lid and give it more time. If readings vary across the stone, choose a landing area away from the strongest hot spot. If the surface exceeds your intended bake conditions, adjust using the grill's approved controls and recheck before loading.
The guide to whether you should preheat a pizza stone explains the same distinction between heating the grill and preparing the baking surface. Base your launch decision on the stone beneath the dough, with the controller reading serving as a setup reference.
Launching the Pizza and Baking to a Crisp Base
A good launch starts at the preparation table. Use a dry, lightly floured peel, keep sauce off its surface, and check that the assembled pizza moves before you walk to the grill. If it's stuck, fix it there, not with the lid open and your hands over the stone.
The movement should be controlled rather than forceful.
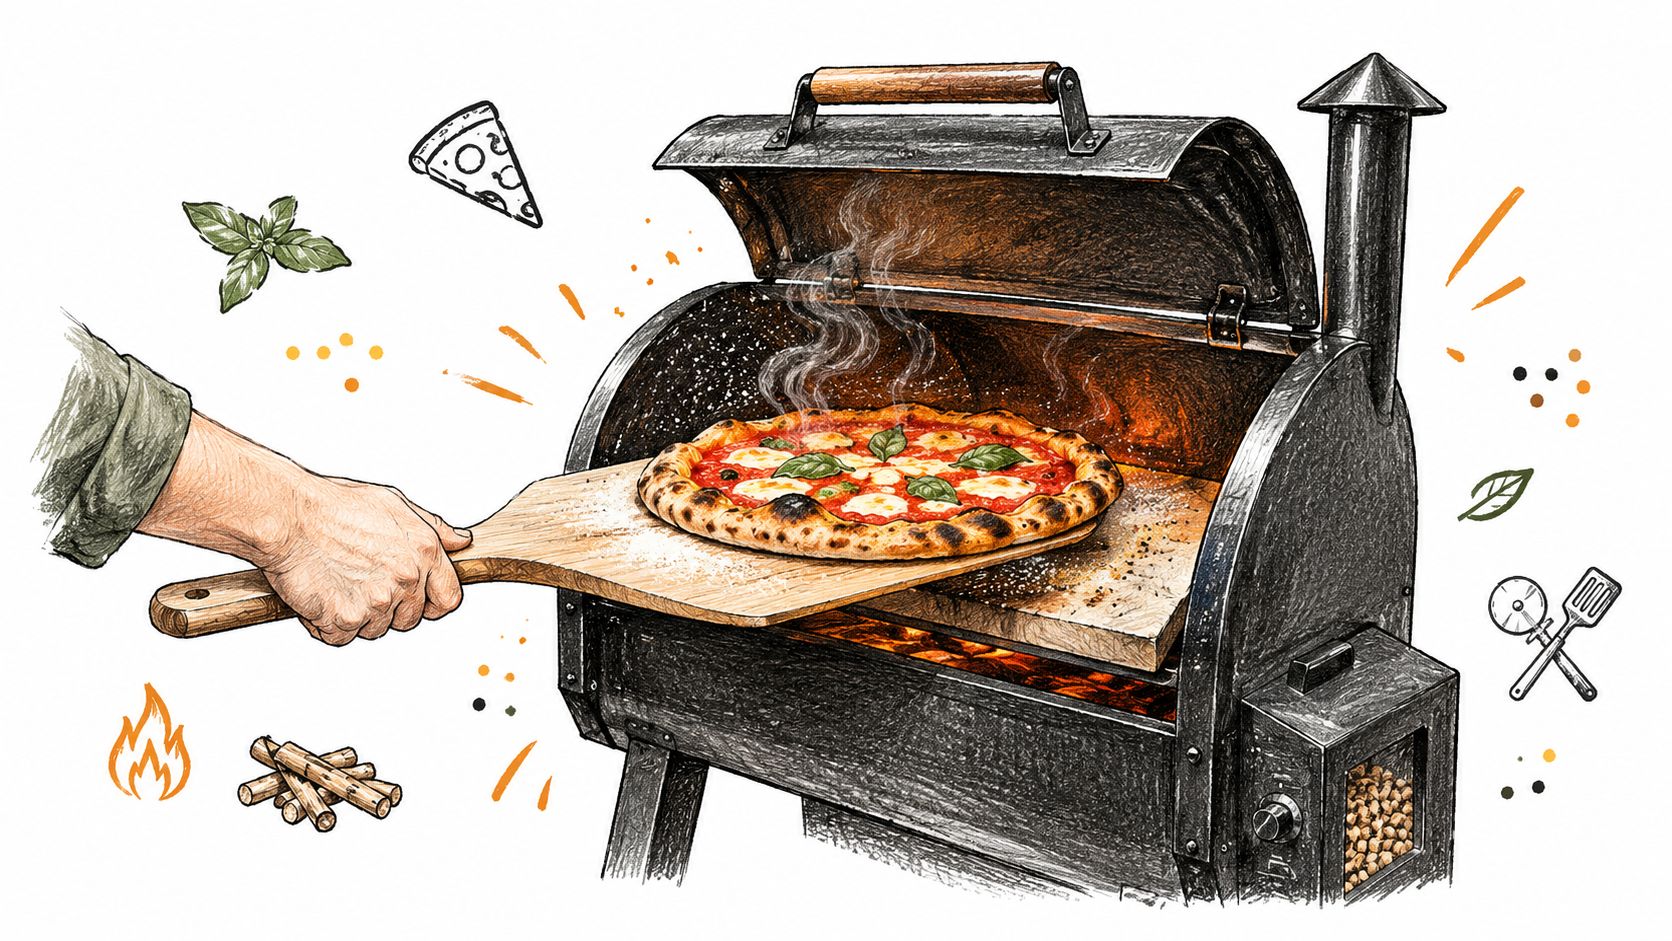
Position the peel over the intended landing area, then withdraw it so the dough settles onto the stone. Close the lid promptly. Don't keep it open while searching for a turning tool or rearranging your work surface.
Peel choice is partly a handling preference. The comparison of wood and metal pizza peels can help you choose a launching tool that feels comfortable, but practicing the motion matters more than buying another accessory.
Inspect the underside before trusting the timer
Use the earlier timing benchmark as an inspection window, not an automatic removal instruction. Wind, lid opening, dough hydration, and heat recovery can change the bake. Lift an edge with the peel and look at the base itself.
You're looking for browning across the underside, not just a dark perimeter. Check the rim and center as well; bubbling cheese alone doesn't settle whether the pizza is finished.
| What you notice | What to do |
|---|---|
| One side browns ahead of the other | Turn the pizza so the paler side faces the hotter area. |
| The underside darkens before the center finishes | Inspect closely and use a less aggressive surface condition for the next pie. |
| The base remains pale | Recheck the stone before the next launch rather than relying on elapsed time. |
| The crust and toppings finish together | Record the setup so you can repeat it. |
Don't rotate by habit if the pizza is coloring evenly. Turn it when the difference between sides gives you a reason.
Watch the peel handling and baking sequence as a movement reference.
Between pizzas, close the lid and reassess the surface before loading again. A successful first pie doesn't establish that the next one has identical conditions. Measure, inspect, and adjust instead of trying to rescue every result with extra cooking time.
Why the Grill Reading Is Lying to You
The display reaches your chosen setting, you launch a pizza, and the underside scorches while the toppings still need time. The controller may be working correctly. It measures conditions at the grill's sensor; the stone beneath your dough can be running at a different temperature.
Controller temperature, grate temperature, and stone-surface temperature are separate measurements. Treating them as interchangeable makes it harder to diagnose a bad bake.
The Green Mountain Grills pizza-attachment manual makes that distinction concrete: it specifies a 650–800°F stone-surface target, warns that the stone may exceed 900°F, and limits the attachment's grill setting to 350°F. Those instructions apply to that purpose-built attachment. Copying them onto an ordinary stone-on-grate setup would ignore the equipment's different heat arrangement.
Use the controller to operate the grill. Use the surface reading to judge whether the stone is ready for your dough.
That distinction also explains the cold-to-hot preheat approach. Heating the stone with the grill helps avoid the abrupt temperature change of putting a cold stone into a hot cooking environment. Reaching the dial setting alone doesn't establish that the baking surface is ready. A gradual warmup addresses the transition; surface measurement checks the cooking condition.
An infrared thermometer gives you something more useful than a guess based on the display. On a rectangular stone, compare the center with areas toward the edges. A single reading can miss a hotter zone that part of the pizza will cover.
Match the surface to the pizza. Thin and lightly topped: a hotter surface and faster bake may work, with close inspection. Thicker or heavily topped: leave room for the center to cook before the underside takes too much heat. Unevenly heated stone: use the readings to choose placement, then let browning guide any turn.
A burnt bottom doesn't automatically call for a shorter bake, especially when the toppings need longer. A pale base doesn't automatically call for more time either; the stone may have been underheated at launch.
Record dough style, topping load, surface readings, placement, and result. Those observations give you a repeatable setup on your own grill, rather than a dial setting borrowed from someone else's equipment.
Keeping the Stone Alive Through Transitions and Cleaning
The last pizza comes off, and the patio table looks like a handy place to set the stone. Leave it in the grill. A high maximum-temperature rating doesn't protect it from thermal shock, the abrupt temperature change that can crack a stone even when it handles normal cooking heat.
The independent stone-care instructions identify a cold stone on a hot grate, a hot stone moved onto a cold or wet surface, and contact with cold moisture as cracking risks. The cold-ramp approach addresses the first transition; careful loading and cooling address the others. Lowering the controller setting doesn't make the stone's surface ready for cold contact.
Treat everything that touches that surface as part of stone care. Don't put frozen pizza, chilled cookware, or a wet dough carrier onto an overheated stone. Keep loading tools dry. With chilled dough or frozen products, check both the stone's instructions and the food's preparation directions before choosing direct stone contact. Convenience isn't a reason to skip that check.
When cooking is finished, follow the pellet grill's normal shutdown procedure and leave the stone inside to cool with it. Resist moving it to a wet countertop or cool sink to clear the grate sooner.
Care habit: Plan a place for the cooled stone, not a landing spot for the hot one.
Let it cool in place. Never rinse a hot or warm stone with cold water. Once it is completely cool, remove loose residue using the manufacturer's recommended method. The guide to whether you should wash pizza stones explains the distinction between routine residue removal and washing, so cleanup doesn't become another damaging transition.
Store it dry. Put the stone away only after complete cooling and any required drying. At the next setup, Inspect before use. Check for hairline cracks or other damage and seek manufacturer guidance if you find any.
Color alone is a poor condition check. Look for damage that affects safe use rather than trying to keep a working baking surface looking unused. Careful transitions can't guarantee a stone never fails, but they reduce avoidable risks that its temperature rating doesn't cover.
Pulling It All Together and Quick Answers for First-Time Users
The working method is simple: prepare the setup, complete the instrumented preheat, launch cleanly, inspect the underside, and let the stone cool safely afterward. Above all, adjust to the measured surface and the pizza's actual progress, not just the controller or clock.
Quick answers before pizza night
- Can I bake frozen pizza on the stone? Don't assume so. Check the stone's instructions and the package directions, keeping the transition risks described above in mind.
- How long does the whole session take? Allow for the grill's initial heat-up, the surface-preheating period, and the bake. There isn't one reliable cold-start-to-plate time for every grill.
- How do I know it's ready? Measure the intended landing area with the infrared thermometer. The display alone can't answer that question.
- What if the base looks done but the toppings don't? Treat that as a balance problem, not proof that the pizza is finished. Reconsider the surface condition, dough thickness, and topping load for the next bake.
Keep food safety separate from crust quality
For meat or poultry toppings, verify the applicable safe internal temperature with a food thermometer rather than judging by appearance. The USDA's safe-handling guidance defines the Danger Zone as 40–140°F, limits perishable food at room temperature to 2 hours, or 1 hour above 90°F, recommends holding hot food at 140°F or above, and specifies 165°F internally for reheated leftovers.
A crisp crust tells you about the bake. It doesn't replace checking perishable toppings or handling leftovers safely.
Hans Grill offers cordierite pizza stones for oven and BBQ use, along with pizza-making tools and preparation guidance. Visit Hans Grill to compare the options with your grate space and build a setup around measured surface temperature, clean launches, and repeatable pizza nights.


