

How to Make Restaurant Style Pizza at Home
You pull a pizza from the oven expecting a crisp, blistered crust. The rim looks promising, but the center bends under the toppings, the base is pale, or the crust turns tough before the cheese has properly melted. Most of the time, the recipe isn't the problem. Restaurant style pizza depends on controlling heat, dough timing, and moisture from start to finish.
That approach matters whether you're using a conventional oven, a pizza stone, a steel, or a backyard grill. You don't need premium toppings or the most expensive oven to make a convincing pizzeria-style pie. You need a thoroughly heated baking surface, dough that's fermented to the right stage, restrained toppings, and a bake judged by structure rather than the clock.
Table of Contents
- The Real Difference Between Restaurant Pizza and Home Bakes
- Building Better Pizza Dough Through Controlled Fermentation
- Choosing the Right Baking Surface for Your Kitchen Setup
- Shaping, Topping, and Loading Like a Pro Pizzaiolo
- Baking Temperature, Timing, and Food-Safety Benchmarks
- Why Process Control Matters More Than Expensive Gear
- Troubleshooting Common Pizza Problems and Finishing Well
The Real Difference Between Restaurant Pizza and Home Bakes
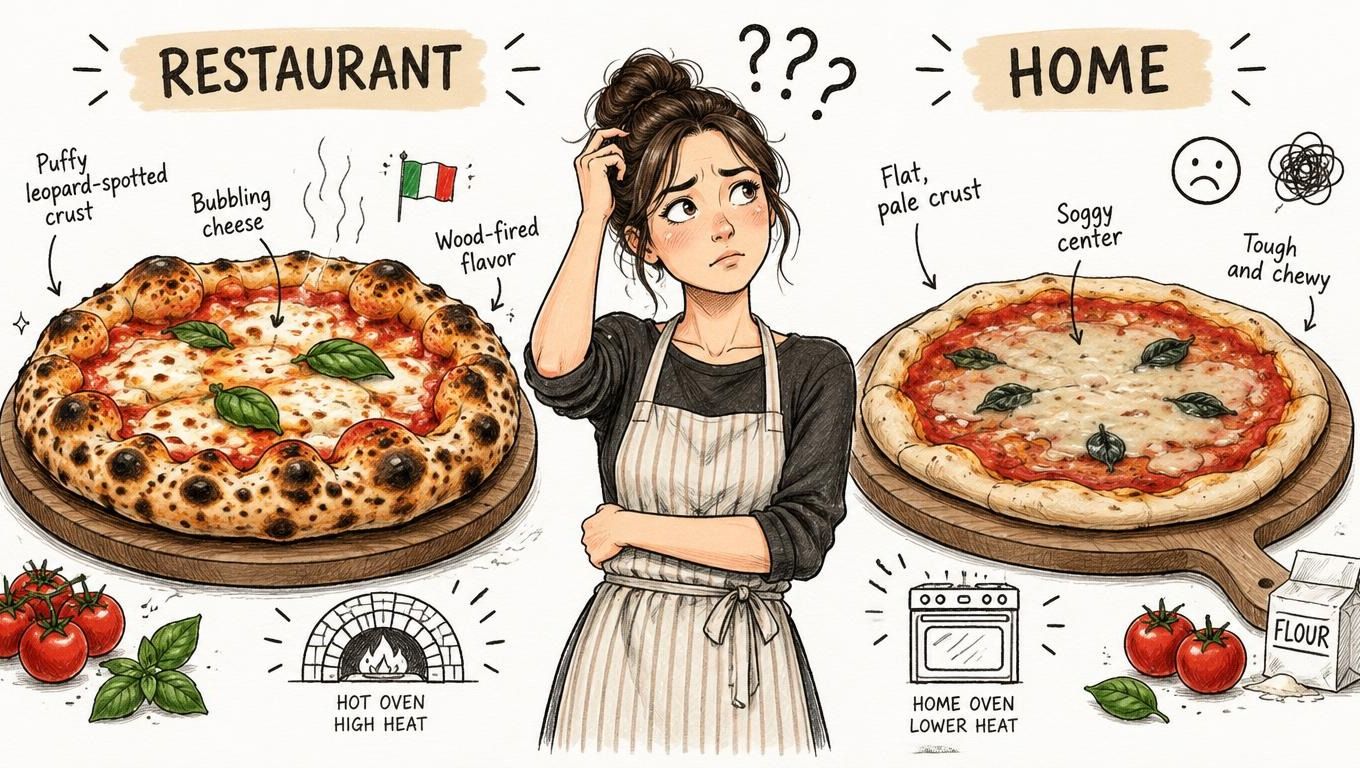
A restaurant pizza kitchen creates a powerful, stable heat environment. The dough meets a hot baking surface immediately, the exposed rim receives intense radiant heat, and the pizza is served before steam has softened the crust. A home oven often struggles in a different way. The air may be hot, but the stone or tray underneath the pizza hasn't recovered, so the base cooks slowly while the toppings release moisture.
That difference explains the familiar failures. A soggy center usually points to weak bottom heat, too much sauce, or a heavy topping load. A tough crust often comes from overbaking while waiting for the middle to set. A collapsed rim can begin during shaping, especially if the dough's gas is pressed out before it reaches the oven.
Start with the surface, not the recipe
The baking surface is the part of the system that most home cooks underestimate. Heat reaches the pizza through convection and radiation at the exposed top, but the base relies heavily on conduction from the stone, steel, or other surface. If that surface isn't fully heated, the dough spends too long absorbing moisture before it firms.
Give the surface enough time to heat all the way through. A short preheat can make the oven display look ready while the stone remains comparatively cool. Once you launch a pizza, the surface also loses heat, so recovery matters if you're baking several pies.
Practical rule: A hotter oven can't rescue a cold baking surface.
Keep the first pizza simple while you establish your process. Use a moderate layer of sauce, enough cheese to cover without pooling, and toppings that aren't dripping wet. Change one variable at a time, such as preheat duration, rack position, or topping quantity. That makes each bake useful feedback instead of another random experiment.
Building Better Pizza Dough Through Controlled Fermentation
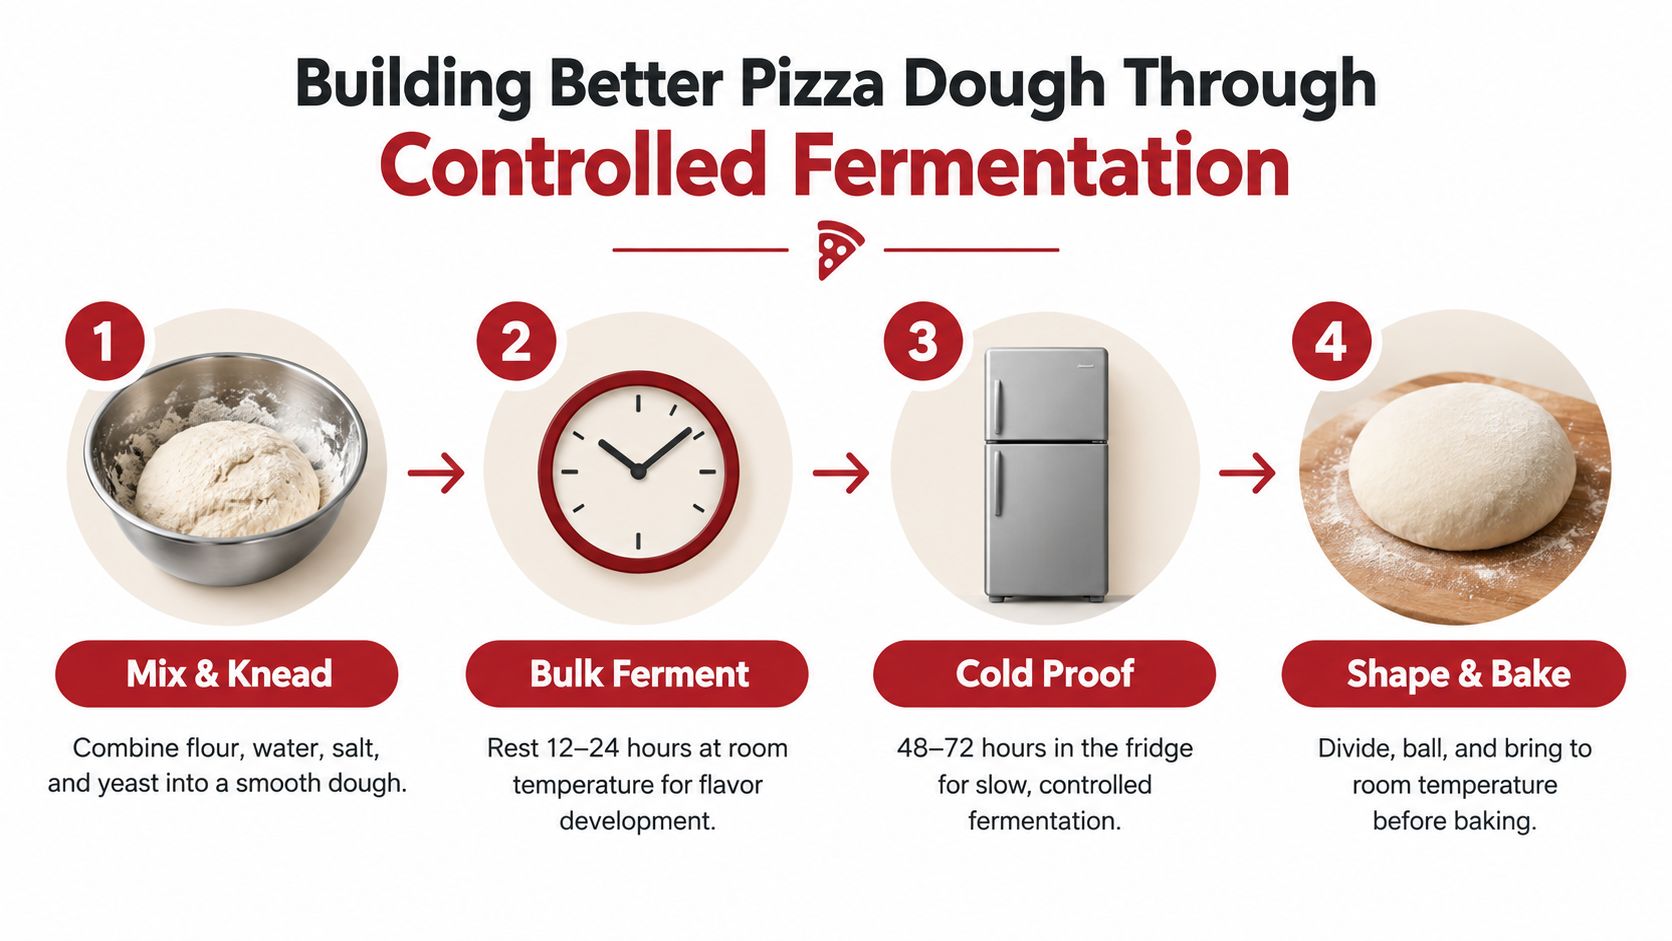
Dough quality starts before shaping. Fermentation is a controllable quality variable, not merely time spent waiting. Yeast produces carbon dioxide, the dough retains some of that gas, and the resulting structure affects rim volume, aroma, chew, and crispness.
A pizza-dough experiment found that fermentation temperature and time significantly affected carbon-dioxide release. Under its short-process conditions, 30°C for 36 minutes and 33°C for 42 minutes were favorable combinations for bubble size, aroma, taste, and crisp edges, as reported in the controlled fermentation study. Those timings aren't universal home recipes. They show why yeast quantity, dough temperature, and schedule must be treated as one system.
Use endpoints instead of borrowed clock times
For repeatable dough, standardize three things:
- Dough-ball mass: Keep each portion consistent so pizzas bake at a similar rate.
- Fermentation temperature: Warmer dough moves faster, while cooler dough develops more slowly.
- Endpoint volume: Look for a dough ball that has expanded appropriately and still has enough strength to stretch.
An overnight schedule needs less yeast than a quick same-day dough. If you use a large amount of yeast and then leave the dough warm for too long, the structure can weaken. The dough may spread across the bench, develop sour aromas, or lose oven spring. A controlled cold-fermentation schedule can work well, but it must match the yeast quantity and the temperature inside your refrigerator.
For a practical walkthrough of longer fermentation, use this cold-ferment pizza dough method as a process reference, then adjust based on how your dough behaves rather than copying its timing blindly.
Protect the dough surface
Cover dough balls so they don't form a dry skin, but avoid a seal that traps so much condensation that water drips onto the surface. Excess bench flour creates another problem. It burns on the baking surface and leaves bitter residue, especially during high-heat baking.
The dough should feel supple and aerated when you shape it. If it fights back and shrinks immediately, it may need more rest. If it feels slack, sticky, and difficult to lift, fermentation may have gone too far or the dough may be too warm.
Choosing the Right Baking Surface for Your Kitchen Setup
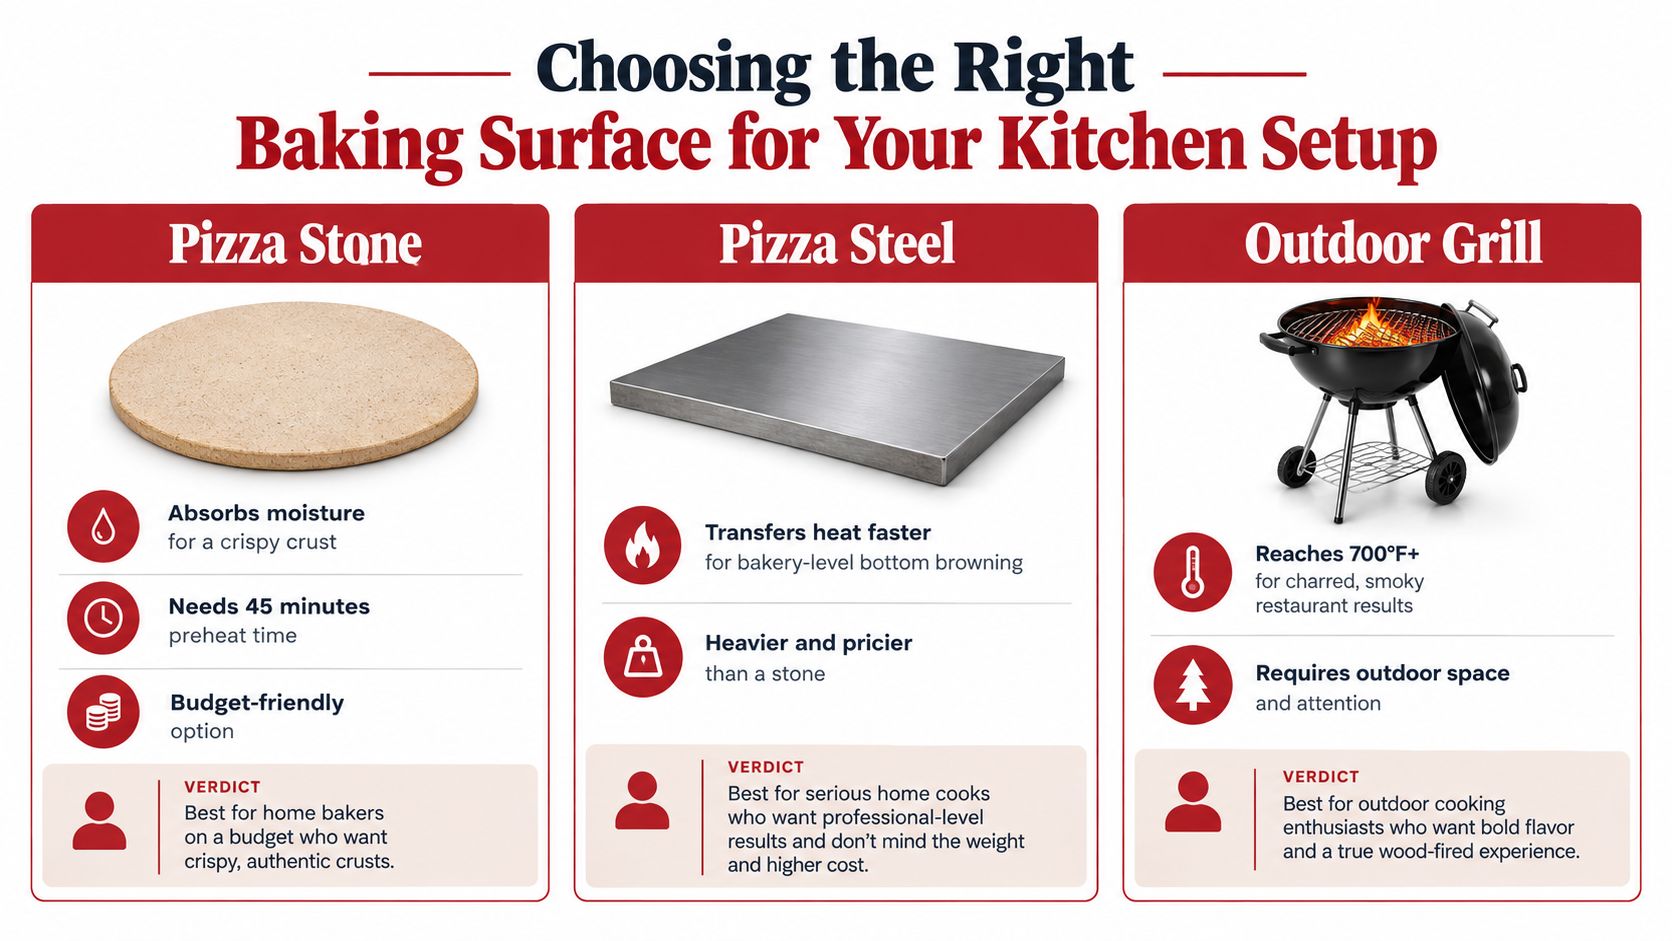
A baking surface should match your oven and your habits. Stone, steel, and grill setups can all make good pizza, but they transfer heat differently and demand different handling.
Pizza stone
A cordierite stone absorbs some surface moisture and provides steady, even heat. It tends to be forgiving when you're learning to launch and bake, though it needs a thorough preheat. Stones also require careful handling because thermal shock, such as placing a cold stone in a very hot environment or exposing a hot stone to liquid, can cause cracking.
A stone suits a home cook who bakes occasionally and wants stable bottom heat without adding a heavy metal slab. It works particularly well when the oven has enough preheat time and you're not trying to bake pies back to back at maximum speed.
Pizza steel
Steel transfers heat more aggressively than stone. That can produce stronger bottom browning and faster recovery between pizzas, but it also reduces your margin for error. A poorly stretched pie, excess flour, or a sugary sauce can darken quickly against the hot metal.
Steel is a good choice for frequent baking, thin crusts, and ovens that struggle to recover after a launch. It weighs more and usually costs more than a basic stone, so the benefit is greatest when you actually use that faster heat transfer. The pizza steel versus stone comparison can help you evaluate the trade-off against your oven and baking style.
Outdoor grill
A grill gives you a different heat pattern and can produce richly browned edges with a lightly smoky character. The challenge is managing the relationship between the hot surface and the lid temperature. If the bottom burns before the top sets, move the surface farther from the direct burner or reduce the fire beneath it. If the rim stays pale, you need more heat above the pizza or a better-managed indirect setup.
Choose a grill when you already own suitable outdoor equipment and enjoy active heat management. It isn't automatically easier than an indoor oven, but it can create an excellent restaurant-like environment when you monitor both sides of the bake.
| Setup | Main strength | Main limitation |
|---|---|---|
| Stone | Steady heat and moisture absorption | Slower recovery and possible cracking |
| Steel | Fast heat transfer and strong browning | Less forgiving and heavier |
| Grill | High heat and outdoor flexibility | Requires close attention to fire and lid temperature |
Shaping, Topping, and Loading Like a Pro Pizzaiolo
A good dough can still fail in your hands. The shaping stage determines how much gas remains in the rim, while topping decisions determine whether the center can dry and set before the crust overbakes.
Start by turning the dough onto a lightly floured surface. Press outward from the center, but stop short of the edge so you preserve the inflated rim. Stretch the middle over your knuckles or lift and rotate it gently. Don't use a rolling pin if you want an airy edge, because aggressive pressure flattens the gas pockets that create the characteristic raised border.
Build a balanced topping layer
Spread sauce thinly and leave a visible margin around the rim. Add cheese evenly rather than creating a thick mound in the center. Wet vegetables, fresh mozzarella, and oily meats can all release liquid or fat during baking, so drain or pat them where appropriate.
A restrained pizza often tastes more like a pizzeria pie than an overloaded one. Heavy toppings insulate the dough, slow evaporation, and make the middle difficult to set. They can also force you to extend the bake, leaving the edge dry while the center finally firms.
Load quickly and bake immediately
Prepare all toppings before stretching the dough. Dust the peel lightly, assemble the pizza quickly, and give the peel a short forward-and-back movement to confirm that the dough still slides. If it sticks, lift one edge and add a small amount of flour. Don't keep adding flour to the entire underside, because excess flour burns and leaves a bitter taste.
Use a clean, confident launch. Lower the front edge onto the heated surface, then pull the peel away smoothly. The pizza peel technique guide is useful if your launches are uneven or the dough catches during transfer.
Rotate only when the base has developed enough structure to move safely. Watch the rim and underside instead of relying on a fixed schedule. A pizza is ready when the base is firm and browned, the rim has expanded, and the center no longer looks wet or floppy.
Baking Temperature, Timing, and Food-Safety Benchmarks
High heat drives browning, expansion, and moisture loss, but temperature alone doesn't determine the result. The baking surface must be hot enough to transfer energy rapidly into the base, while the top of the pizza needs enough radiant and convected heat to set the cheese and rim.
During baking, moisture moves outward through the dough and evaporates. The bottom receives conduction from the surface, while the exposed top receives heat from the surrounding air and oven walls. That is why a fully preheated stone or steel matters. A hot oven with a cool surface can brown the toppings before the base becomes crisp.
Use a benchmark, then validate your setup
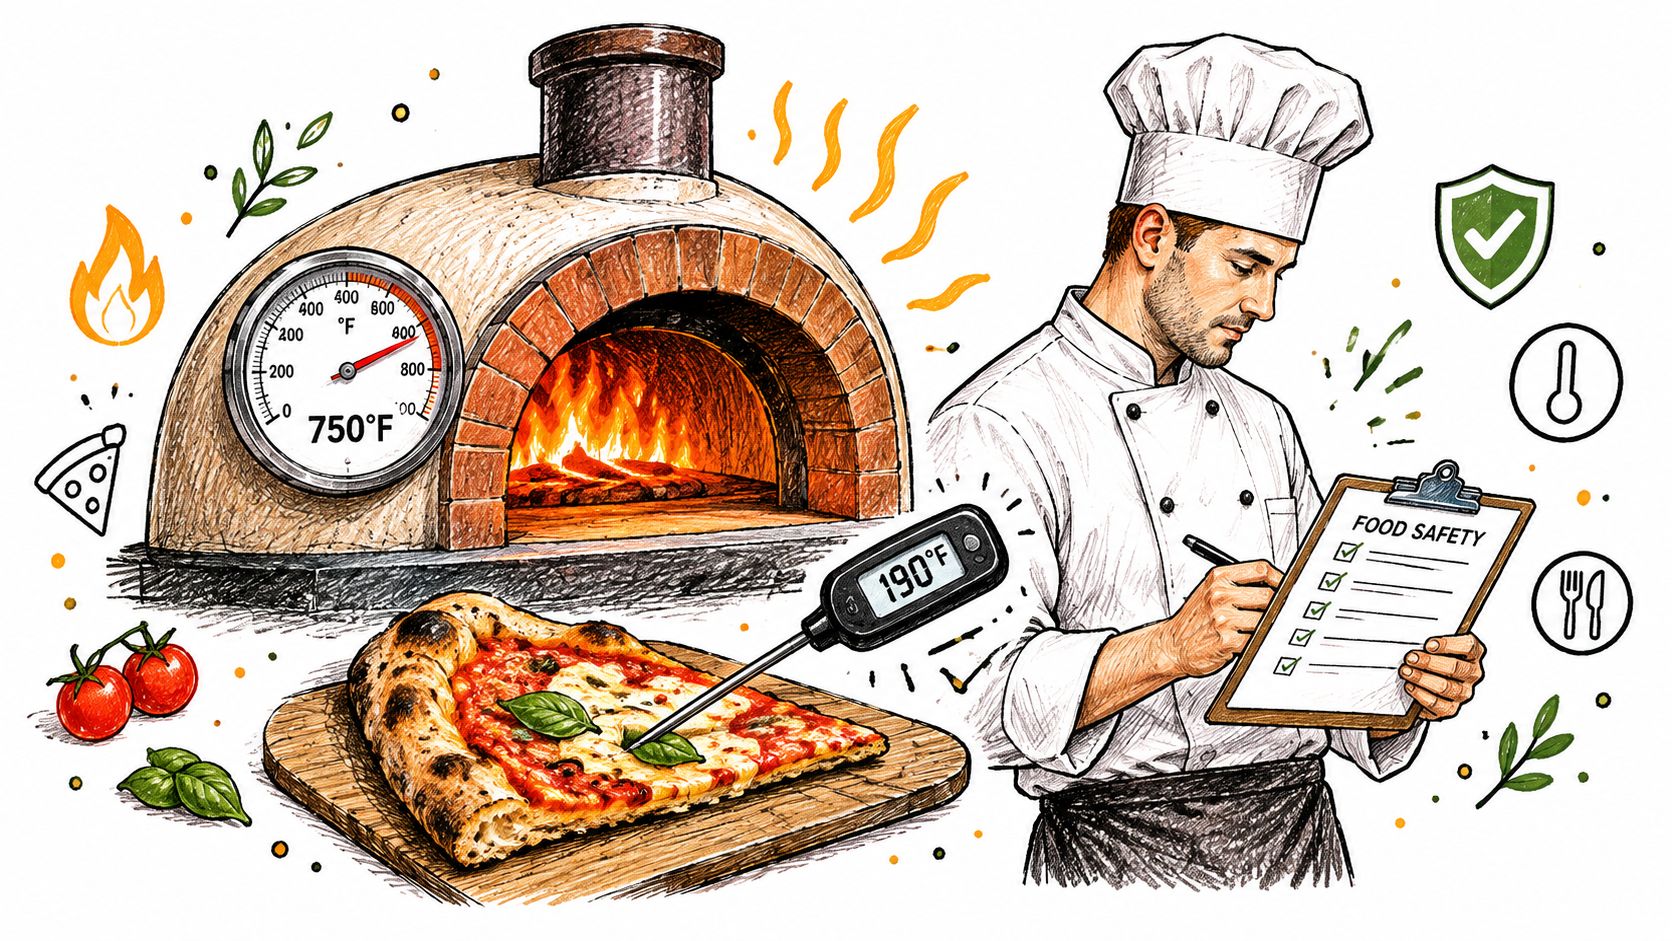
A commercial-style study found that baking pizza at 260°C, or 500°F, for 12 minutes produced an approximately 5-log reduction in Shiga toxin-producing E. coli, with the pizza reaching about 99°C, or 209°F, internally, according to the Frontiers in Microbiology pizza-baking research. Treat that as a conventional-oven food-safety benchmark, not a universal instruction for every crust.
A thinner pizza or a much hotter oven can bake in a different way. If you change the dough thickness, topping load, or baking temperature substantially, the benchmark needs separate validation. A food thermometer can help when you're testing a new method, particularly if the center still appears soft.
Judge the pizza by structure
Use three checks at the oven:
- Base firmness: The underside should support the pizza when lifted.
- Rim expansion: The edge should rise rather than remain dense and flat.
- Center set: The middle should look cooked through, not wet beneath the toppings.
Elapsed time is only a guide because dough mass, surface temperature, moisture, and oven recovery all change the result. Bake until the pizza meets those structural checks, then serve promptly.
Why Process Control Matters More Than Expensive Gear
Restaurant pizza has become a meaningful expense for many households. In the United States, the average restaurant pizza price reached $17.61 in 2025, an increase of 15.1% over five years, and 35% of consumers said they were ordering restaurant pizza less often because of price, according to Food Business News coverage of pizza innovation. That makes home baking attractive, but buying equipment without improving the process can easily swap one frustration for another.
The expensive-flour mindset is easy to understand. Specialty flour is visible, easy to purchase, and satisfying to discuss. Yet the quality people perceive as “restaurant style” often comes more from heat recovery, fermentation control, moisture management, and a properly heated surface than from premium ingredients alone.
Separate investment from operating cost
Think about your setup in two categories:
- One-time equipment: A stone, steel, peel, thermometer, or grill accessory.
- Recurring ingredients: Flour, yeast, salt, sauce, cheese, and toppings.
A stone may be the sensible starting point if you bake occasionally and need forgiving heat. A steel can justify itself when you bake frequently and want faster recovery. A grill setup makes sense when outdoor cooking is already part of your routine. Hans Grill offers cordierite stones, Pizza Steel PRO products, proofing boxes, and peels for oven and BBQ use, so those are options to compare against your existing equipment rather than automatic upgrades.
Test your process before spending more. Preheat longer, reduce topping moisture, improve dough timing, and observe the base. If the pizza improves, you found a process issue. If the surface still can't deliver enough bottom heat or recovery, then equipment can solve a defined limitation instead of serving as a guess.
Troubleshooting Common Pizza Problems and Finishing Well
A failed pizza usually leaves evidence. Read the evidence before changing the recipe.
Diagnose the bake
- Soggy center: Reduce sauce and wet toppings, improve surface preheat, and launch a smaller or thinner pie until the base sets reliably.
- Pale underside: Increase preheat time or move the pizza onto a more conductive surface. The oven air may be hot while the baking surface remains underheated.
- Burnt bottom: Lower the pizza away from an overly aggressive surface, remove excess bench flour, or shorten the bake after the base has developed color.
- Collapsed rim: Handle the dough more gently during shaping and check whether fermentation has weakened its structure.
- Greasy, soft crust after serving: Reduce topping fat and moisture, then cool the pizza on a rack instead of trapping steam against a solid surface.
Cooling is part of the recipe. A crisp pizza can soften when enclosed immediately because escaping steam condenses inside the box or beneath the slice. For carryout-style results, allow steam to escape briefly, use a vented container when available, and avoid stacking slices while the crust is still releasing moisture. Current off-premise guidance reports that carryout is ordered more frequently than delivery, at 65% versus 55%, and that 30% to 40% of restaurants have changed operations to improve off-premise quality, as reported by Meat & Poultry's pizza trend coverage.
Crispness is created by heat, but preserved by moisture control.
Keep a short bake log. Record dough temperature, fermentation endpoint, surface preheat, topping load, and the condition of the base when the pizza comes out. Adjust one variable on the next attempt. That habit will improve your restaurant style pizza faster than buying another topping or turning the oven dial higher.
Set up your next pizza around controlled dough fermentation, a thoroughly heated surface, restrained toppings, and a quick, confident launch. For stones, steels, proofing tools, and pizza peels designed for oven or BBQ use, visit Hans Grill and choose the equipment that solves your specific heat or handling problem.


