

Bread Dough Proofing Box: A Practical Guide for Home Bakers
You've shaped the dough, set it on the counter, and planned dinner around it. Then the kitchen warms up, the dough races ahead, or the room stays chilly and the dough barely changes. By the time you're ready to bake, the surface may be dry, the dough may be overproofed, or you're still waiting for it to become light and airy.
A bread dough proofing box can make that process much easier, but it isn't just a heated container. The useful question isn't “How hot can this box get?” It's “When should I use controlled warmth, when should I use the fridge, and when is the counter already the right place?” Once you answer that, the box becomes a timing tool rather than something you rely on for every dough.
Table of Contents
- Why Dough Struggles on the Counter
- What a Bread Dough Proofing Box Does
- Why Consistency Matters More Than Heat
- Choosing the Right Box for Your Kitchen
- Setting Up Your First Proof
- Warm Box, Cool Fridge, or Room Counter
- Food Safety and Common Misconceptions
- Cleaning, Care, and Quick Troubleshooting
Why Dough Struggles on the Counter
You set a dough ball on the counter and expect it to wait for you. The trouble is that the counter does not stay the same for the next hour. Sun through one window, a cool draft by the door, or heat from a preheating oven can all change how the dough behaves, even if the recipe never changes.
That is why one batch seems sleepy and another seems to sprint. On a cool day, pizza dough can stay tight and dense long after shaping. On a warm day, the same dough may puff up before your oven or toppings are ready. If it sits uncovered, the outside can dry into a thin skin while the inside keeps fermenting, a little like pudding forming a film on top.
The counter isn't the problem. The actual issue is that it leaves three connected variables to chance.
- Time controls how far fermentation progresses before baking.
- Temperature changes the speed at which yeast produces gas and dough relaxes.
- Humidity helps the surface stay supple instead of drying out.
Research on final bread fermentation identifies those three variables as the main controls in proofing. In controlled conditions, final proofing commonly lasts about 15 to 60 minutes, depending on dough-piece weight, dough consistency, yeast quantity, and how much fermentation has already happened. The same research places a normal final-proofing range around 30–35°C and 70–85% relative humidity. Research on final bread fermentation and proofing conditions
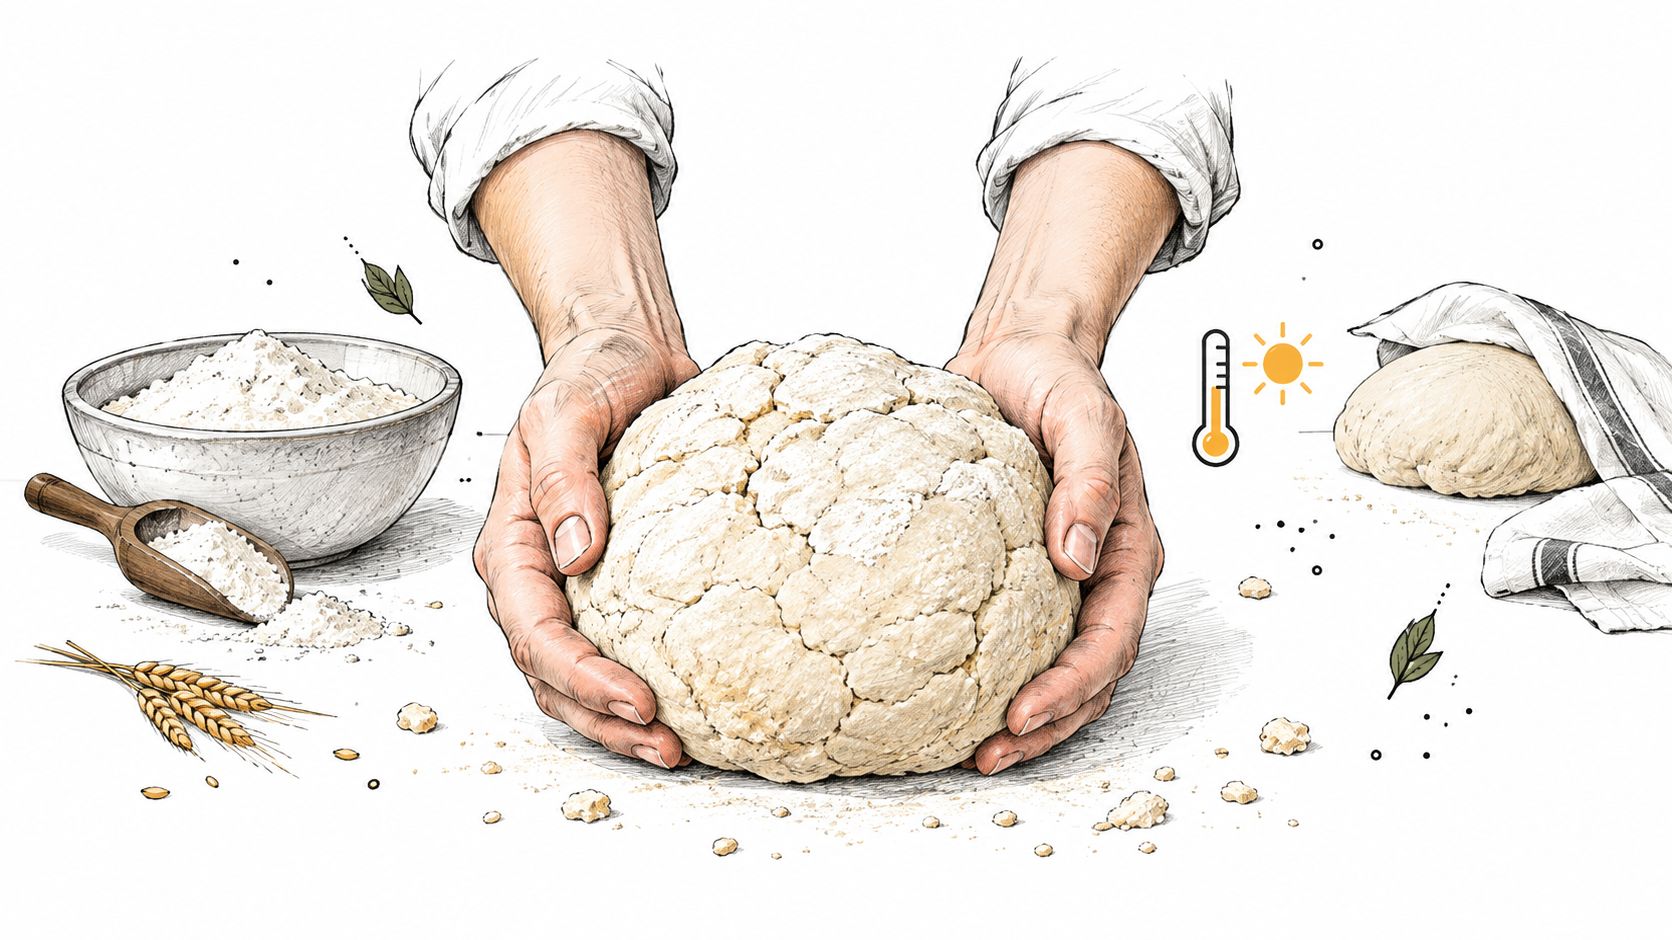
A proofing box helps because it shrinks the environment down to something steadier and easier to repeat. That matters, but warmth is only part of the choice. Sometimes a warm box is useful. Sometimes the fridge is the better tool for slower timing and flavor. Sometimes your room is already good enough. The goal is not to put every dough in a box. The goal is to stop guessing.
What a Bread Dough Proofing Box Does
A bread dough proofing box gives you a smaller, more predictable environment than an open kitchen. In plain terms, it helps you control the three things that keep changing on the counter: time, temperature, and humidity. The box is the tool. Your job is still to read the dough.
A simple way to picture it is a mini climate-controlled room for fermentation. Instead of hoping your kitchen stays warm enough, or humid enough, you set conditions and check how the dough responds. That distinction matters because a proofing box does not guarantee better bread on its own. It only makes your choices easier to repeat.
Time is your schedule
Time matters, but the clock does not make dough rise. It only tells you when to look. Dough can move quickly or slowly depending on warmth, hydration, yeast amount, sugar, fat, and how much fermentation happened earlier.
That is why experienced bakers use time as a guide, then confirm with the dough itself. If the dough looks airy, slightly swollen, and still has some strength, it may be ready. If it is tight and dense, it needs more time. If it looks fragile and overpuffed, the box stayed warm too long for that dough.
Temperature is the speed control
Temperature changes the pace. A proofing box works best when it gives gentle, even warmth instead of blasting heat in one spot. Warm air can help dough ferment more steadily, but more heat is not automatically better. In many home kitchens, that is the first misunderstanding.
As noted earlier, final proofing often happens in a warm range around 30–35°C. Use that as a reference point, not a rule for every dough. Lean dough, enriched dough, pizza dough, and sourdough can all respond differently. Sometimes the right move is the box. Sometimes the fridge is better for a slower schedule and more flavor. Sometimes the counter is already fine.
Humidity protects the surface
Humidity is there to protect the outside of the dough. It works like the lid on a pot. It slows moisture loss so the surface stays flexible while the inside continues fermenting.
You are not trying to make the dough wet. You are trying to stop it from drying into a skin that resists expansion. A water tray, a covered container, or a lightly oiled surface can all help create that protection.
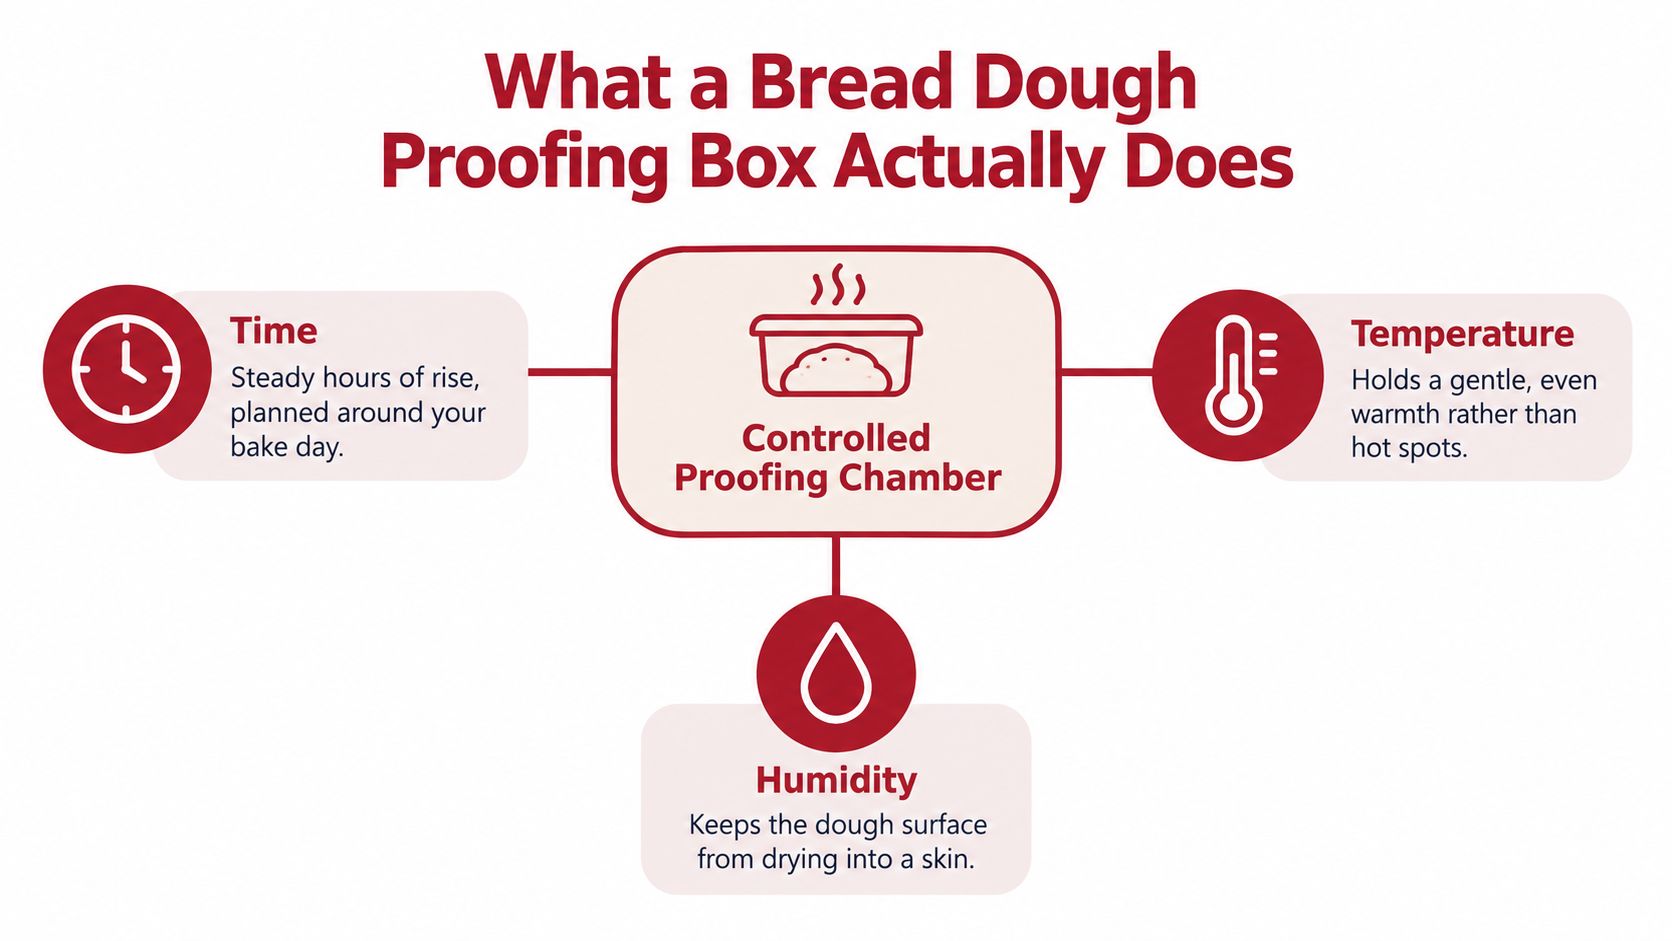
The practical takeaway is simple. The box is for steady conditions, not maximum speed. Use it when your dough needs a stable, warm, moist space. Skip it when the fridge or your room already gives the result you want.
Why Consistency Matters More Than Heat
A warmer box can make fermentation move faster, but speed isn't the same as control. If the dough races past its ideal point, it may lose strength before it reaches the oven. If it rises unevenly, shaping and baking become less predictable.
Temperature changes also affect gas development. In one bread-dough proving study, researchers compared 30°C, 33°C, 36°C, and 39°C. Fermentation around 36°C produced the best dimensional results for a 300-gram white-bread loaf, with carbon-dioxide release measured at 2,624 parts per million after one hour in a closed proving cabinet measuring 0.36 cubic meters. That result applies to the tested loaf and conditions, not automatically to every pizza dough. Study of bread-dough proving across different temperatures
The important lesson is that relatively small temperature differences can change expansion and handling. A box that holds a stable target gives you a better chance of repeating the same dough behavior from one bake day to the next.
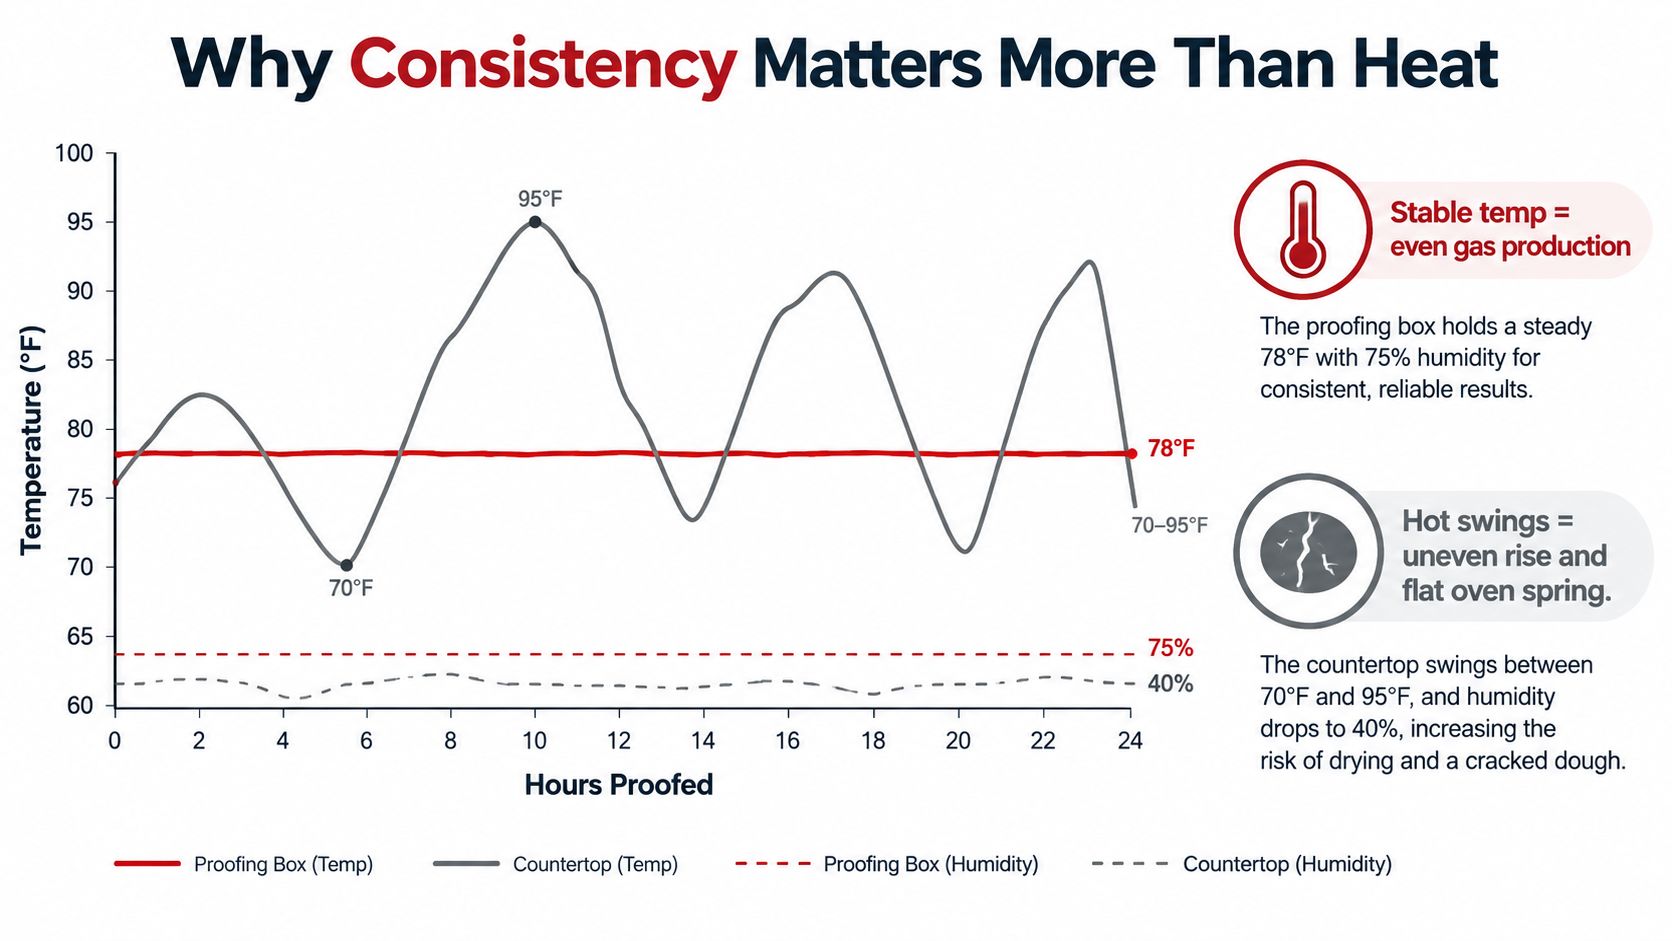
What stability changes in the bake
A dough that ferments evenly tends to be easier to stretch without tearing or collapsing. Consistent gas production can support better volume and more predictable oven spring, the rapid expansion that happens when dough enters a hot oven or grill.
Humidity matters before the bake. A dry skin can restrict expansion and make the dough harder to handle. It can also create a rough outer layer that doesn't match the soft interior you wanted.
Time matters after the box does its job. A controlled environment doesn't mean you can ignore the dough indefinitely. The box helps you reach a planned baking window, while visual and tactile checks tell you when to stop.
Practical rule: Choose the gentlest setting that makes your timing predictable. Maximum heat is usually a poor substitute for steady conditions.
For a closer look at choosing a temperature for different dough schedules, see this guide to bread proofing box temperature.
Choosing the Right Box for Your Kitchen
Start with your dough routine, not the feature list. A person proofing a few pizza balls needs a different layout from someone handling a large loaf or several batches. The right box should fit the dough you make, leave room for expansion, and make covering and cleaning straightforward.
Size and clearance
Count the dough pieces you normally proof together, then allow space between them. Dough balls that touch can merge as they expand, and a lid that sits too close can press against the surface or restrict the rise.
For pizza, tray height matters as much as floor area. A shallow container may suit tightly covered dough balls, but a taller chamber gives rounded dough more headroom. Stackable trays can help if you prepare multiple batches, provided each tray remains easy to load and clean.
Materials and moisture
Food-safe plastic is light and easy to handle. Wood can insulate naturally but may absorb moisture and require more careful drying. Stainless steel is durable and easy to wipe, though it may feel less forgiving if the design creates strong temperature differences.
The humidity method deserves close attention. A covered tray may retain enough moisture for many home bakes. A shallow water tray offers more control, but it also adds a cleaning task. Active humidification can be useful in specialized equipment, but it may add complexity that a home baker doesn't need.
Heat source and insulation
Electric heating offers direct control and repeatability. Passive insulation uses the warmth already present in the dough or surrounding environment, so it may be simpler but less consistent when the kitchen changes.
| Criterion | What to Look For | Why It Matters |
|---|---|---|
| Capacity | Enough room for your usual dough batch and expansion | Prevents crowding, sticking, and lid contact |
| Height | Clear space above dough balls or loaves | Protects the rising surface and preserves shape |
| Material | Food-safe, smooth, moisture-resistant construction | Makes cleaning and drying easier |
| Humidity method | Covered trays or a shallow water tray | Helps reduce surface drying |
| Heat source | Even, adjustable warmth rather than a single hot spot | Supports repeatable fermentation |
| Storage | Stackable or easy to store when empty | Keeps the box practical in a home kitchen |
If you're comparing a purpose-built container with a homemade setup, review the trade-offs in this DIY dough proofing box guide. A simple setup can work, but you'll still need to verify temperature, protect the dough from contamination, and manage moisture.
Setting Up Your First Proof
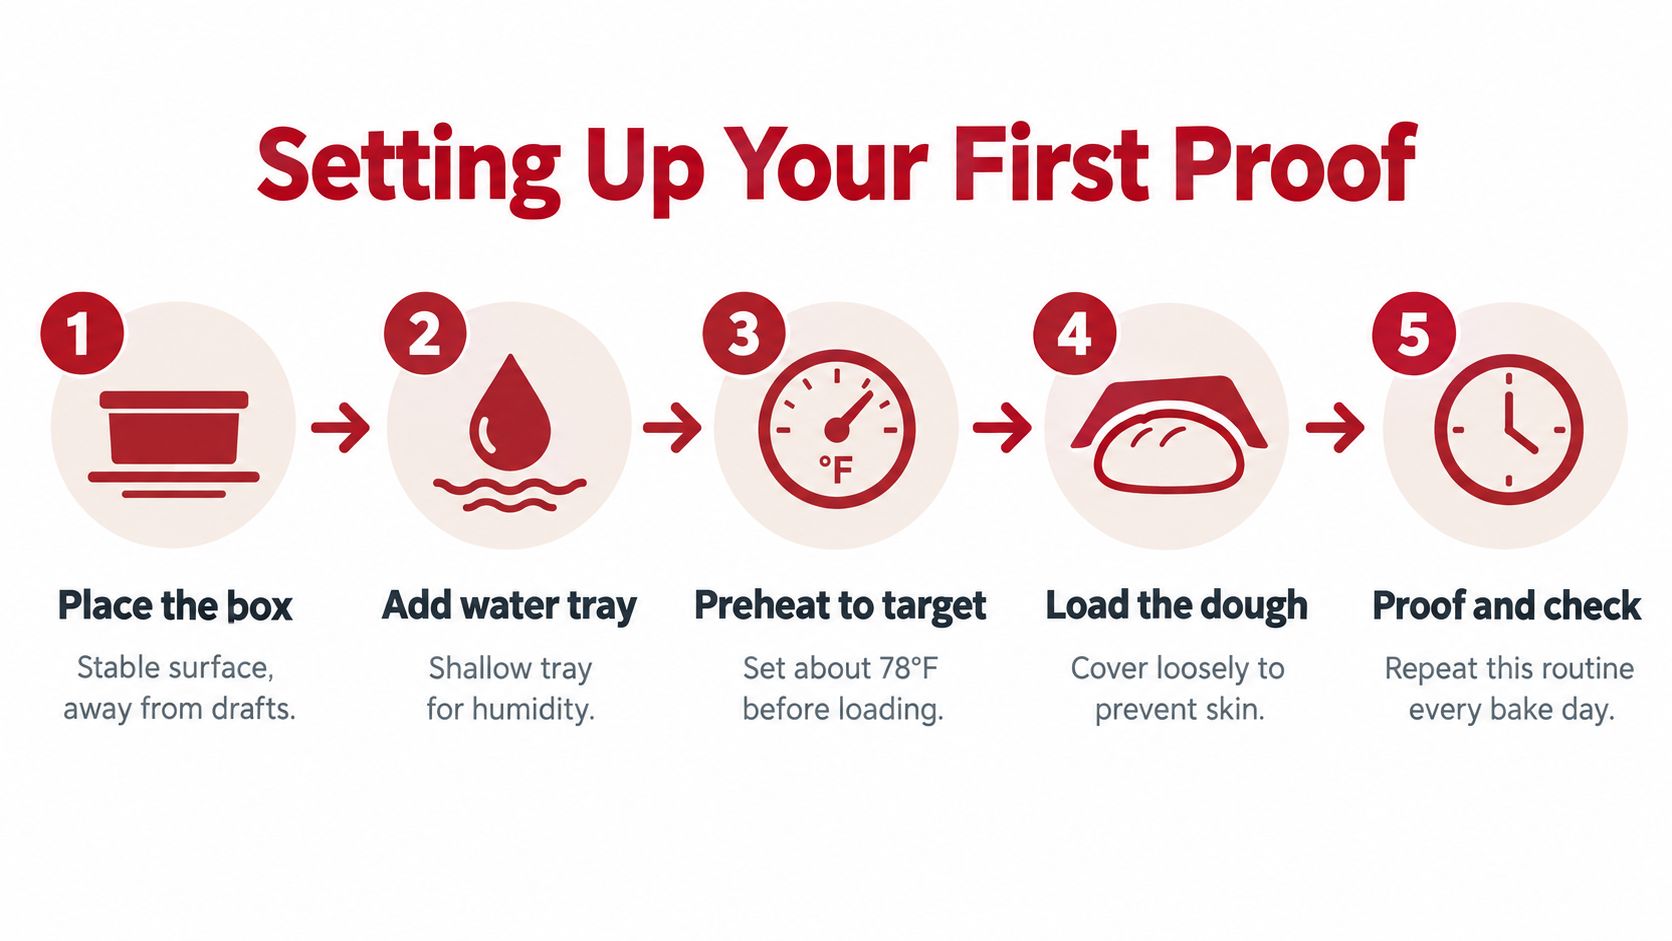
Use the same routine each bake day. Consistency in your process makes it easier to identify whether a problem comes from the dough formula, fermentation timing, or the equipment.
- Place the box. Set it on a level, stable surface away from drafts, direct sunlight, and active cooking heat.
- Add humidity. If the design allows it, place a shallow water tray inside. Keep water away from electrical parts and avoid creating condensation that drips onto the dough.
- Preheat the chamber. Give the box time to settle before loading. A short preheating period, often around 10–15 minutes in a home routine, helps the chamber reach its target before the dough enters.
- Load the dough. Place shaped dough balls with room around them. Cover them loosely or lightly oil the surface so air can't dry the outer layer.
- Check the dough. Use volume, softness, elasticity, and a gentle touch instead of relying only on the clock.
A pizza dough ball that's ready should feel aerated and relaxed rather than tight and heavy. If it springs back immediately after a light press, it may need more time. If it feels fragile and collapses easily, it may have gone too far.
Keep a clear height margin under the lid, especially with pizza-style dough balls. A container that works well for cold storage may still be too shallow for a warm proof if the dough expands upward.
The routine is easier to repeat when the box is simple to load, wipe, and store. This Hans Grill dough proofing box is one example of a stackable tray design intended for proofing or cold-fermenting dough.
Here's a visual walkthrough of the setup routine:
Warm Box, Cool Fridge, or Room Counter
You mix dough in the morning, planning pizza at dinner. By noon, one kitchen feels chilly, another feels almost summer-warm, and the same dough can act like two different recipes. That is why the choice is not just warm versus cold. The key question is what the dough needs to do next, and how soon you need it ready.
Use a warm box for active proofing. Use the fridge for holding time. Use the counter when the room is already giving you a steady rise. A proofing box is a tool, not the automatic answer every time dough needs attention.
Same-day pizza dough
For dough you plan to bake later the same day, a box helps when the room is cool, drafty, or swinging in temperature. Gentle warmth can keep fermentation moving at a predictable pace, which makes the rest of the day easier to time. If your kitchen already feels stable and the dough is rising at a healthy rate, the counter often does the job just fine.
Overnight dough
For dough that needs to wait until tomorrow, the fridge usually makes more sense. Cold storage slows fermentation so the dough does not race ahead while you are sleeping or away from the kitchen. Then, later, you can shift it to a warmer spot only if it needs a final rise before baking.
A Study of cold fermentation followed by warm proofing tested sweet dough at 5°C, 10°C, and 15°C for 8–48 hours, followed when needed by proofing at 30–32°C and 75–80% relative humidity. That is a useful reminder that cold fermentation and warm proofing are not rivals. They can work together in one schedule.
Sourdough
Sourdough reacts quickly to temperature changes, so avoid copying a timer from someone else's kitchen. For a same-day bake, use the counter or box if the dough needs help reaching your baking window. For a longer schedule, refrigerate at the right stage, then warm it only if the final proof needs a push.
Enriched dough
Dough with butter, eggs, or sugar often benefits from a controlled environment because those additions can slow or soften fermentation. Even so, warmth should guide the dough, not force it. If the dough needs to wait, refrigeration is usually the calmer option.
Decision shortcut: Bake soon, use controlled warmth if needed. Bake tomorrow, use the fridge. If the dough is already moving well on the counter, leave it there and don't change conditions without a reason.
Food Safety and Common Misconceptions
A proofing box creates the same conditions that yeast likes. Warmth and moisture. That is helpful during an active rise, but it also means dough should not sit there for hours without attention. If your schedule changes and baking has to wait, the fridge is usually the safer holding place.
Cover the dough every time. A bowl lid, food-safe wrap, or clean container does two jobs at once. It helps prevent the surface from drying out, and it reduces exposure to dust, stray splashes, and hands moving around the kitchen. Clean trays, tools, and worktops matter as much as the box setting.
One common misunderstanding is that a proofing box is always the "better" choice because fermentation speeds up there. Faster is not automatically better. A warm box is for dough you plan to watch and bake soon. The counter works when the room is steady and the dough is progressing normally. The fridge works like a pause button when the dough needs to wait.
Earlier research on fermented dough used below 21°C as a boundary for slowing fermentation during a longer hold in that study setup. Use that as context, not as a kitchen rule for every dough.
The safe habit is simple. Match the environment to the clock, not just to the recipe.
Cleaning, Care, and Quick Troubleshooting
Wipe the interior and trays after every session with a suitable food-safe cleaner, then dry all surfaces completely. Pay special attention to the water tray and any seams where flour and condensation collect. Keep moisture away from electrical components, and store the box with the lid slightly ajar if the manufacturer permits it.
Use the symptom as a clue rather than changing several settings at once.
- Sticky surface: Excess humidity, condensation, or an uncovered water source may be affecting the dough. Reduce exposed water and cover the dough more carefully.
- Collapsed dough: Fermentation may have continued too long, or the dough may have become too warm. Shorten the warm stage and check earlier.
- Sour smell: Clean the chamber, wash removable parts, and dry everything fully before the next use.
- No rise: Check yeast or starter activity, dough temperature, and whether the dough has already spent too long in a cold environment. Give it time before increasing heat sharply.
A bread dough proofing box should make your routine calmer, not more complicated. Keep the chamber clean, measure its actual warmth with a thermometer, protect the dough surface, and choose the fridge or counter whenever they better fit the schedule.
Hans Grill offers pizza tools and dough-proofing equipment for home kitchens and backyard grills, including a stackable proofing box designed to help protect dough during proofing or cold fermentation. Visit Hans Grill to compare the proofing box with its pizza stones, steels, and other baking tools, then choose the setup that matches your dough schedule.


