

Bread Proofing Box for Sale: A Practical Buying Guide
You followed the same recipe as last Friday. Same flour, same yeast, same bowl under the same cloth. Last week the dough was smooth and ready to stretch, and today it's tight, dry on top, and barely puffed, or it's blown up so fast it tears. Before you blame your hands, look at the room. When you're comparing any bread proofing box for sale, that unreliable counter is the problem you're buying your way out of.
Table of Contents
- Why Dough Behaves Unpredictably on Your Counter
- What a Bread Proofing Box Actually Does
- The Four Engineering Pillars of a Good Proofing Box
- Passive, Active, and Prosumer Designs Compared
- Matching Temperature and Humidity to Your Recipe
- Five Buyer Traps That Waste Real Money
- Price Tiers and What You Actually Get
Why Dough Behaves Unpredictably on Your Counter
It's November, the heating hasn't really kicked in, and your dough balls are sitting on a cold stone worktop near a drafty door. Three hours pass and they've hardly moved, so you stretch them anyway because people are hungry. They snap back, resist, and bake dense. Now picture the same batch in July, sun hitting the counter, oven preheating nearby. The dough races ahead, goes slack and fragile, and you can't shape it without tearing holes.
Nothing in the recipe changed. Your kitchen changed. That's the moment most home bakers stop tweaking flour percentages and start looking for a box. Not because a box is exciting, but because the one variable you can't control with a recipe is the air around the dough.
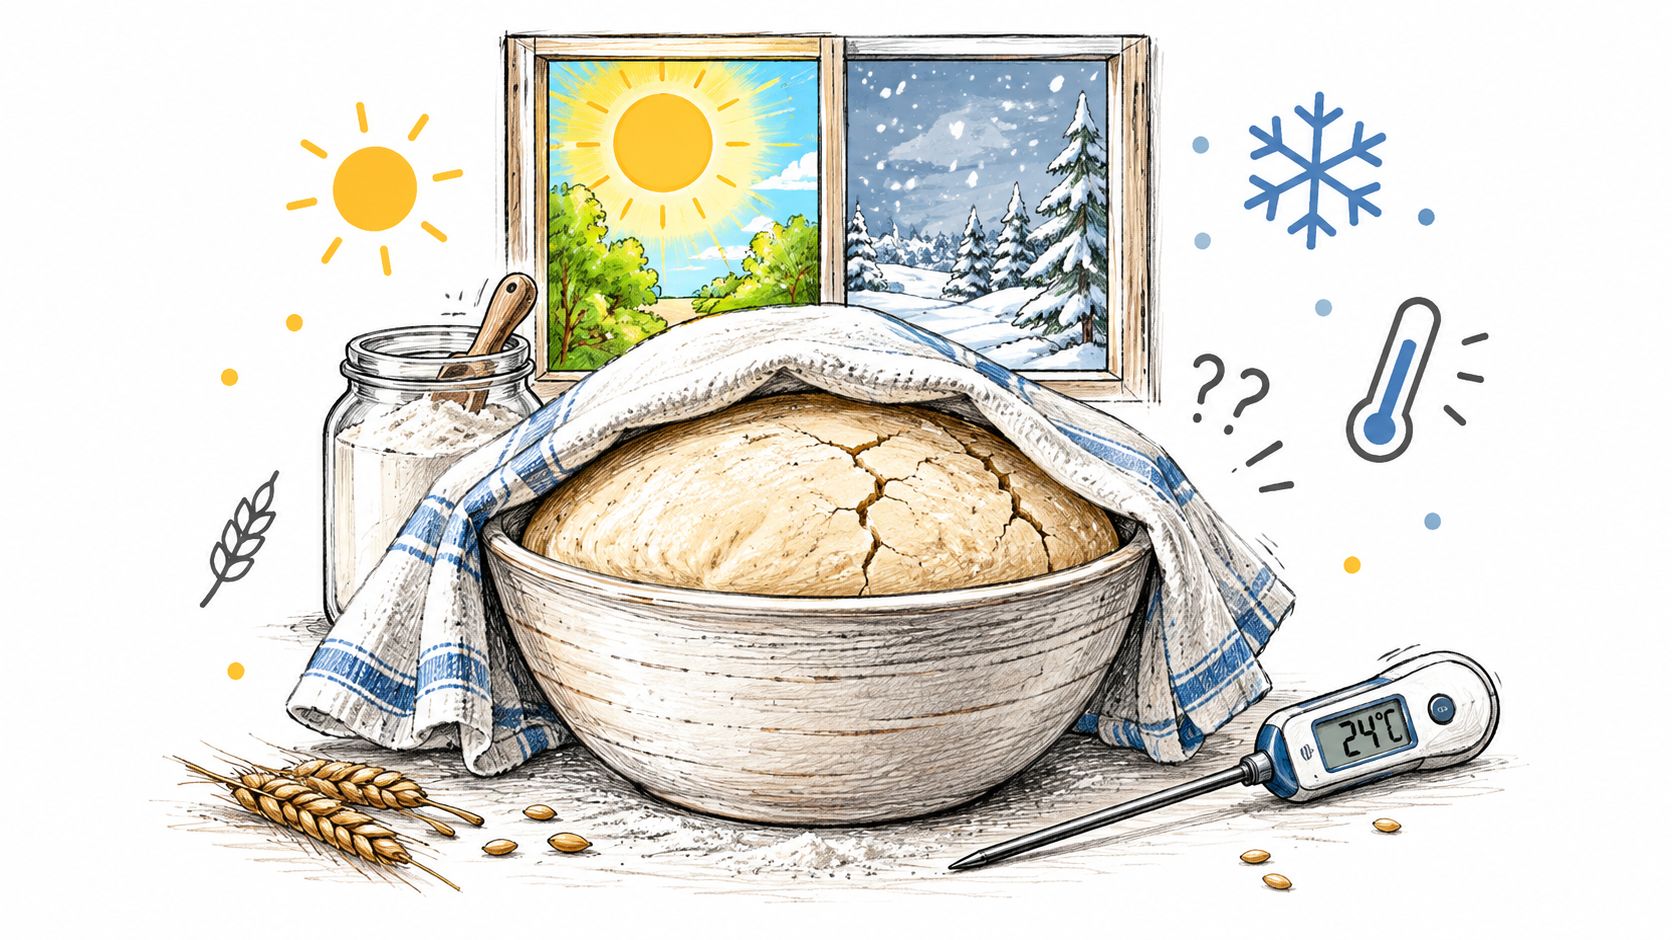
Then there's the skin. Dry room air pulls moisture from the exposed surface while the inside is still trying to expand. You get a thin, leathery top that restricts the rise, splits unevenly in the oven, and leaves you wondering why the oven spring never happened. A damp cloth helps for a while, then it dries out too, or it sticks and rips the surface when you lift it.
The Variable You Cannot Recipe Away
You can weigh everything to the gram and still lose to a cold corner. Yeast doesn't read your schedule, it responds to its environment. If that environment swings between morning and evening, winter and summer, your timing will swing with it, and you'll keep mistaking an environmental problem for a skill problem.
Your dough isn't inconsistent. Your room is. Fix the room in miniature, and the same recipe starts behaving like itself again.
A proofing box earns its counter space by taking that swing out. It gives you a small, sheltered space where warmth and moisture stay roughly where you set them. Choosing one well comes down to four decisions, heat, humidity, size, and materials, and the cheapest listing rarely tells you enough about any of them.
What a Bread Proofing Box Actually Does
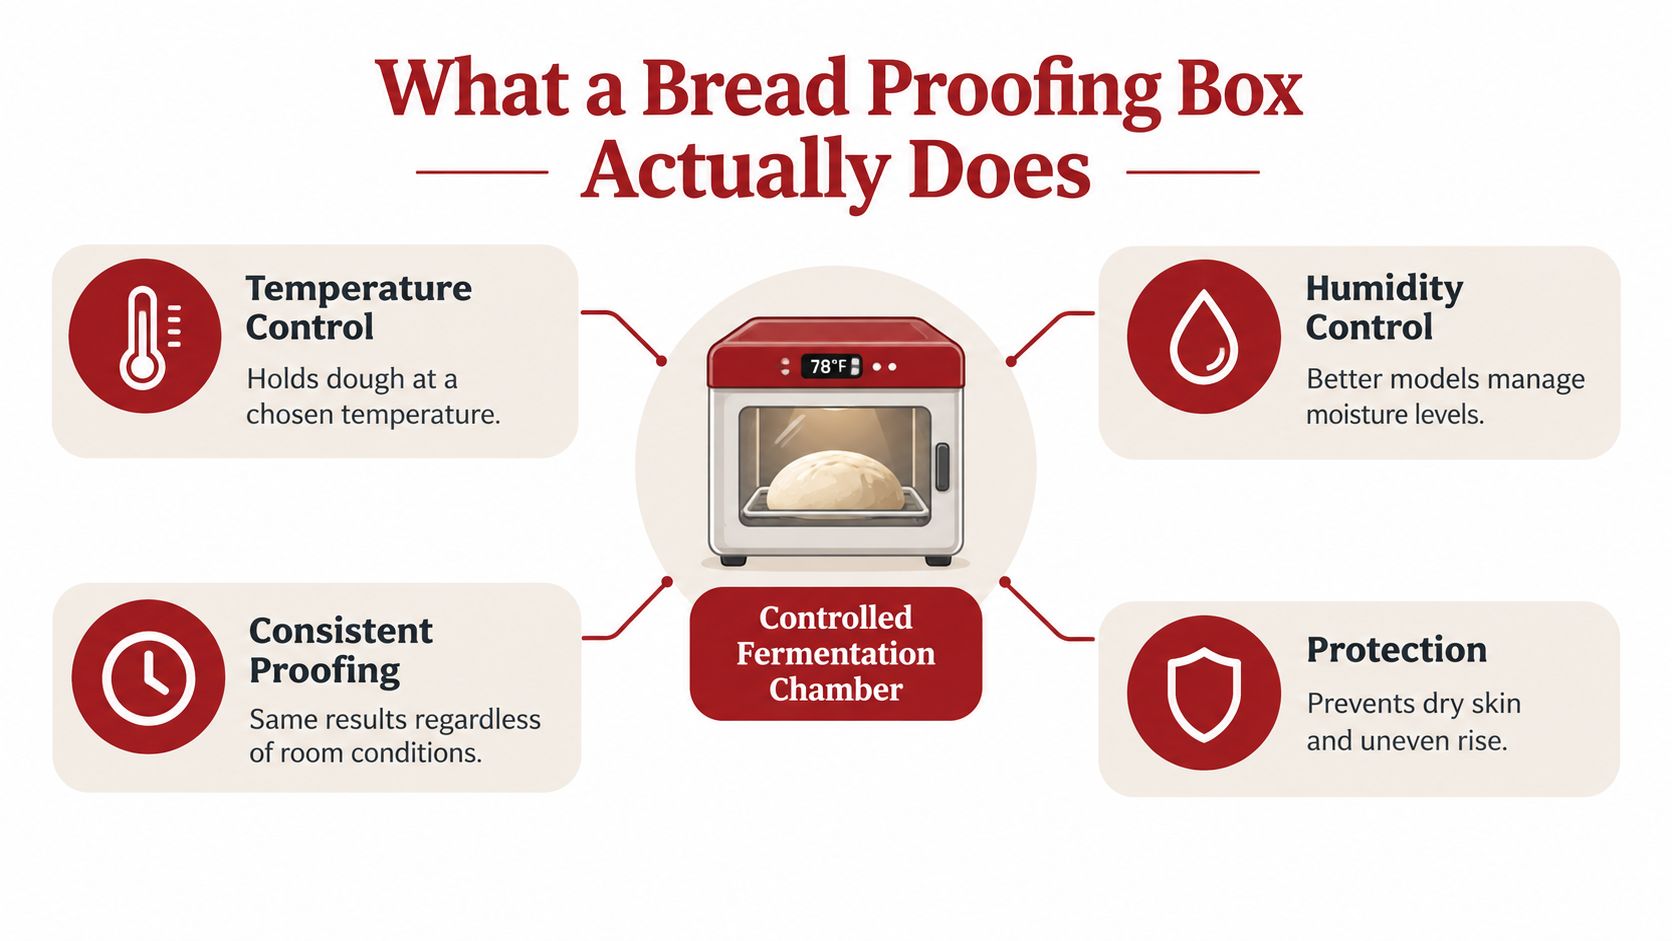
Think of it as a greenhouse for dough. A greenhouse doesn't grow tomatoes by force, it holds steady conditions so the plant can do its own work at a predictable pace. A proofing box does the same for fermentation. It's a small, usually insulated chamber that holds dough at a temperature you choose, and in better designs it also manages the moisture around the surface.
The diagram below maps that job in simple terms, temperature, humidity, and protection working together inside one chamber.
Yeast is alive. Its activity speeds up and slows down with temperature, so the box is really setting a metabolic tempo for the dough. That's why proofing isn't a vibe or a guess. Research summarized in a peer-reviewed wheat dough study on proofing temperature and humidity notes that final proofing commonly lasts 15 to 60 minutes, depending on dough weight, consistency, yeast quantity, bulk fermentation level, temperature, and humidity, with 30 to 35°C as a normal proofing range and 70 to 85% relative humidity as the typical chamber target.
What It Is Not
Learners often confuse a proofing box with three other warm things, and the difference matters.
- A slow cooker: It's built to cook food through, far hotter and wetter than dough wants, and it will damage yeast.
- A yogurt maker: It's close in spirit, gentle warmth, but it's sized for jars, not trays of dough balls or a loaf tin.
- An oven with the light on: It can work, but you can't dial it in, you lose your oven, and someone will eventually preheat it with your dough inside.
This short video is a helpful visual for how a controlled chamber changes the pace of a rise compared with leaving a bowl to chance.
Once you see fermentation as a measurable process rather than a feel you either have or don't, buying gets easier. You're not shopping for magic. You're shopping for steady conditions.
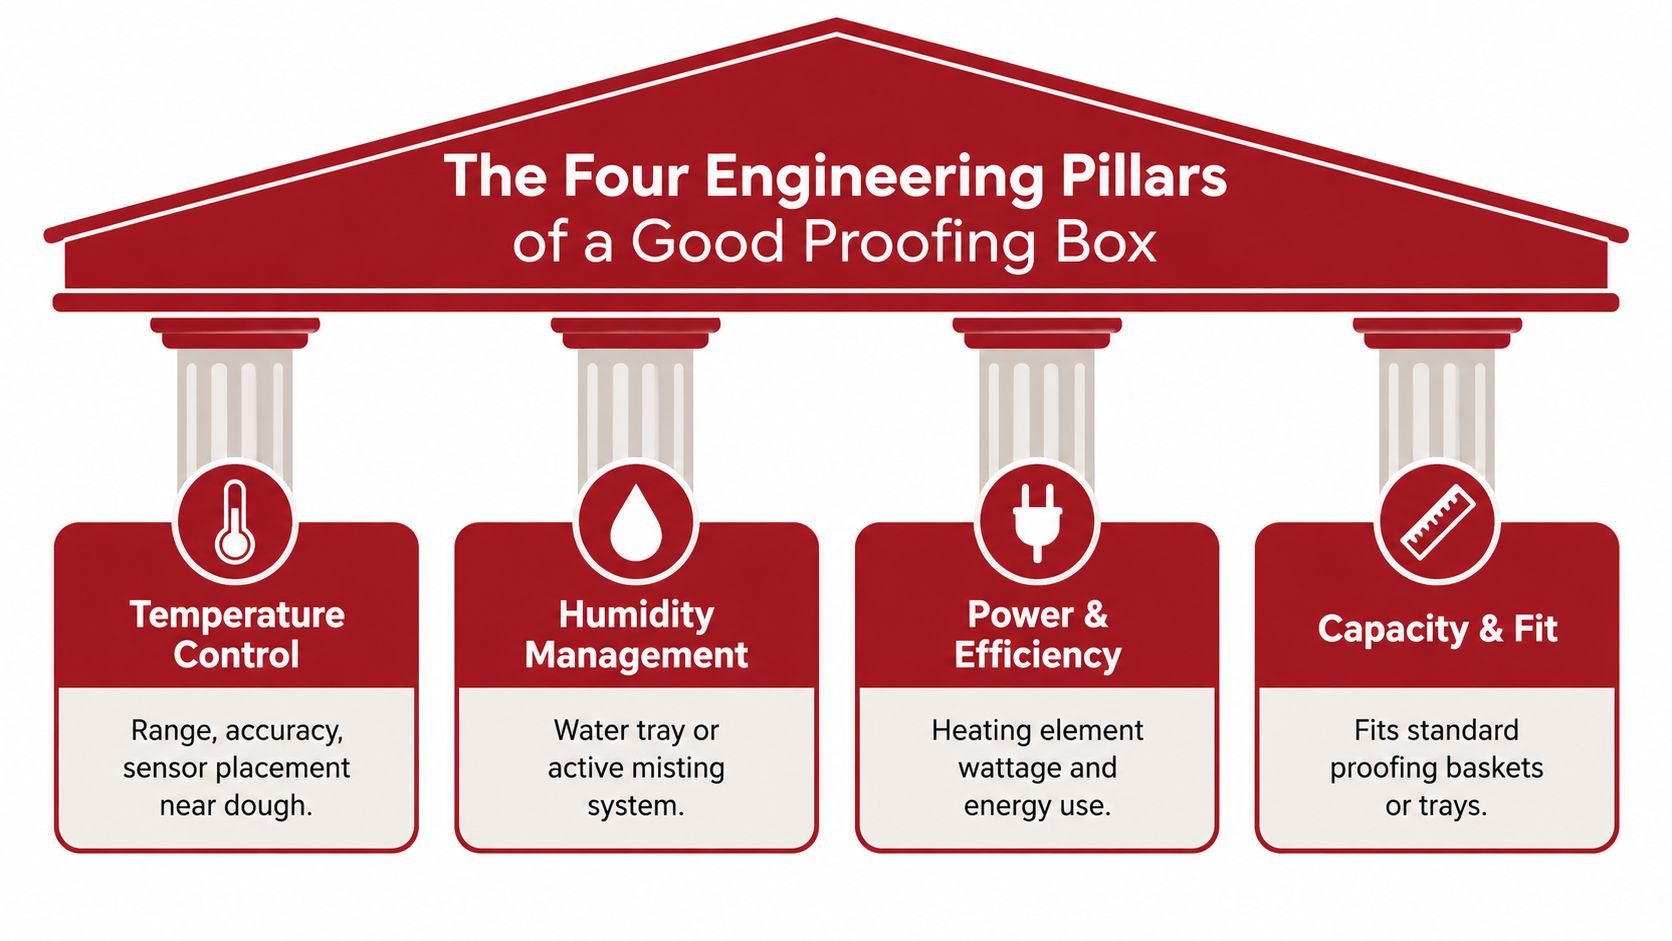
The Four Engineering Pillars of a Good Proofing Box
You don't need to become an engineer. You do need a checklist you can hold up against any product page. These four pillars are that checklist, and each one controls something specific inside the dough.
Temperature Control and Where the Sensor Sits
Range matters less than accuracy in the useful zone. As breadmaking guidance on favorable yeast activity and proofing temperatures puts it, favorable yeast activity sits around 24 to 30°C (75 to 86°F) during fermentation, final proofing often runs around 30 to 35°C (86 to 95°F), and temperatures above approximately 42°C (108°F) can kill yeast. So an adjustable range near 24 to 35°C beats a design that brags about high heat you'll never safely use.
Ask one question on every listing. Does the sensor read the air near the dough, or does it only sit by the heating element? A sensor glued to the element can report a cozy number while your dough, a few inches away, is cooler, or a hot spot cooks one side faster than the other. Test: If the spec sheet won't say where the sensor lives, treat the accuracy claim as unproven.
Humidity Delivery Without Soaking
Next, look at how moisture arrives. A passive water tray evaporates gently and is forgiving, though it won't give you a precise readout. An active steam or misting system responds faster and can hold a target more tightly, but it adds parts to clean and ways to overdo it. Either can prevent that dry skin. Neither should drip onto the dough.
Practical rule: You want humid air around the dough, not water on the dough. If you can see droplets raining from the lid, the system is working against you.
Test: Look for a tray or reservoir that's separated from the dough surface and easy to empty. If water pools directly under a tray with no barrier, expect soggy bottoms.
Chamber Size and Materials You Will Actually Clean
Size is about your real batch, not your ambition. Measure the tray, tin, or basket you already use and check the internal dimensions, not the outside footprint. A box that fits several pizza dough balls with room to expand, or one loaf tin without the dough kissing the lid, will get used. A cavern for a batch you make twice a year will mostly store air.
Materials decide whether you'll still like the box in six months. Food-safe plastics are light and stack well. Stainless interiors wipe clean and don't hold smells. What matters most is whether trays and lids come out and fit in your sink, because flour paste and condensation will find every fixed corner. Test: If you can't picture washing it after a sticky brioche day, pick a simpler design.
Passive, Active, and Prosumer Designs Compared
Most listings sort into three tiers, and the right one depends on how you bake, not on which has the longest feature list.
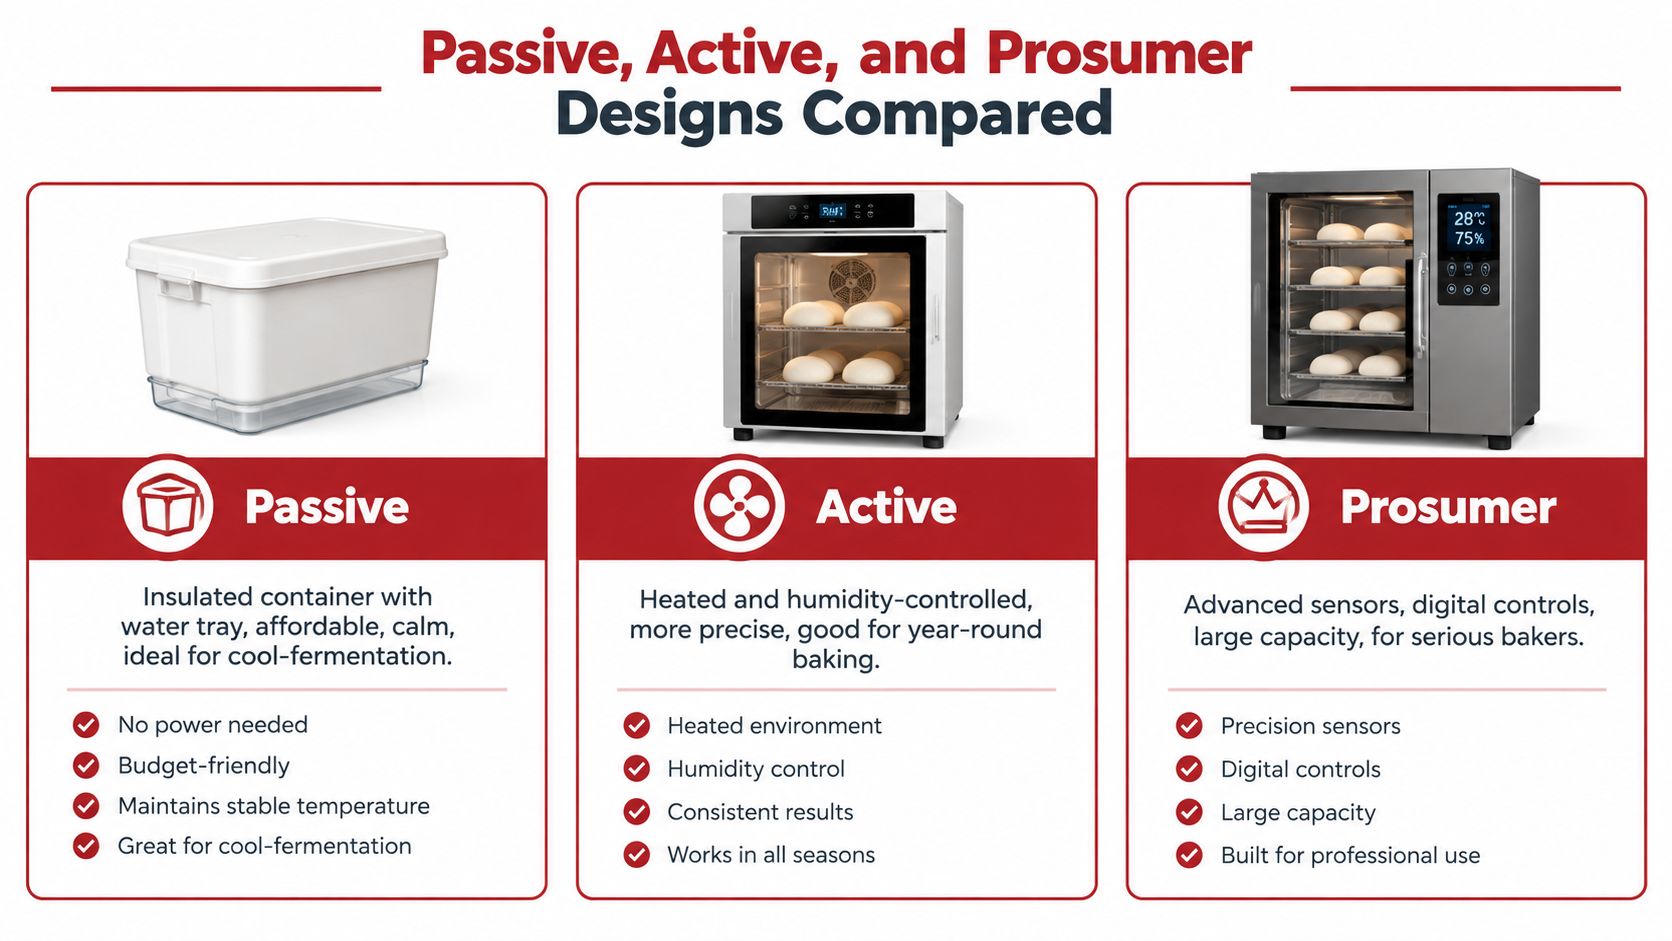
Passive boxes are insulated containers, often with a lid and sometimes a water tray. They don't add heat, they slow down temperature swings and protect the surface from drying. For pizza dough balls and slower, cooler schedules, that calm stability is often enough. Hans Grill's stackable pizza dough proofing trays with covers sit in this category, holding multiple dough balls per tray for bread dough, sourdough bulk fermentation, and overnight cold proofing.
Active boxes add a thermostatically controlled heating element, and sometimes a humidity module. They suit bakers who proof often and want same-day timing they can repeat in January and July. You set a temperature, the chamber holds it, and your schedule stops depending on whether the kitchen is warm.
Prosumer units layer in digital controllers, humidity readouts, and larger chambers. They're for serious home bakers and small side businesses who run batch after batch and need to document settings. They also demand the most counter space and cleaning discipline.
Match the Tier to Your Schedule, Not Your Ego
Research on wheat dough fermented across temperatures from cold to warm tested dough at 5°C, 15°C, 25°C, and 35°C with yeast concentrations of 20 to 120 g per kg of flour, and the longest times came at 5°C with the lowest yeast level while the shortest came at 25°C with the highest. In plain terms, cool and warm are both legitimate strategies. A useful box shouldn't force you into only fast, warm proofing.
So ask yourself three things. How often do you bake? Do you lean on long, slow ferments in the fridge, or do you mix and bake the same day? How much counter can you give up? If you also shape loaves in baskets, it's worth reading about choosing and using a basket for baking bread so your basket and chamber dimensions agree before you spend anything.
Daily bakers usually land on active. Weekend pizza makers often thrive with passive. Prosumer makes sense when volume, not curiosity, is pushing you.
Matching Temperature and Humidity to Your Recipe
Settings aren't one-size-fits-all, and beginners get confused here. They find a number online, set every dough to it, and wonder why brioche sulks while pizza dough overproofs. Let's translate the principles into dial positions for three doughs you probably make.
For a long cold ferment, you may not need the box at all. The fridge is your cold chamber, and the box becomes useful afterward, when you bring dough balls back to a gentle warmth so they relax and finish expanding before stretching. Use the lower, moderate end of your box for that job. You're waking the dough up, not rushing it.
Three Doughs, Three Different Jobs for the Same Box
- Pizza dough balls: Keep them covered so the surface stays supple, and favor steady moderate warmth for a same-day schedule. You want balls that are aerated and extensible, stretching without snapping back, not the biggest possible volume.
- Lean bread loaves: A slightly warmer final proof helps a shaped loaf fill its tin or basket before baking. Watch the dough's spring when gently poked rather than obeying the clock.
- Enriched brioche: Butter and eggs slow things down, so a warm, protected, moist environment helps, but excess heat can melt the fat structure and leave the dough greasy and weak. Gentle beats aggressive.
Temperature alone doesn't tell the whole story. Work cited in a study on coordinated temperature, humidity, and proofing time for frozen dough recommends approximately 32 to 43°C, 70 to 75% relative humidity, and 80 to 100 minutes for that specific process. Don't copy those settings onto fresh pizza dough. Take the lesson instead, which is that temperature, humidity, and time work as a team, and a temperature-only spec sheet is incomplete.
Judge readiness by the dough in front of you. The dial sets the pace, but volume, feel, and surface condition tell you when to bake.
Try this simple matching exercise before you buy. Name your most common bake, then write down how long you want it to take and whether it needs warmth, cool stability, or just protection from dry air. That short note tells you the range your chamber must deliver. For a deeper walkthrough of dial choices by dough type, see this guide to setting bread proofing box temperature for different doughs.
Five Buyer Traps That Waste Real Money
Most disappointing purchases aren't lemons. They're decent boxes bought for the wrong reasons. Watch for these five traps, each with a question to ask before checkout.
1. The oversized chamber. A huge box for a two-ball batch means a lot of air to warm and humidify, and conditions near your small amount of dough can lag behind the display. Ask whether the internal size matches your usual batch, and check photos with a tray inside for scale. If your dough looks lost in there, it is.
2. Water pooling under the dough. Some humidity trays sit so close that condensation collects and touches the base. You get wet, sticky bottoms that tear when you lift them out. Look for separation between the water source and the dough surface, plus a way to drain or wipe the tray without tipping the whole unit.
Traps That Hide in the Spec Sheet
3. A lid sealed too tight. Dough releases gas as it ferments. A completely airtight seal with no venting path can work against expansion and trap excess moisture until it rains back down. Check whether the design allows a small amount of exchange or at least a lid you can offset slightly.
4. Humidity claims with no water source. If a listing promises humidity control but shows no reservoir, tray, or sensor, you're probably looking at a passive tray dressed up in marketing language. Ask a direct question. Where does the water go, and what, if anything, measures the result?
5. Heat with no chamber sensor. As covered in the section above, an element that only measures itself can leave the dough zone cooler than the number on the panel. The red flag is a spec sheet full of wattage and silent on sensor placement.
If you're handy and want to understand these tradeoffs by building first, this walkthrough of a DIY dough proofing box setup shows what each component does, which makes commercial listings much easier to judge afterward.
Price Tiers and What You Actually Get
Friday pizza night, done calmly, looks like this. You mixed at lunch, the dough balls have been sitting covered and steady while you prepped toppings, and at stretch time they're relaxed and bubbly instead of tight or collapsed. Nobody's waiting on a miracle. That's what you're paying for at every tier, just with different levels of control.
As an example of how the market is usually structured, use this table to set expectations rather than chase features.
| Tier | Price Range | Best For | Key Limitations |
|---|---|---|---|
| Budget passive | Example range, roughly $30 to $80 | Pizza dough balls, slow ferments, fridge workflows | No added heat, no precise humidity readout |
| Mid-range active | Example range, roughly $80 to $200 | Most home pizza and bread makers who bake weekly | Moderate chamber size, basic humidity tray |
| Upper prosumer | Example range, $200 and up | Daily bakers and small businesses running larger batches | Counter space, cost, more parts to clean |
A Two-Minute Decision Checklist
- Batch size: Count your usual dough balls or loaves, then match internal dimensions to that, with headroom to rise.
- Typical recipe: Same-day warm proofs point to active heat. Long cold schedules point to a good passive tray you can refrigerate.
- Counter space: Measure the spot, including room to lift a lid straight up without hitting a cupboard.
- Control style: Plug-and-go simplicity suits most beginners. Hands-on dials and readouts suit bakers who keep notes.
Run any bread proofing box for sale through those four lines and the shortlist usually shrinks to one or two sensible options. Buy the tier that matches your Fridays, not your fantasies, and it'll earn its place every week.
Ready to proof pizza dough balls in stackable, covered trays that move cleanly from counter to fridge, then bake on a stone or steel built for crisp bases? Explore proofing boxes, pizza stones, and steels at Hans Grill and build a pizza night setup that behaves the same way every week.


