

Neapolitan Pizza Temperature Secrets for Home Cooks
Your oven is preheating right now. The dial says it's as hot as it goes. You've got dough on the counter, sauce ready, mozzarella drained, and a small voice in your head saying, “Why doesn't my pizza come out like that place with the blistered crust and soft center?”
I've stood on both sides of that question. In front of very hot pizza ovens, the answer feels obvious. In a home kitchen, it gets murky fast. The good news is that Neapolitan pizza temperature isn't magic. It's heat transfer. Once you understand where the heat needs to come from, you stop chasing myths and start making better decisions with the oven, stone, steel, or grill you already own.
A home oven won't become Naples just because you want it to. But you can get much closer when you stop asking, “What temperature is my oven set to?” and start asking, “What temperature is my baking surface, and how much top heat is my pizza getting?”
Table of Contents
- What Authentic Neapolitan Heat Actually Feels Like
- The Two Temperatures That Define Neapolitan Pizza
- Why Extreme Heat Changes the Crumb Itself
- Cordierite Stone vs Steel vs Home Oven
- Practical Ways to Push Your Home Setup Hotter
- Hydration and Dough Built for High Heat
- The 500 Degree Myth and Other Common Mistakes
- Your Pre-Bake Temperature Checklist
What Authentic Neapolitan Heat Actually Feels Like
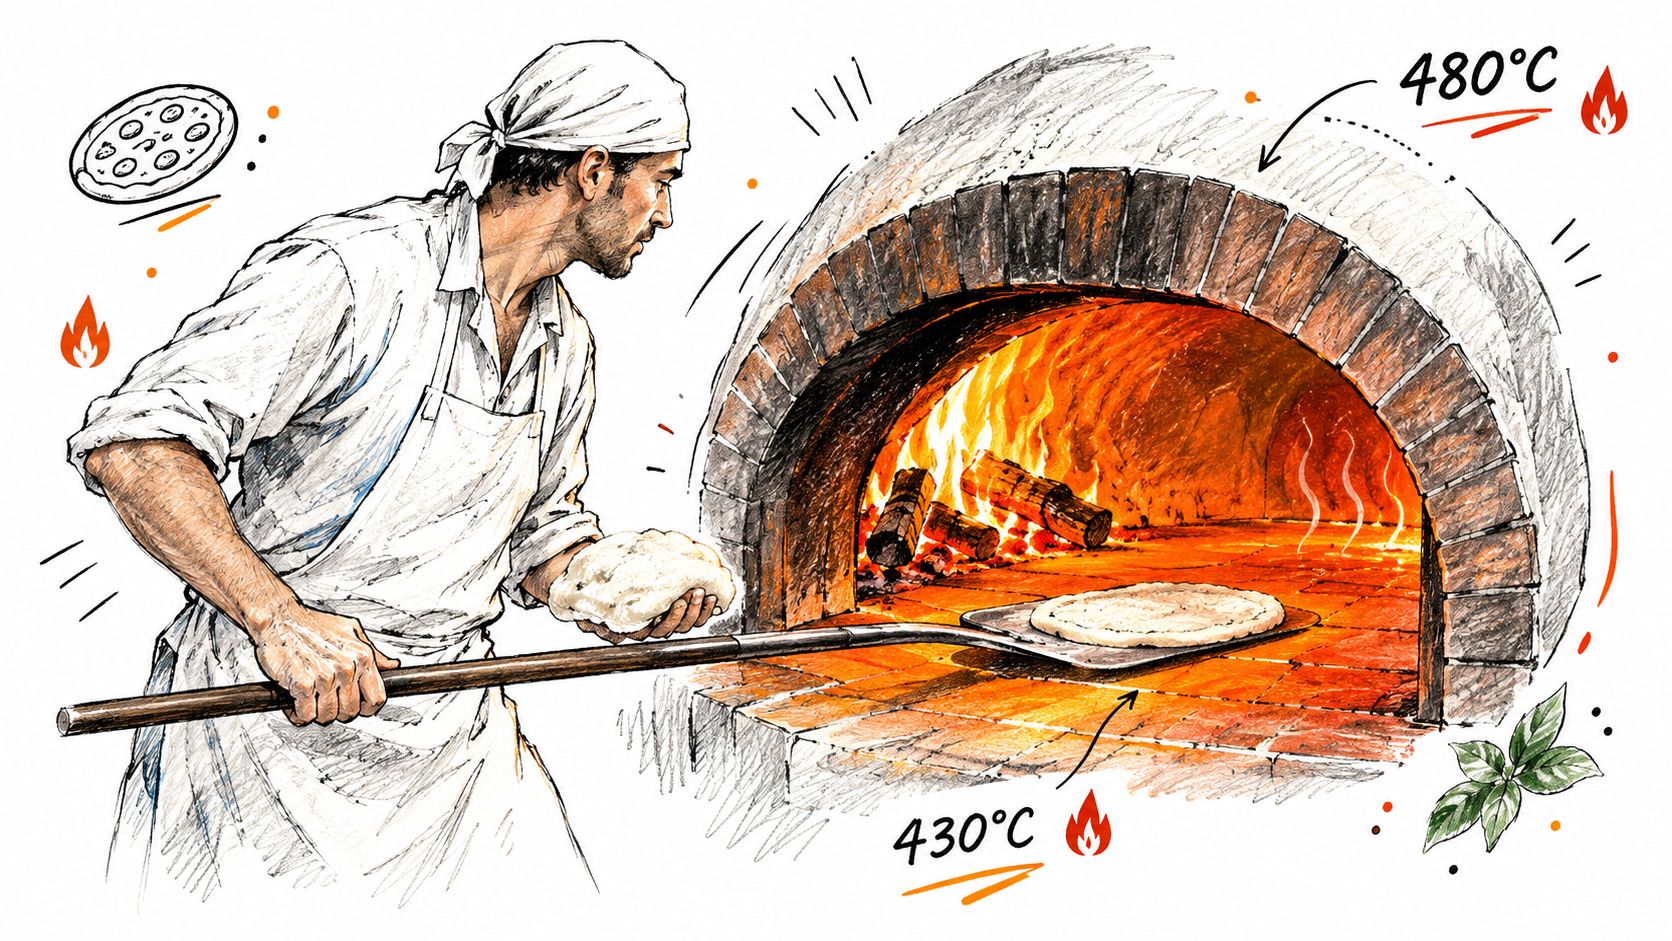
In a proper Neapolitan oven, the moment of baking is violent in the best way. The peel skims the deck. Raw dough lands with a faint slap. The edge starts swelling almost immediately, not after a minute, but right away. Moisture flashes into steam, the rim blooms, and the crust freckles before your brain fully catches up with what's happening.
When people talk about Neapolitan pizza as “light,” they sometimes make it sound delicate or fussy. It isn't. It's fast, intense, and very controlled. The soft center and spotted cornicione come from a short blast of extreme heat, not from a gentle bake.
What your kitchen usually feels like instead
At home, most cooks see a very different scene. The oven is set high, but the pizza still sits there for several minutes. The cheese finishes before the bottom does. The crust edge colors a little, but the center stays slack. You lift a slice and it folds all the way over.
That gap can feel frustrating, but it's not a sign that you've failed. It's a sign that your setup is delivering heat in a different way.
Practical rule: If your pizza needs a long stay in the oven, you're not baking Neapolitan style. You're making a different style of pizza, and that's fine as long as you know what result to expect.
This is a physics problem, not a talent problem
A Neapolitan oven throws heat from below and above at the same time. Your home oven usually struggles to do both. The floor or stone may not be hot enough to set the base quickly. The top heat may be uneven or weak until the broiler kicks in. That's why one pizza comes out pale underneath and another burns on the rim before the center is ready.
Once you see the problem clearly, the path gets simpler. You don't need to pretend your kitchen oven can perfectly replicate a wood-fired dome. You need to understand which part of the Neapolitan bake you can mimic, which part you can support with tools, and which part you can't force.
The Two Temperatures That Define Neapolitan Pizza
The official standard matters here because it gives us a real target instead of internet folklore. The Associazione Verace Pizza Napoletana specifies an oven floor of about 380 to 430°C, a dome around 485°C, and a total bake time of 60 to 90 seconds in its published disciplinary standard for vera pizza napoletana, which also caps the finished pizza at 35 cm in the AVPN standard.
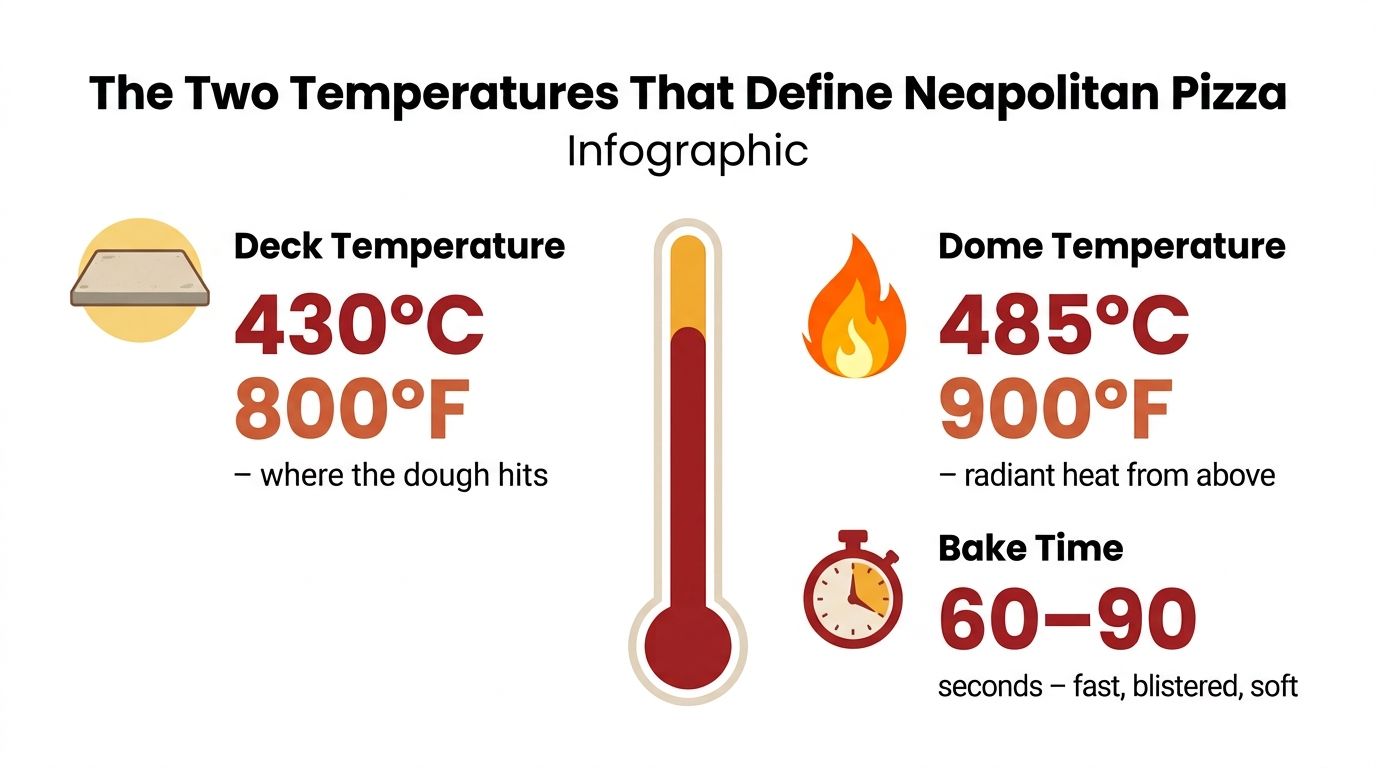
Those numbers explain a lot. They also confuse people, because many home cooks assume “oven temperature” is one number. It isn't.
Floor heat and dome heat do different jobs
The floor temperature is about the surface the dough touches. That contact heat is like a cast-iron skillet for the bottom crust, setting the base, driving steam from the dough, and helping the underside brown before the toppings overcook.
The dome temperature is different. That's the intense radiant heat coming from above and around the pizza. It colors the rim, melts the cheese quickly, and gives the top side enough energy to keep pace with the fast-moving bottom.
A single thermometer reading can hide this distinction. Your oven air might sound hot, but if the baking surface is lagging, the pizza still bakes slowly from underneath. Or the broiler might scorch the top while the base remains underdone.
Why the bake is so short
A very short bake works only when these two zones are in balance. The floor grabs the dough from below. The dome blasts it from above. The pizza cooks as a whole system rather than one side waiting for the other.
A useful technical explanation from Vesuviano Forni says the floor must be hot enough to set the base quickly while the dome supplies strong radiant heat to brown the rim without drying the pizza out in its guide to Neapolitan oven temperature.
When you're trying to improve a home setup, you're really trying to fake these two zones with ordinary equipment.
What this means for home cooks
Every workaround later in this article points back to this same idea:
- A stone or steel stands in for the hot oven floor.
- A broiler or live flame stands in for the dome.
- Preheating stores energy in the surface before the dough lands.
- Positioning helps the top and bottom finish closer together.
That's the whole game. Not one temperature, but two forms of heat arriving at nearly the same time.
Why Extreme Heat Changes the Crumb Itself
Temperature doesn't just brown pizza. It shapes the interior texture. That's why two pizzas made from the same dough can come out radically different depending on the bake environment.
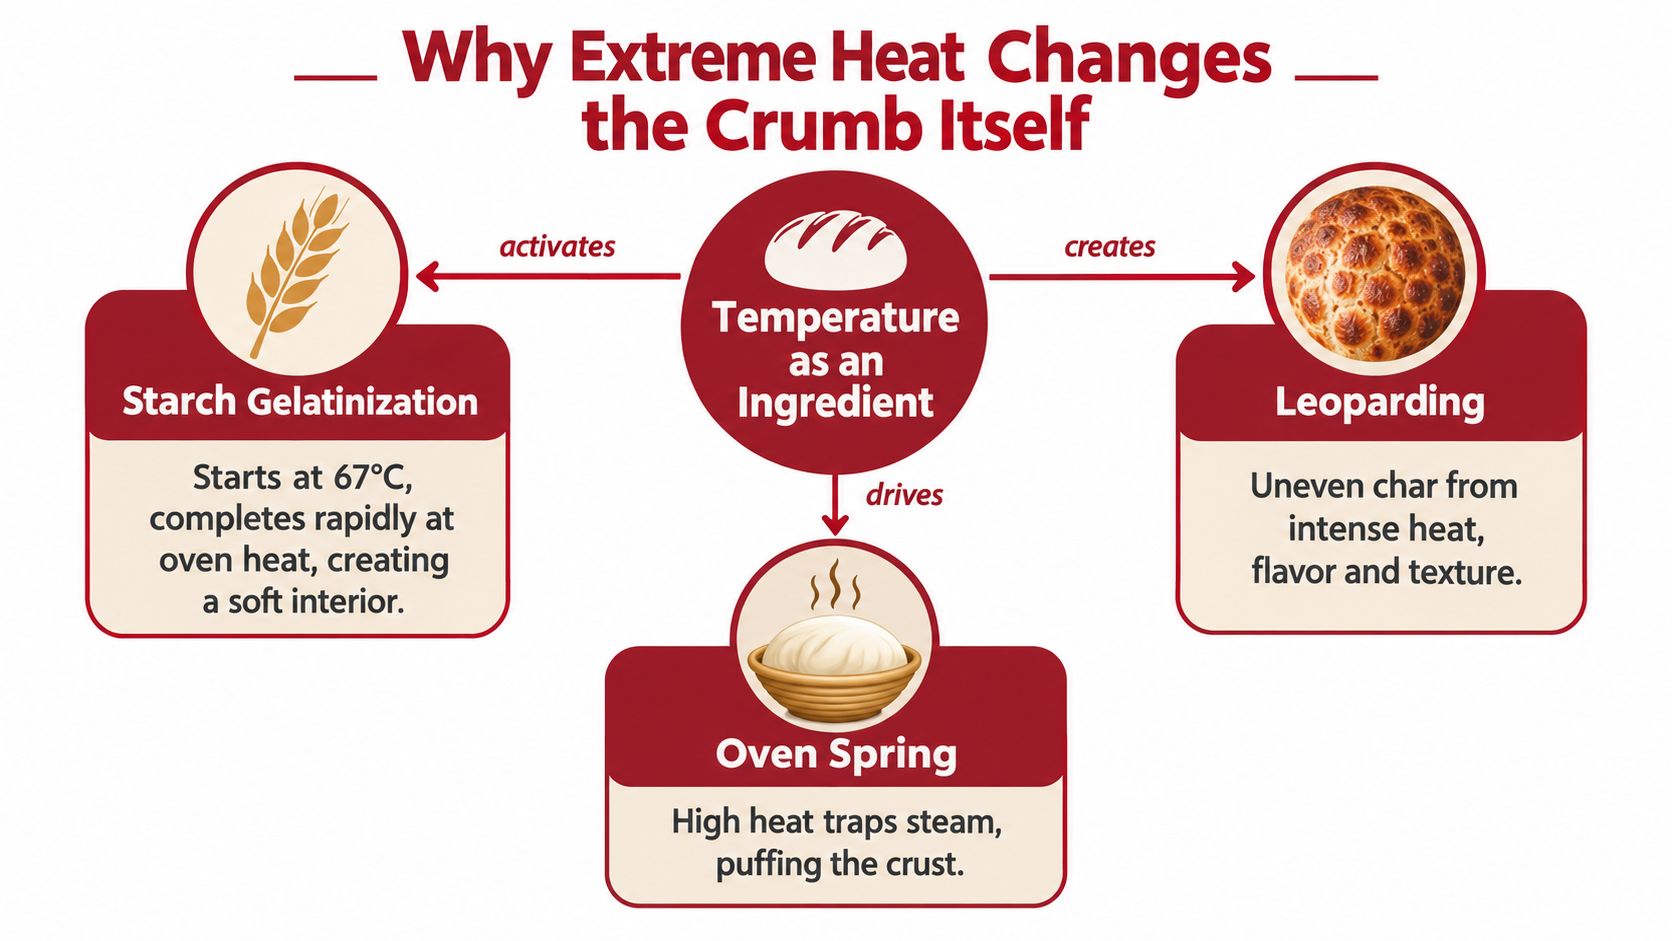
When dough hits a very hot surface, several reactions start overlapping. They don't happen in tidy sequence. They pile into each other.
Fast heat traps softness
Starch gelatinization starts as the interior heats up. In plain terms, the starches absorb water and set into the soft structure you recognize as crumb. Gluten firms up too, which lets the dough hold onto expanding steam and gases long enough for the rim to rise instead of flatten.
That's why quick heat can produce a crust that's both airy and tender. The structure sets before moisture has too much time to leave.
Independent technical work on Neapolitan-style oven behavior points to stone or deck temperature as the key control variable, typically around 430 to 480°C, because that range drives the rapid starch gelatinization and oven spring associated with a soft, airy cornicione. At lower deck temperatures, bake times stretch to several minutes and the result shifts toward a drier, firmer crust in this technical review.
Leopard spotting is a sign of intensity, not decoration
Those dark spots on the rim aren't there for looks alone. They show that parts of the dough surface received intense heat quickly enough to brown and lightly char before the whole crust dried out. You get flavor from browning, a little bitterness from char, and contrast between crisp blisters and a soft interior.
Here's a good visual reference before the next paragraph digs deeper into the mechanics.
Lower heat changes the style
In a cooler home oven, the dough spends more time exposed to heat before the crust fully sets. Water keeps leaving. The base dries. The crumb tightens. The pizza can still taste good, but it moves away from classic Neapolitan texture.
A steak dropped into a ripping-hot pan behaves differently from one eased into moderate heat. Same ingredient. Different thermal story.
- Very hot deck gives quick bottom set and stronger oven spring.
- Strong top radiation blisters the rim before the center dries.
- Longer bakes pull more moisture from the dough and firm the crust.
A soft Neapolitan slice isn't underbaked. It's fast-baked.
Cordierite Stone vs Steel vs Home Oven
If you're trying to improve Neapolitan pizza temperature at home, the most useful question isn't “Which tool is best?” It's “What kind of heat does this tool deliver?”
Three surfaces, three behaviors
A cordierite stone stores heat and releases it more gently. That makes it forgiving. When the dough lands, the stone doesn't attack the bottom as aggressively as steel. It behaves more like a deck, especially for cooks who want a spotted base without scorching the underside first.
A pizza steel transfers heat faster. It's punchier. The bottom crust colors quickly, and that can be a big advantage in a weak home oven where top heat is the limiting factor. The tradeoff is that steel can outrun the rest of the pizza. If your top heat can't keep up, the base may darken before the rim gets the look you want.
A bare oven rack or thin tray has very little thermal mass. It doesn't store much energy, and it gives up heat fast when the cold dough lands. That's why pizzas baked this way often come out pale underneath and floppy through the center.
Home Baking Surface Comparison
| Surface | Max Practical Temp | Preheat Time | Bottom Char | Best Use |
|---|---|---|---|---|
| Cordierite stone | Higher than a bare tray in real baking use, with more stored heat | Longer | Balanced, gentler | Neapolitan-leaning home bakes |
| Pizza steel | Strong surface heat in ordinary ovens | Shorter than stone | Fast, aggressive | Crisper bottom in weaker ovens |
| Bare rack or thin tray | Limited by low thermal mass | Minimal | Weak | Convenience, not style accuracy |
What each option can and can't mimic
Stone does the best job of imitating the feel of a true pizza deck because it stores heat and releases it steadily. Steel does the best job of compensating for a sluggish oven floor. Neither one creates a real masonry dome overhead, which is why broiler use and rack position matter so much.
If you want a more detailed side-by-side equipment breakdown, this guide on pizza steel vs stone is useful for matching surface choice to your oven and preferred crust style.
Steel is like a blowtorch for the bottom. Stone is more like a brick hearth. Choose based on what your oven lacks.
One more thing cooks often miss is recovery time. After one pizza comes out, your surface needs time to recharge. A stone or steel that looked hot before bake one may be noticeably weaker for bake two if you rush it.
Practical Ways to Push Your Home Setup Hotter
You can't turn a standard oven into a wood-fired dome. You can, however, organize the heat you do have so the pizza bakes faster and more evenly.
Start with stored heat, not wishful thinking
A pizza surface needs time to absorb energy all the way through. If you only preheat until the oven says it's ready, the top of the stone may be warm while the interior mass is still catching up.
That's why longer preheats matter. You're charging a battery, not just warming a plate.
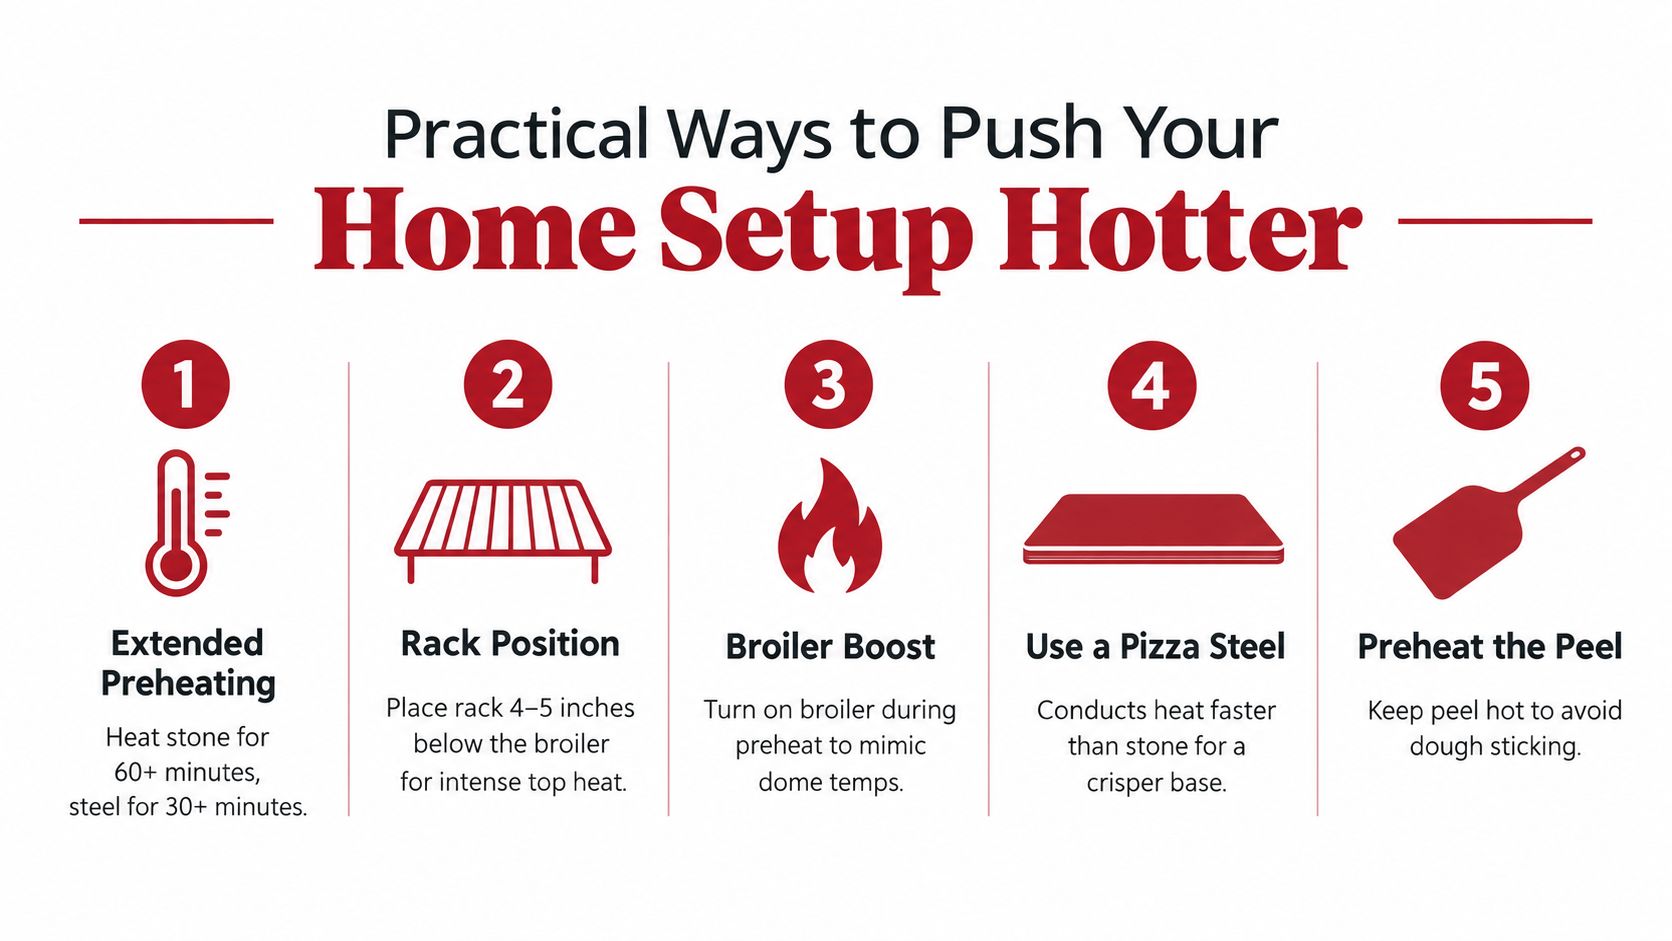
Five adjustments that make a real difference
- Preheat longer than feels necessary. Stone usually benefits from a long full preheat. Steel also needs time, though often less. The goal is a fully loaded baking surface, not a hot-looking oven.
- Move the rack high. Putting the baking surface a few inches below the broiler helps the top of the pizza receive stronger radiant heat.
- Launch onto the hottest zone. Surfaces often have hot spots. Learn yours and use it.
- Measure the surface, not the dial. An infrared thermometer tells you what the dough will experience. The oven knob doesn't.
- Recover between bakes. Turn the broiler back on or let the grill re-stabilize before launching another pizza.
A practical option for this style of setup is a cordierite surface such as the Hans Grill Rectangular Pizza Stone, which is designed for ovens and BBQs and gives you the thermal mass a thin tray can't provide.
Use top heat on purpose
Most home ovens are stronger at baking than broiling, but Neapolitan-style pizza needs both bottom contact and hard top radiation. So use the broiler strategically. Preheat with it when your oven allows. Finish with it when the rim needs help. Between bakes, use it to rebuild the top-side environment.
For cooks using steel, this companion guide to baking steel for oven use is helpful because steel rewards precise rack placement and timing.
Don't ignore outdoor options
A gas grill with a stone, a ceramic cooker with good heat retention, or a small dedicated pizza oven can get you closer to the thermal pattern you want. The common thread is simple. They all create more concentrated heat than a standard kitchen oven.
Some cooks also add extra thermal mass around the bake area, such as heat-safe bricks or similar materials, to help the oven recover after the door opens and the dough lands. That doesn't create authentic dome behavior on its own, but it can make the environment less fragile.
Hydration and Dough Built for High Heat
A lot of home cooks separate dough from oven setup. In practice, they belong to the same conversation. Dough that thrives under intense heat can struggle badly in a cooler oven.
Why the same dough can succeed or fail
A dough built for a fast, hot bake usually carries enough water to expand well, stay tender, and support that soft center people chase in Neapolitan pizza. In true high heat, that moisture works for you. The exterior sets fast, the interior steams, and the rim opens up.
In a cooler setup, that same dough may stay wet too long. The bottom lags, the center turns gummy, and the structure can collapse before the pizza gets proper color.
The dough and the oven are having one conversation. If they speak different languages, the pizza shows it immediately.
Match the dough to the bake
If your oven runs cooler, a slightly less delicate approach often works better. You may need dough that's easier to handle, toppings that carry less moisture, and shaping that preserves gas without leaving the center too thick.
A few practical matches help:
- For hotter setups, dough can lean softer and more extensible because the bake will set it quickly.
- For ordinary ovens, dough often benefits from being a bit easier to support structurally so the base can finish before the middle gets swampy.
- For steel users, restraint with sauce and cheese matters because the bottom may race ahead of the top.
If you want a dough guide built around home use, this article on Neapolitan pizza dough is a good next read.
Heat won't rescue the wrong dough forever
Cooks sometimes assume a hotter oven fixes everything. It doesn't. If the dough is stiff, overhandled, or poorly fermented, extreme heat won't suddenly create an airy cornicione. It may only harden flaws faster.
The reverse is also true. Beautiful dough can't fully express itself if the bake environment is too weak. That's why the best home results come from pairing realistic dough choices with realistic equipment choices.
The 500 Degree Myth and Other Common Mistakes
The biggest myth in home pizza is that a hot oven dial equals Neapolitan conditions. It doesn't. The number on the wall of the oven isn't the same as the heat stored in your baking surface.
That misunderstanding explains a lot of disappointing pizzas. The toppings can look done because the upper air and broiler are active, while the underside remains underpowered because the deck equivalent never got hot enough.
Mistakes that keep the pizza pale or gummy
- Trusting the thermostat alone. Air temperature and surface temperature aren't the same thing.
- Opening the door too often during preheat. Every peek bleeds heat your surface is trying to store.
- Using dough straight from the fridge. Cold dough resists stretching and slows the bake at the exact moment speed matters.
- Skipping thermal mass. A thin pan can't imitate a pizza deck.
- Confusing broiler glow with full oven readiness. Bright heat from above won't fix a weak base.
- Chasing ultra-short bake times in weak equipment. If your setup can't support that style, forcing it usually makes worse pizza, not better pizza.
A better benchmark
Judge your setup by what the crust does. If the base takes too long to color, your surface isn't ready. If the rim blackens while the underside stays blond, your top heat is outrunning your floor heat.
The cure isn't bravado. It's balance.
Your Pre-Bake Temperature Checklist
Before every pizza session, run a short check. It saves dough, time, and frustration.
Quick checks before launch
- Confirm the baking surface is fully heated. Use an infrared thermometer if you have one. Don't rely on the oven dial.
- Give your surface enough preheat. Stone usually wants a longer runway than steel.
- Temper the dough. Dough that has loosened up on the counter shapes and bakes more predictably than cold dough.
- Set the rack high if you need more top heat. A surface placed closer to the broiler helps the rim and toppings keep pace with the base.
- Prep toppings before shaping. Once the dough is stretched, speed matters. A long topping session on the peel can sabotage the launch.
- Watch the first bake closely. It tells you whether the next pizza needs more bottom heat, more top heat, or more recovery time.
If the base lags, your floor heat is the problem. If the rim burns first, your top heat is too far ahead.
Treat Neapolitan pizza temperature like a workflow, not a mystery. Measure, observe, adjust, repeat. That's how good home pizzaiolos get consistent.
If you're dialing in home pizza, Hans Grill offers the tools that matter most for this style, including cordierite pizza stones, pizza steels, and dough boxes built for ovens and BBQs. If you want gear that helps you store more heat, bake on a stronger surface, and turn this temperature theory into repeatable pizza nights, visit Hans Grill.


