

Pizza Grill Stone: How It Works on a Grill
The grill lid says 500°F, but your first pizza comes off pale underneath and soft in the middle. The dough looks fine, so you blame the recipe. More often, the problem is that the air reached temperature before the stone had stored enough heat to bake the base.
A pizza grill stone turns your grill grate into a broad baking surface. Once you understand how the stone heats, how to measure its actual cooking face, and how to avoid sudden temperature changes, you can make crisp pizza without treating the grill like a mystery machine.
Table of Contents
- What a Pizza Grill Stone Does on a Grill
- Grill Stone Versus Oven Stone and Steel
- Why Cordierite Handles Grill Heat
- How to Read Stone Temperature by Grill Type
- How to Preheat Cool and Clean Without Cracking
- Backyard Pizzas That Suit a Grill Stone
- Choose the Right Stone for Your Grill
What a Pizza Grill Stone Does on a Grill
A pizza grill stone is a thick ceramic slab, commonly made from cordierite, that sits on the grill grate and works like a portable oven floor. The burners or coals heat the slab, and the slab stores that energy. When you slide dough onto it, the stone cooks the underside through direct contact while the closed grill lid helps the toppings and rim bake.
Think of it as a pizza-oven deck shrunk to fit your gas grill or kettle. The basic idea of baking dough on a heated surface has a long history: the Smithsonian Magazine's account of pizza and its origins describes early flatbreads baked on stones beneath cooking ashes, as well as ancient ovens with durable floor surfaces. A modern grill stone adapts that heat-management principle for backyard cooking.
The stone isn't a cold serving plate, a baking steel, or a magic shortcut to the very high temperatures of a dedicated pizza oven. It won't make a grill produce heat the grill can't reach. Its job is more modest and useful: provide steady bottom heat so the crust dries and browns while the grill's enclosed space heats the top.
A good result is a dry, crisp underside, with the rim and toppings finishing at roughly the same time. Leave the stone in place throughout the session rather than moving it between pies. Hot spots, a leaky lid, stone thickness, and sudden temperature changes can all affect the bake, so don't judge success by the lid gauge alone. That gauge reads the air near the lid, not the stone face you'll measure later.
Before buying, compare the stone with steel and a standard oven stone. The right surface depends on how your grill behaves and how quickly you want the base to brown.
Grill Stone Versus Oven Stone and Steel
Choose cordierite for a forgiving surface on a grill with hot spots or frequent lid openings. Choose steel when your grill can hold steady high heat and you want faster browning.
| Surface | Heat behavior | Grill fit | Main risk | Best result |
|---|---|---|---|---|
| Cordierite pizza grill stone | Slower transfer; needs a full preheat, then steady bottom heat | Made to sit on BBQ grates as well as in ovens | Cracks from sudden cold, not from normal high heat | Crisp base with less chance of an instant scorch |
| Standard ceramic oven stone | Similar stored heat if thick, but often sold for closed ovens | Usable only if the maker rates it for grill heat and flame | Edges over direct flame or a cold grate | Even bakes in a stable oven more than on an open BBQ |
| Pizza steel | Much faster bottom heat and quicker recovery between pies | Works on a grill once thickness and surface temperature are controlled | Burned underside while toppings stay raw | Dark spots and shorter bakes for cooks who measure the surface |
A grill-rated cordierite stone is meant to sit on the grate and heat up with the barbecue. It's usually the more forgiving choice when the grill's heat isn't perfectly even. The trade-off is patience: cordierite transfers heat more slowly, so the stone needs a thorough preheat and time to recover after a pie leaves.
A standard oven stone may be made from a similar ceramic, but that doesn't automatically make it safe on a grill. An oven surrounds the slab with more controlled heat; a grill can expose its edges to direct flame or place it on a very cold grate. Use an oven stone outdoors only if its maker specifically permits grill use.
A pizza steel moves heat to the dough faster than stone. That can create a darker, more blistered underside, but it also gives you less room for error if the bottom is already hotter than the toppings can handle. Steel generally recovers faster between pies, while a thick stone may need a pause before the next launch. A rectangular surface can cover more of the grate, giving the pie a wider, more consistent deck and reducing the need to spin it away from a cool spot.
For a fuller comparison of how these surfaces behave, use this guide to pizza steel versus stone. If you cook on gas or charcoal and want a crisp thin base without a specialty oven, start with cordierite. Consider steel once you can measure and manage the stone-level heat.
Why Cordierite Handles Grill Heat
A grill stone warms from the grate upward, so its cooking face and underside may not reach the same temperature at the same time. Cordierite helps manage that uneven heating because it has low thermal expansion: it changes size relatively little as it gets hot. The material is also used in catalytic-converter ceramics, which face high temperatures and repeated heating.
A published study of cordierite ceramics reports typical expansion of about 1.5–4.0 × 10^-6 K^-1 over 25–700°C. Some engineered compositions reach about 0.7 × 10^-6 K^-1 over 25–1,000°C. In simple terms, expansion in some directions and slight shrinkage in another can balance movement through the material. That helps limit strain between a hot cooking face and cooler underside or edges, reducing the chance of cracking during repeated heating.
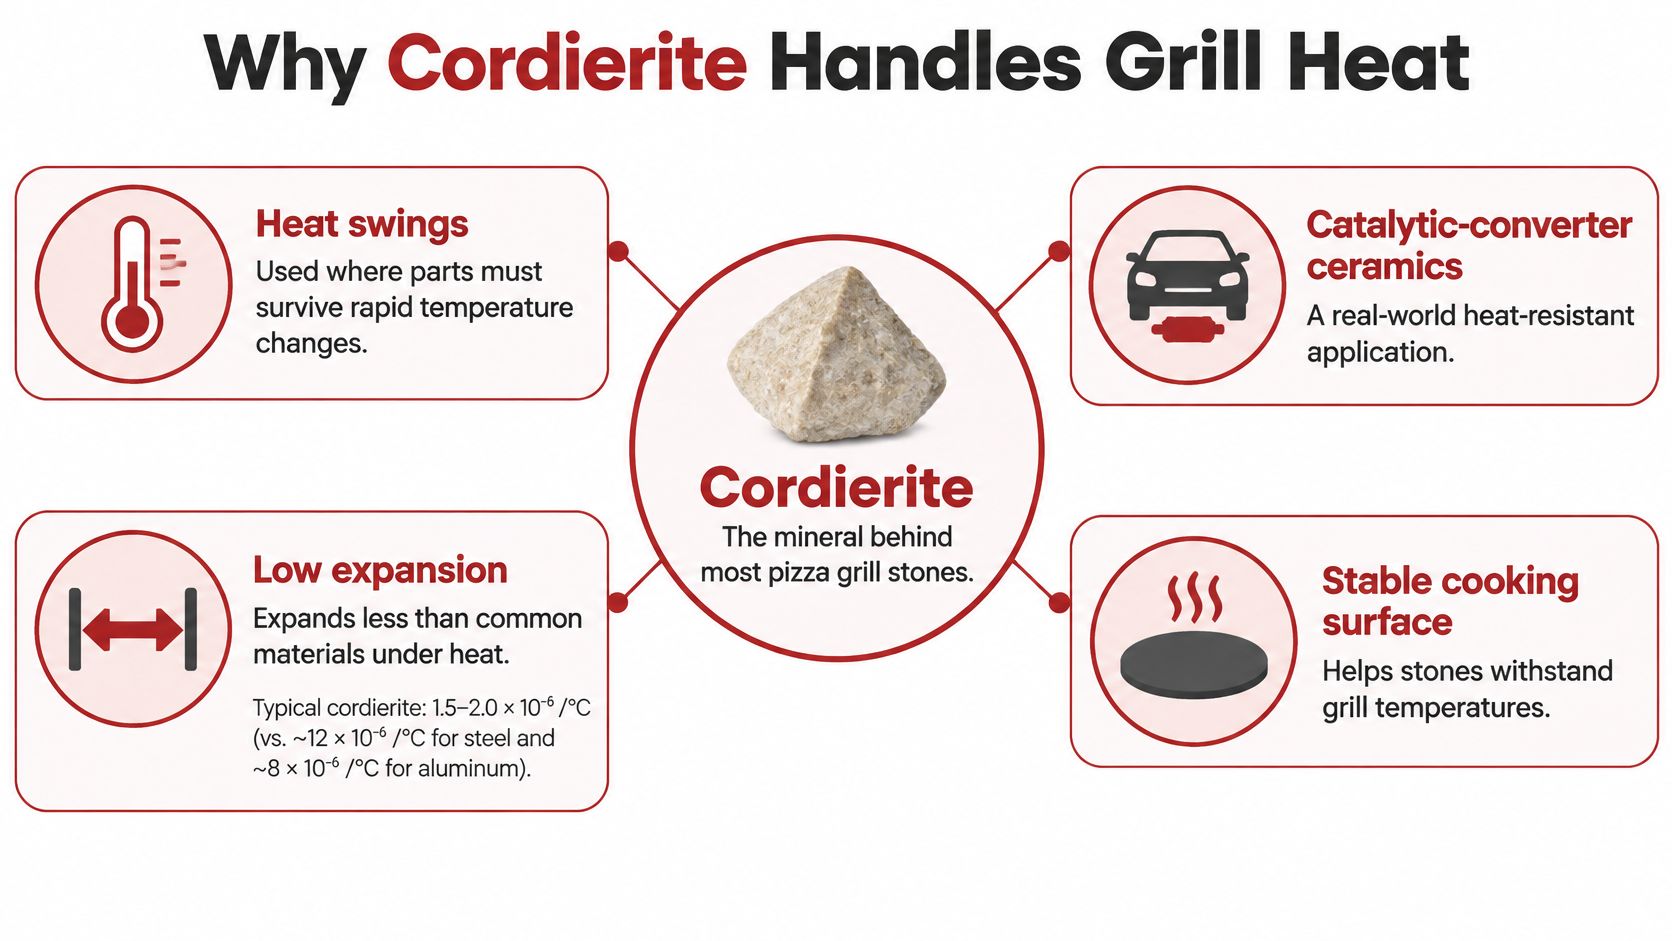
Cordierite also transfers heat more slowly than alumina and many metals. A heavy skillet behaves similarly: it takes time to heat, then holds usable heat, unlike a thin pan that responds quickly. Once hot, the stone's thermal mass helps bake the base steadily. The same slow heat transfer means the stone needs time to preheat.
What slow heat transfer means for your pizza
A hot lid gauge does not show how much heat the stone has stored. If the base is pale and soft, give the slab more time to stabilize before launching. Keep the stone in the grill as it preheats, and avoid repeatedly opening the lid, since that releases heat from the cooking environment.
After several pizzas, a thick stone may need a pause to recover. If you are cooking for a group, a larger slab with more thermal mass can help later pies start on a properly heated surface instead of one that has given up too much heat.
Low expansion is not protection from every temperature change. Cracks can still form if a hot stone meets cold water, a cold counter, or concentrated flame at an edge. Thickness, porosity, formulation, and grill temperature also affect performance. Treat thermal shock as a sequence to manage: avoid sudden heat differences while the stone warms, cooks, cools, and is cleaned.
How to Read Stone Temperature by Grill Type
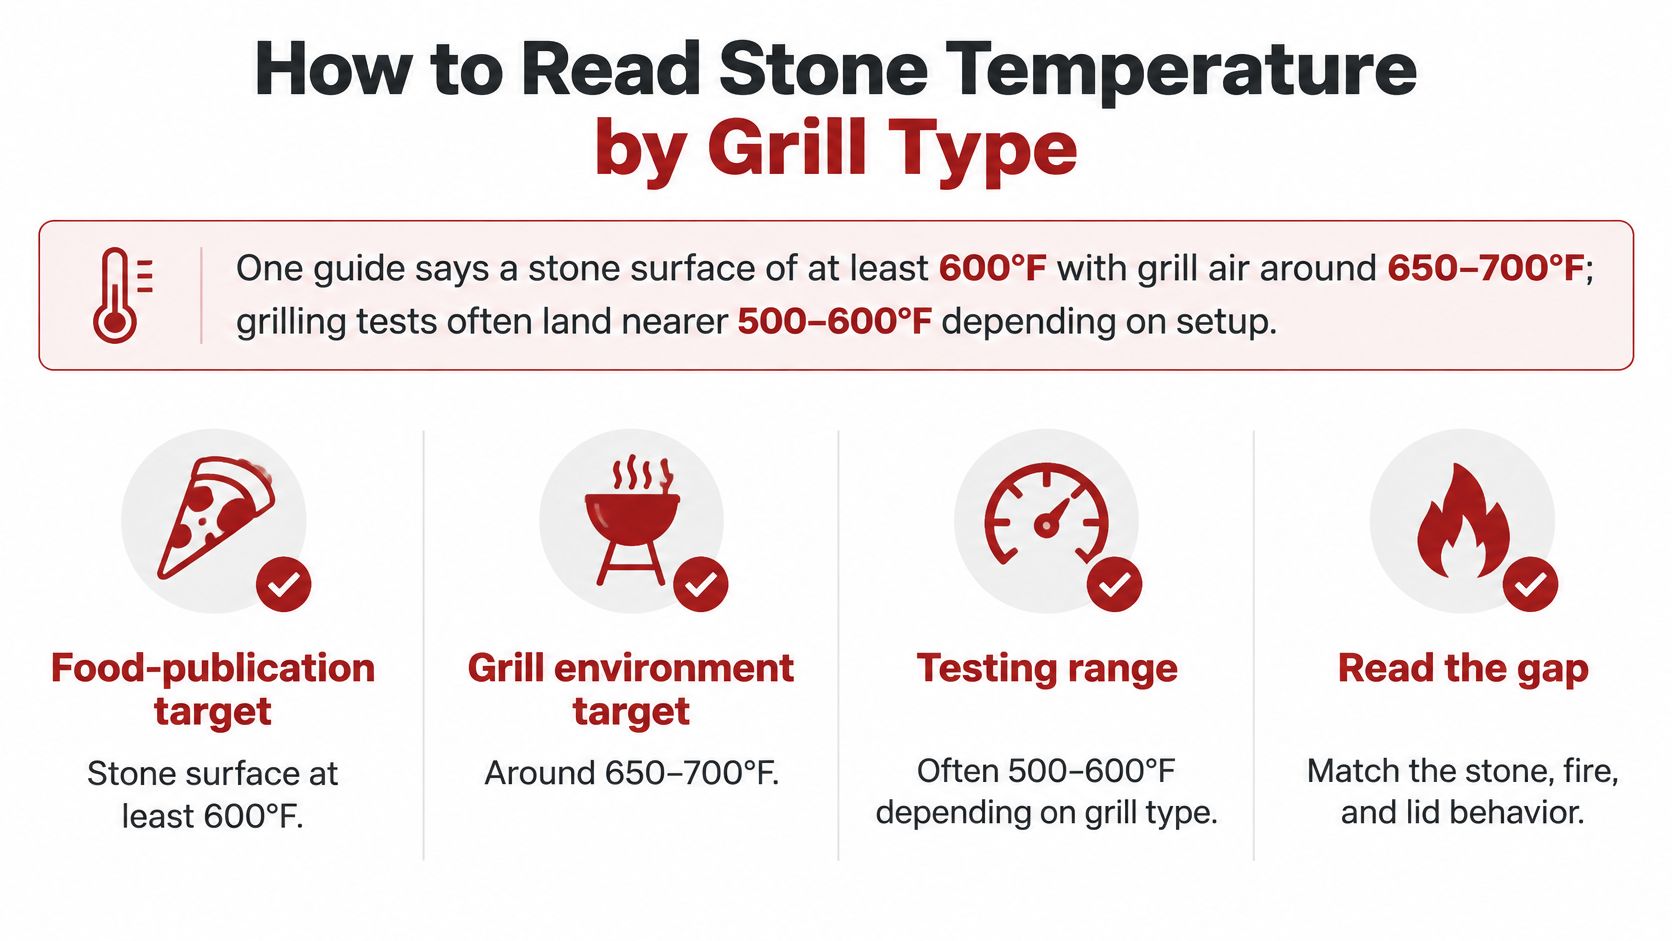
Temperature advice can sound contradictory because one guide may recommend a hotter stone than another. A Food Network guide to pizza stones for grills recommends a stone surface of at least 600°F with grill air around 650–700°F, while grilling tests cited in the same guidance give examples around 500–600°F, depending on the grill. Those figures describe different setups, not one universal target.
The lid gauge measures air, not the cooking surface. Fuel placement, airflow, grate height, stone thickness, and direct versus indirect heat can all change how hot the slab gets. Use an infrared thermometer aimed at the stone to check the surface before you launch. Treat the ranges below as starting points, then adjust according to the crust.
| Grill | Environment cue | Stone surface to try | If the base is wrong |
|---|---|---|---|
| Gas | About 650–700°F when the grill can hold it | Start around 550–600°F | Pale: wait longer; burned bottom: lower burners or raise the grate |
| Charcoal | Indirect zone, lid often near 650°F | About 500–600°F; hotter grates run to the top of that band | Pale: add fuel or lower the stone; burned bottom: pull coals outward |
| Pellet | Often limited near 500°F | Stone lags the lid; measure before trusting the controller | Use a longer preheat and slightly thicker, less wet dough; don't chase Neapolitan heat |
| Kamado or ceramic | High, stable dome heat | Often 600°F or more on the stone | For a burned bottom, use a more indirect setup and keep flame off the stone edges |
On a gas grill, preheat the stone in place and measure its face before baking. If the grill can hold the suggested air temperature but the stone is still cool, wait rather than trusting the lid display. If the bottom scorches before the toppings finish, reduce the burners under the stone or raise the cooking surface if your setup allows it.
On charcoal, create an indirect zone and check different points on the slab. If one side heats much faster than the center, shift the coals outward rather than accepting an uneven bake. For pellet grills, the stone may lag behind the controller reading, so allow a longer preheat and choose dough that doesn't require a very short, ultra-hot bake. A kamado can hold high heat, but keep direct flame away from the slab edges.
Read the crust, not just the display: A pale, soft base usually means the stone is cool or the dough is wet. A black underside with raw toppings points to too much bottom heat or too little heat reaching the top.
Change one variable at a time. For grill-specific setup ideas, see this guide to using a pizza stone on a charcoal grill, then let the stone recover before judging the next pie.
How to Preheat Cool and Clean Without Cracking
A cordierite stone can handle substantial grill heat, but a sudden temperature difference across the slab can still fracture it. Protect it through the whole routine, from the cold grate to cleanup, rather than treating preheating as the only danger. Consumer guidance on grilling mistakes that can damage a pizza stone warns about gradual heating, cold surfaces, wet cleanup, and cracks that may appear immediately or later.
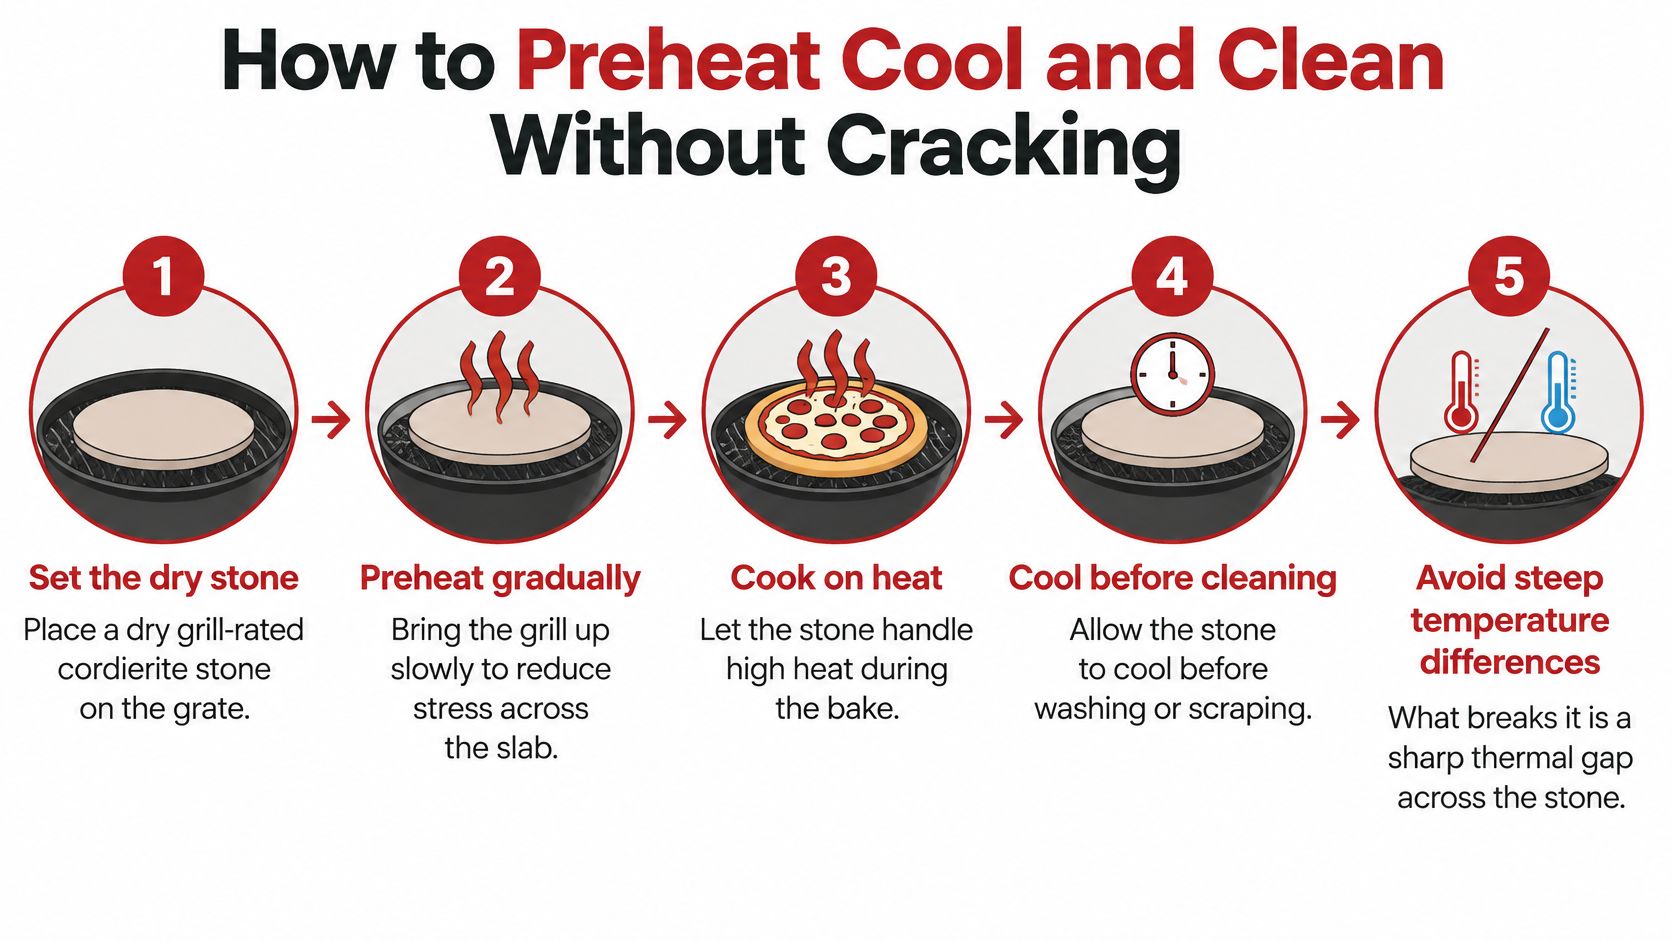
- Start with a dry stone on a cold or warming grate. Place it before the grill gets hot. Never set a refrigerator-cold stone onto a blazing grate, where the bottom can heat much faster than the rest.
- Bring the grill up gradually. Consumer advice recommends at least 30 minutes of preheating, then additional time after the lid reaches its target so the stone itself can catch up. Keep the lid closed where possible, and don't rush the stone straight to its maximum heat.
- Launch dough that won't shock the surface. Use room-temperature dough on a floured peel rather than frozen or dripping-wet dough. A cold, wet patch on a hot stone creates a sharp local temperature change.
- Leave the stone in place after baking. Shut off the fuel and let the grill and stone cool together. Don't carry the hot slab to a cold countertop, wet patio, or sink.
- Scrape only after the stone is fully cool. Use a dry brush, spatula, or scraper to remove stuck cheese and burnt flour. Skip soap and avoid putting water on a warm stone. Dark marks are often baked-on residue, not a problem that requires a deep wash.
If cheese spills during the bake, wait until the slab cools before scraping. If rain hits while the grill is hot, close the lid and let the grill and stone finish cooling before moving anything. A stone left outdoors should dry completely indoors before its next heating cycle. Even a hairline crack that appears later can trace back to one abrupt temperature jump.
For more on keeping a baking surface in working shape, follow this pizza stone care guide. The simple rule is to keep the stone dry, let it heat and cool with the grill, and accept that a used stone may show stains.
Backyard Pizzas That Suit a Grill Stone
A grill stone earns its place when it matches the way you cook. For a weeknight thin crust on gas, a rectangular cordierite slab can cover more of the grate than a round one, so the pie sits on a wider heated deck rather than hanging over a cooler area. Hans Grill's Rectangular Pizza Stone is one example designed for ovens and BBQs, giving a cook one surface for indoor practice and outdoor pizza night.

For a longer pizza night, the challenge shifts from first-pie heat to keeping later pies crisp. A Pizza Stone PRO XL Set adds more stone surface and includes tools for prep, while a dough proofing box can keep dough balls ready to stretch. Keep toppings light enough for the top to finish while the base browns, especially if your grill's heat is stronger underneath than above.
Pellet grills often suit a slightly thicker, less wet crust, since their stone may take longer to build heat. A hot charcoal or kamado setup can suit a thinner base once you've checked the stone surface and found a stable setup. If you already measure surface temperature and want faster browning between pies, a steel is a different tool for that preference, not a stone that needs to be pushed beyond its strengths.
Here's a short demonstration to help you picture how a grill-stone bake comes together.
Choose the Right Stone for Your Grill
If you want a crisp thin base without buying a dedicated pizza oven, choose the surface that suits your grill and the way you cook. If you're new to measuring stone heat, start with a cordierite pizza grill stone and an infrared thermometer. A wide grate and a pie that needs room to bake point toward a rectangular stone; several pies in one session call for more thermal mass so later bakes don't land on a depleted surface.
Choose a steel only after you can hold a steady surface temperature and want a darker underside with faster recovery. If your pellet grill tops out near its usual ceiling, keep the cordierite stone and adapt the dough rather than switching to steel in hopes of creating heat the grill can't supply.
Hans Grill offers rectangular and round stones, a Pizza Stone PRO XL Set, and Pizza Steel PRO options for different grill setups. Its stated purchase terms include food-safe materials, a one-year warranty on Amazon or through its website, 30-day returns, and free US shipping on orders of $49 or more. Customer and review totals can help you assess a seller, but they can't tell you whether your stone has heated enough for tonight's grill.
For your first test, bake one plain cheese pie and measure the stone before launch. Note whether the base is pale or burned, then change one burner, coal, or grate setting before you cook for guests.
Choose a pizza stone, steel, or prep tool that fits your grill and the crust you want, then measure the stone surface on your next bake. Visit Hans Grill to compare oven-and-BBQ baking surfaces and get your backyard pizza setup ready.


