

Pizza Stone Oven Temp: Preheat Times for Every Crust
Preheat a cordierite stone at 500°F (260°C), up to 550°F (290°C) if your oven and stone allow, for 45–60 minutes, aiming for a stone reading of 475–500°F (245–260°C) before loading. A hot oven doesn't necessarily mean a ready stone, so don't launch your pizza just because the preheat light switches off.
That distinction explains a frustrating pizza-night result: bubbling cheese above a pale, floppy base. You can leave the thermostat exactly where it is and still improve the crust by changing when you load, where you measure, and how you manage the baking surface between pizzas.
Table of Contents
- Recommended Oven Settings and Preheat Times by Stone Type
- Why the Stone Runs Cooler Than the Oven Dial
- Preheat, Check and Confirm the Stone
- Baking Times for Each Crust Type
- Common Problems and How to Fix Them
- Which Heats Best
Recommended Oven Settings and Preheat Times by Stone Type
Use the highest setting your stone and oven allow, then judge readiness at the surface. Put a standard cordierite stone in a cold oven so slab and air climb together, and give the center time to catch up with the edges.
For a starting schedule, Bistro Bounty's oven-temperature guide describes conventional ovens typically reaching 500–550°F and guidance commonly recommending 45–60 minutes of preheating. Treat that as a planning window, not proof that every baking surface is ready when the timer rings.
Choose the schedule by the baking surface
Oven settings and preheat times by stone type
| Stone or setup | Preheat time | Stone reading before loading |
|---|---|---|
| Standard cordierite stone | 45–60 minutes, starting from a cold oven | Within the target baking range at the center, with edges close |
| Thin pizza steel | Longer than the cordierite window; load only after readings stabilize | Stable readings across the cooking area, allowing for reflective-surface measurement errors |
| Thick high-mass slab | Longer than a standard stone; start it before stretching dough and load after readings level off | Center and edges close enough to avoid a pronounced cool zone |
| Cordierite stone between pizzas | A recovery reheat after each launch; load when the used area returns to range | Back within the intended baking range before loading |
A standard cordierite stone is a sensible baseline because it gives the dough strong bottom heat without transferring energy as aggressively as steel. Don't shorten the preheat just because its exposed surface feels hot. You need a useful reserve beneath that surface, especially when the first pie pulls heat out and the second and third arrive while the slab is still recovering.
Steel deserves a different approach. It transfers heat into dough more readily, which can improve browning but also burn a base while the toppings are still catching up. Give it longer than the cordierite window before loading, and remember that a higher surface reading isn't automatically an improvement.
With a thick slab, schedule the preheat before you start stretching dough. More material can store more energy, but you must heat that material first. Its extra mass won't help if you load while the middle is still warming, and it can lengthen recovery if the first bake drains the center.
Practical rule: Use the clock to plan pizza night. Use the cooking surface to decide when to launch.
Keep the pizzeria benchmark in perspective
The Associazione Verace Pizza Napoletana regulations specify a wood-fired oven reaching approximately 485°C (905°F). A domestic oven and a stone don't reproduce that complete baking environment.
Your target is therefore a balanced home-oven pizza: browned underneath, cooked through, and finished on top. Before loading, check the center and surrounding cooking area rather than chasing the highest number your oven can display.
Why the Stone Runs Cooler Than the Oven Dial
Think of oven air as a hot room you walk into, and the stone as a heavy cast-iron skillet sitting inside it. The room can feel hot before the skillet has absorbed enough energy to cook properly. Your oven's sensor reports conditions near the sensor, not how much usable heat the stone has stored.
The stone doesn't always run cooler than the dial, either. Element cycling, rack position, and radiant heat can create hot spots. The important distinction is air temperature versus baking-surface temperature, not a guaranteed temperature difference.
A measured study of a traditional wood-fired oven found the free floor area stabilized near 439°C, while the pizza bottom itself peaked near 100°C because moisture and evaporation limited its temperature. That's a useful reminder that oven, floor, and dough temperatures describe different things.
Surface temperature isn't the whole heat reserve
A stone transfers heat by conduction, through direct contact with the dough. Hot air and radiant energy cook the exposed crust and toppings. Good pizza depends on balancing those processes, not maximizing any isolated reading.
- Thickness changes storage: A thicker stone holds more energy once heated, but takes longer to heat through.
- Contact changes delivery: Excess launch flour, folds, or an unevenly stretched base can interfere with consistent contact.
- Loading changes the surface: Cold dough draws energy from the patch beneath it, so the loaded area won't behave like an untouched corner.
A thin stone may warm and recover quickly, yet have less stored energy to give the dough. A heavier slab can hold its temperature better during a bake but needs more preparation.
The explanation of how pizza stones work is useful if you're deciding whether your problem is equipment or technique. In practice, a fully heated stone often matters more than a more expensive one. Don't replace the surface until you've tested it with a repeatable preheat.
Preheat, Check and Confirm the Stone
- Start with a cold, dry stone on the middle rack. Leave space around it for airflow, and keep it clear of exposed elements. Don't put a cold stone into an already-hot oven unless its manufacturer specifically permits that use.
- Choose a repeatable oven setting. Start with conventional bake so you can establish a baseline. Convection can change top browning and moisture loss, so test it separately rather than changing the fan, rack, and temperature together.
- Allow a complete heat soak. Count the stone's warm-up as part of preparation, not dead time after the oven beeps. A thick slab needs more patience than a lightweight surface.
- Measure the center, then the surrounding cooking area. Use an infrared thermometer rated for the temperatures you're measuring. Check the front, back, and sides where the dough will sit.
- Confirm stability before loading. If readings are still rising or the edges lag noticeably, close the door and continue heating. Repeat the same measurement pattern rather than searching for the hottest spot.
- Prepare the launch before opening the oven. Lightly dust the peel with semolina, top the dough promptly, and give the peel a small shake to confirm the pizza moves. Position it toward the back of the stone and withdraw the peel smoothly.
The starting setup is straightforward.
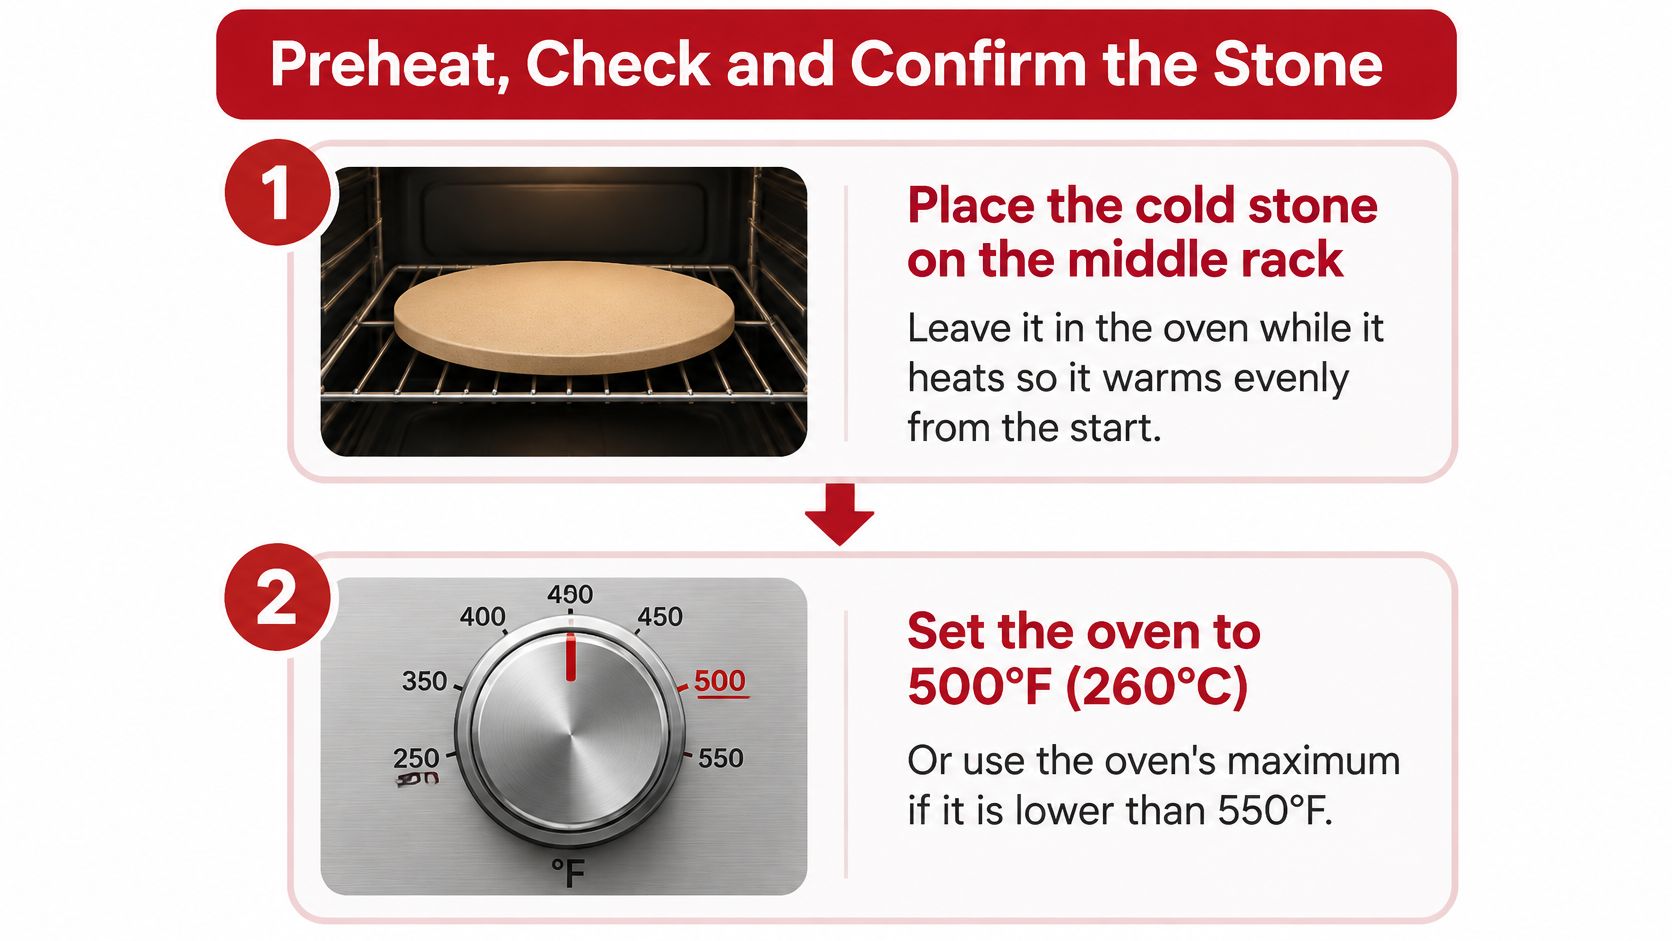
Use the thermometer without fooling yourself
An infrared thermometer measures surface temperature, not the heat stored throughout the stone. A convincing reading taken while the surface is still warming isn't the same as a stable reading after a complete preheat.
Measure directly at the surface with the door briefly open. Don't read through the oven window, and keep your hands away from the hot rack. Check the thermometer's distance-to-spot guidance so you aren't accidentally averaging the stone with its cooler surroundings.
Reflective steel can produce misleading readings unless the instrument and emissivity setting suit the surface. Don't assume the same thermometer setup works equally well on matte cordierite and shiny metal.
A thermometer should make your routine more consistent, not replace watching the pizza.
Make the first pizza a controlled test
Before launching, confirm that the stone is stable, the peel is dry, and the dough slides freely. Keep the door closed while assembling, then measure and load efficiently.
After baking, lift the pizza and inspect the underside before cutting. Record the oven setting, rack position, preheat routine, crust thickness, and result. Change only the factor most likely responsible next time.
A pale base calls for a better heat soak before a hotter thermostat. A dark base with unfinished toppings calls for a different heat balance. Those are different problems, and treating both with more heat makes troubleshooting harder.
Watch the handling and launch technique before your next bake.
Baking Times for Each Crust Type
The same oven setting can produce very different results across crust styles. Use these bake times as starting ranges, then adjust for the stone's heat, dough thickness, and topping load.
Bake times and stone temperatures by crust type
| Crust type | Stone temperature | Bake time | Rack position |
|---|---|---|---|
| Neapolitan-style, very thin center | Upper end of your tested range | About 5–8 minutes | Middle rack |
| Thin New York style or hand-tossed | Hot enough for steady bottom browning without scorching | About 8–12 minutes | Middle rack |
| Traditional crust with pepperoni | Fully heat-soaked surface suited to the recipe | 12 minutes at 260°C (500°F) for the cited benchmark | Middle rack |
| Thick or pan-style, or heavy toppings | Lower than your thin-crust setting | About 12–18 minutes | Lower-middle rack, adjusted for bottom browning |
| Frozen thin pizza | Follow package directions and confirm direct-stone suitability | About 8–12 minutes, or the package timing | Middle rack |
A food-science validation study published in the Journal of Food Safety found optimal results for its traditional-crust pepperoni pizza at an oven temperature of 260°C (500°F) for 12 minutes. Treat that as a benchmark for a comparable pizza, not a fixed time for every crust or topping load.
Read the finish, not just the timer
Look for a browned, crisp underside and a set center. Lift an edge with the peel and check the middle of the base; a browned rim or bubbling cheese alone does not confirm the center is done.
Thin dough needs restraint with sauce and wet toppings. Extra moisture can force a longer bake, darkening the base before the center sets. For thicker crusts, use gentler bottom heat and allow more time. Dough thickness changes how quickly the center cooks, so match the base to the style using this pizza dough thickness guide.
A pan changes how heat reaches the dough, so pan pizza may bake differently from dough placed directly on the stone. Use the table as a starting point, then adjust according to which part finishes first:
- Bottom finishes first: Reduce bottom heat or move the baking surface farther from the lower element.
- Top finishes first: Give the stone more time to heat before baking.
- Center stays heavy: Stretch the dough more evenly, reduce wet toppings, or bake thicker dough more gently.
For frozen pizza, follow the package timing and the stone maker's instructions. Do not assume every frozen base is suitable for direct contact with a hot stone.
Common Problems and How to Fix Them
A pale, floppy bottom usually means the dough didn't receive enough sustained heat from below. The common mistake is trusting the oven's ready signal and loading before the stone has heated through.
Before changing recipes or buying another surface, identify which part finished first. That tells you more than whether the overall pizza seemed overcooked or undercooked.
Pizza stone symptoms, causes and fixes
| Symptom | Likely cause | Fix |
|---|---|---|
| Pale, floppy bottom | Stone not heat-soaked; only air temperature was checked | Extend the preheat and confirm a stable center reading |
| Scorched bottom, pale top | Strong lower-element exposure or excessive bottom heat | Move the rack upward |
| Raw center under a browned crust | Heat too aggressive for thick or wet dough | Lower the baking temperature and allow the center more time |
| Dough sticks to the peel | Damp peel, insufficient release flour, or lengthy assembly | Dust lightly with semolina and confirm movement before launching |
| First pizza slow, later pies uneven | Incomplete initial soak combined with uneven heat use and recovery | Let the used cooking area recover before each launch |
Separate recovery from initial preheating
The first pizza, second pizza, and third pizza don't necessarily meet the same surface conditions. An underheated stone may continue warming during the first bake, while each pizza simultaneously cools the patch beneath it. The result can be faster browning in one area and a weak center elsewhere.
Don't interpret that as proof that later pizzas always cook faster or always cook slower. Measure the area you're about to use, and keep your launch position consistent.
Between-pizza check: Recover the cooking area you actually used, not merely the empty corner beside it.
Brush away loose, scorched flour with a heat-rated tool before reloading. Keep the door closed while the surface recovers, and wait to stretch and top the next dough until you're nearly ready.
Sticking needs a different fix. Adding more flour after a heavily topped pizza has glued itself to a damp peel rarely works cleanly. Keep the peel dry, assemble promptly, and test movement before approaching the oven.
If you change anything during troubleshooting, change it deliberately. Moving the rack while also raising the temperature and thinning the dough might improve dinner, but it won't tell you which adjustment solved the problem.
Which Heats Best
The right surface depends on your baking habits, not on a universal winner. A useful pizza stone oven temp is one that produces a balanced finish with your dough, oven, and topping load.
Use this comparison to choose by technique rather than by the highest advertised heat tolerance.
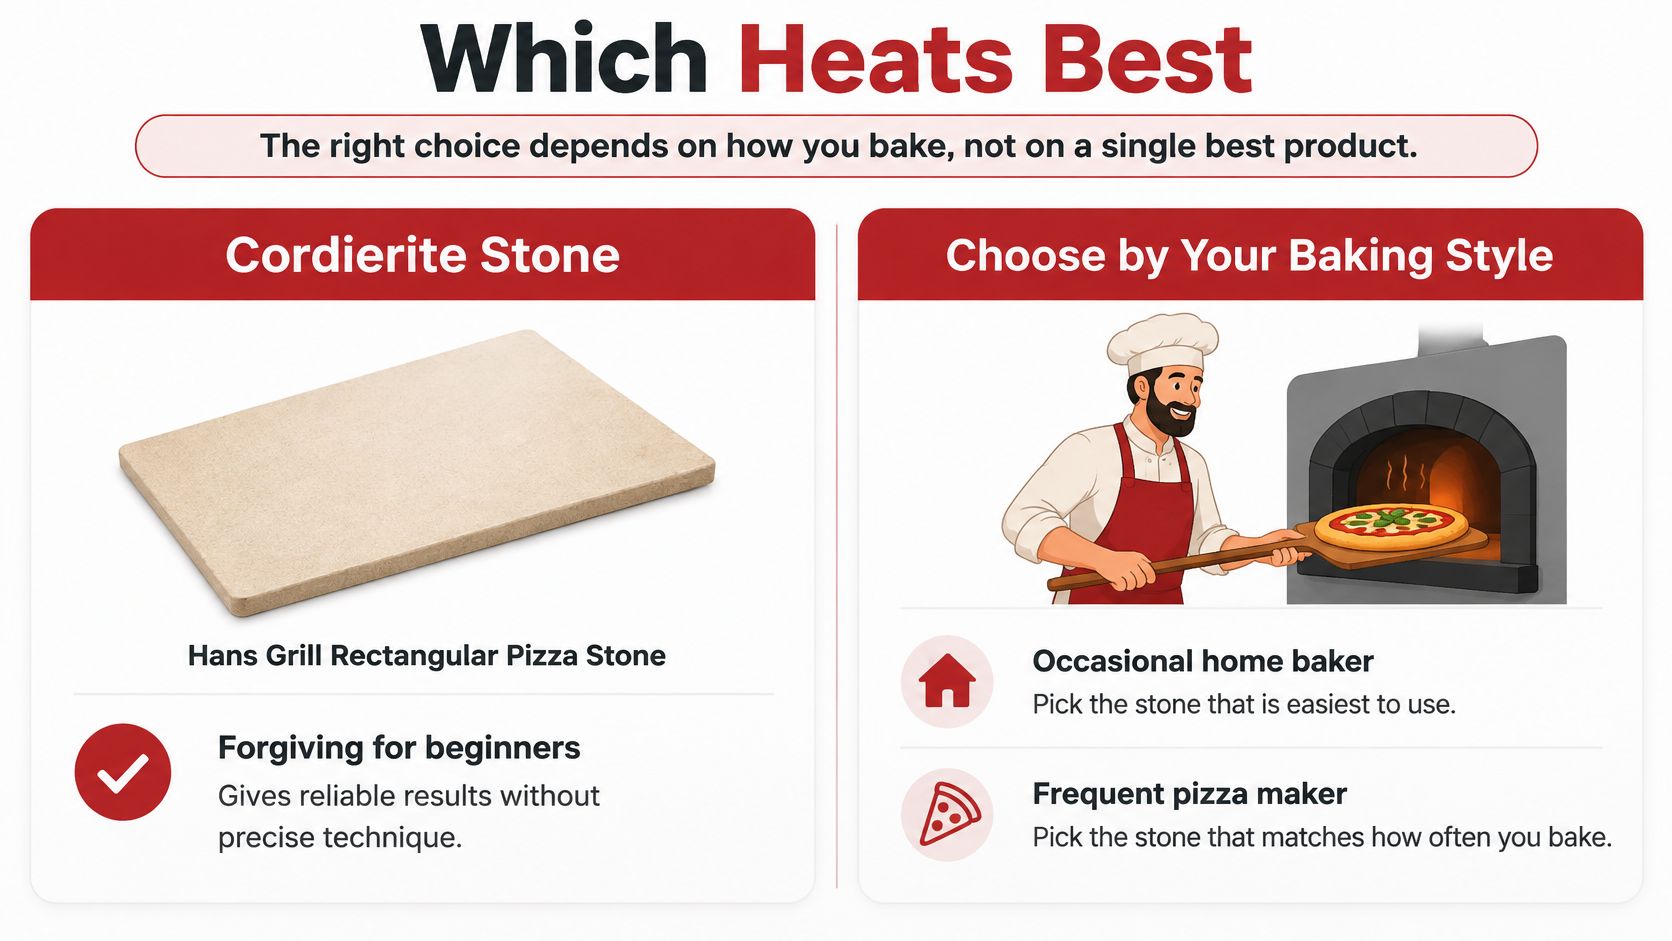
Match the surface to the session
- Cordierite stone: A forgiving option for learning how to balance top and bottom browning. Its drawback is that an incomplete preheat can leave you waiting for crispness while the toppings dry out.
- Pizza steel: Transfers heat readily into thin dough, making it useful when your oven struggles to brown the base. The trade-off is less margin for error with sugary dough, thick centers, or heavy toppings.
- High-mass slab: Stores more energy for repeated baking once thoroughly heated. It requires a longer warm-up, more careful handling, and adequate rack support.
A high-mass surface doesn't automatically recharge faster. It may lose less temperature during loading, but actual recovery also depends on how quickly the oven can put energy back into it. Don't choose a heavy slab solely because you expect an effortless queue of pizzas.
For occasional pizza nights, choose the surface you'll comfortably preheat, clean, and store. For repeated launches, prioritize stored heat and a measured recovery routine. The pizza steel versus stone comparison can help you weigh stronger bottom heat against a more forgiving bake.
I'd improve the preheat routine before replacing a serviceable stone. Once you can reproduce the same finish, an equipment upgrade becomes a specific choice rather than an expensive guess.
Hans Grill offers cordierite pizza stones, pizza steel, and larger baking setups for home ovens and suitable backyard grills. Visit Hans Grill to compare surfaces for your pizza style, then pair your choice with a full preheat and a surface-temperature check before launching.


