

Pizza Stone Preheat: The Complete Guide for Crisp Crusts
Place the stone in a cold oven, heat to 500°F to 550°F, and let it preheat for at least 45 to 60 minutes before baking. When possible, use an infrared thermometer to verify the stone itself is hot, because the oven's ready signal only measures the air.
You've probably met the problem already. The cheese is bubbling, the rim has taken on color, and the pizza looks ready until you slide a peel underneath. The center folds. The bottom is pale, soft, and slightly damp, as if it never received enough heat to finish cooking.
That failure often gets blamed on wet sauce, overproofed dough, or too many toppings. Those can matter, but the more basic issue is frequently the pizza stone preheat. Your oven may be hot while the stone is still nowhere near ready to brown the base.
Table of Contents
- The Pizza Stone Preheat Problem Most Home Cooks Miss
- The Cold Oven Method Your Stone Actually Needs
- Why Your Stone Needs More Time Than Your Oven Indicates
- Grill Versus Oven Preheating Strategies
- How to Know When Your Stone Is Actually Ready
- Fixing Common Preheat Mistakes and Avoiding Thermal Shock
The Pizza Stone Preheat Problem Most Home Cooks Miss
A pizza stone isn't just a surface that happens to sit in a hot oven. It's a heat reservoir. When the dough lands on it, the stone must transfer enough stored energy into the base immediately, before the toppings overcook and before the crust dries out.
That's why a preheated oven can still produce an underwhelming pizza. The air reaches its target quickly, while the dense stone warms more slowly. If you launch the pizza as soon as the oven beeps, the dough may meet a surface that feels warm but lacks the stored heat needed for strong browning.
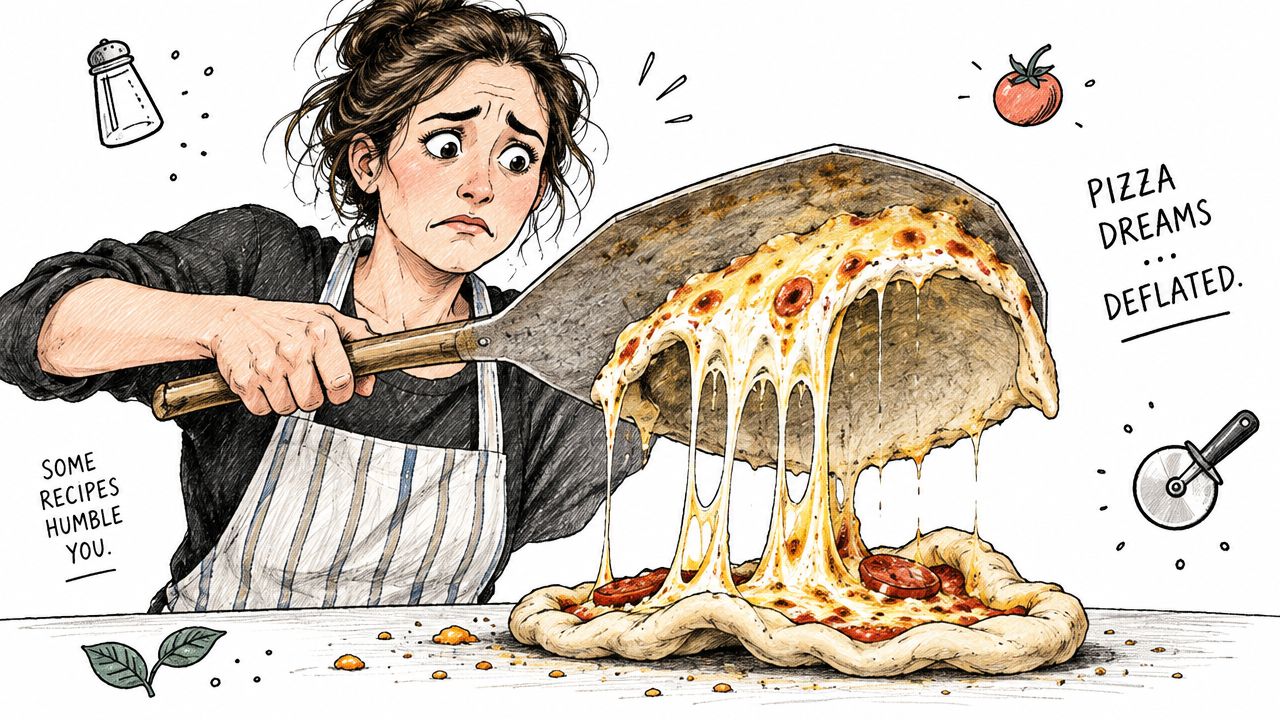
The symptoms are familiar:
- Pale underside: The top cooks faster than the base, leaving a finished-looking pizza that lacks structure underneath.
- Weak oven spring: The dough doesn't expand decisively when it hits the stone.
- Longer bake: You keep the pizza in longer to compensate, which can dry the rim or burn the cheese.
- Sticking and tearing: A soft bottom has more trouble releasing cleanly from the peel.
A stone also changes how heat behaves in the oven. It can smooth out some temperature swings and provide concentrated heat directly beneath the dough, but only after it has absorbed enough energy. The broader explanation of why a stone changes the bake is covered in this guide to why use a pizza stone.
Practical rule: A hot oven is the setting. A heat-soaked stone is the cooking tool.
The difference becomes especially obvious with thicker stones, large ovens, and setups where the lower element cycles on and off. Those conditions can make a timer less reliable. A short warmup might work for a thin surface in one oven and fail badly with a heavier stone in another.
This short visual shows the basic failure pattern and the role of the stone in the bake:
The fix isn't complicated, but it requires changing what you consider “preheated.” You aren't only heating the cavity. You're charging the stone until its surface can deliver immediate, forceful heat to the dough.
The Cold Oven Method Your Stone Actually Needs
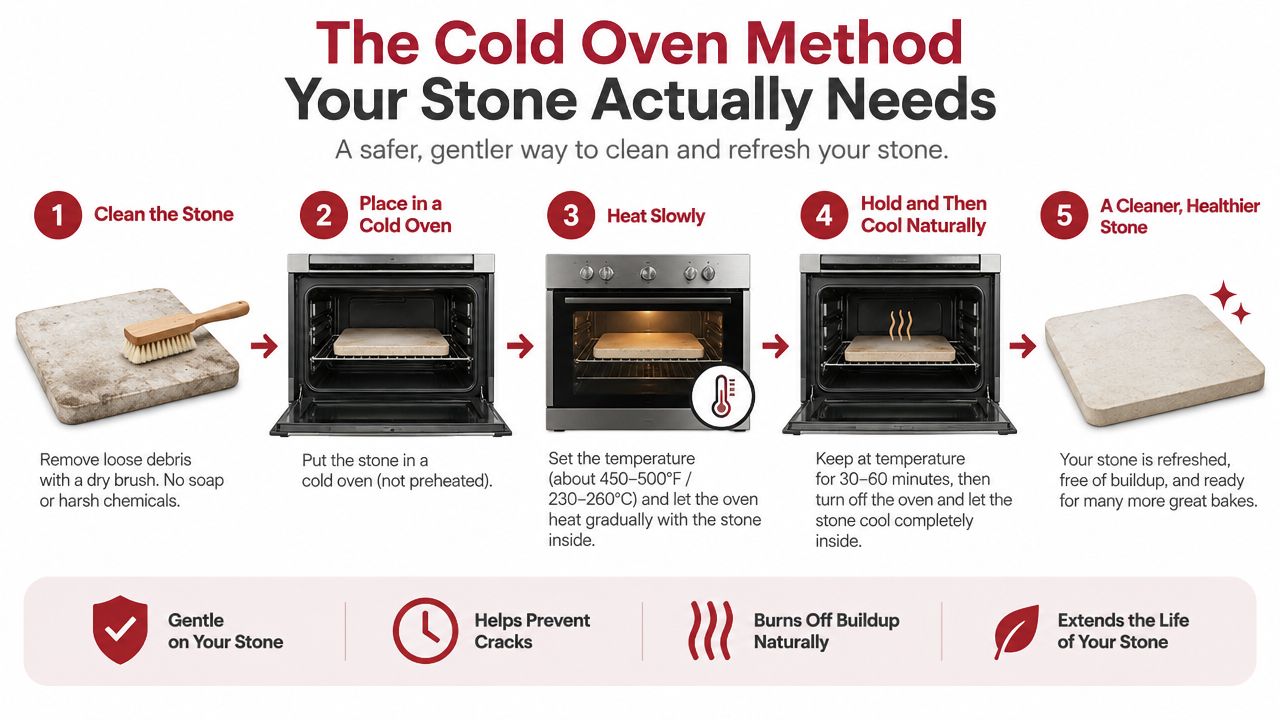
A pizza can go into an oven that reads 550°F while the stone remains too cool to brown the base. Start with the stone in a cold oven, then heat both together. Placing a room-temperature stone into a fully heated oven creates a sharper temperature change, while adding a cold stone after preheating delays the bake and increases thermal stress.
Cordierite offers useful thermal-shock resistance, but it can still crack. For material background and gradual heating, Forno Bravo's pizza-stone guidance provides a practical reference.
A repeatable oven routine
- Position the stone before turning on the oven. Use the rack position suited to your oven, leave clearance around the stone, and keep it level without letting it touch the walls.
- Set the oven to its maximum baking temperature. A practical range is 500°F to 550°F (260°C to 290°C), subject to the oven and stone instructions. The KitchenAid pizza-stone method recommends 500°F and heating for 30 minutes to 1 hour.
- Keep the door closed. Each opening releases heat and interrupts the stone's gradual charge. The air may recover quickly, but the stone surface and core recover more slowly.
- Continue heating after the oven signals readiness. Use 30 to 60 minutes as a broad working window, with 45 to 60 minutes giving thicker stones more time to heat evenly. A timer is only a starting point because stone thickness, rack position, and oven cycling change the result.
- Check the stone before launching. An infrared thermometer is more useful than the oven light or beep. Measure several points across the surface, including the center and the area where the pizza will sit. A cooler center means the stone has not caught up, even if the oven air is already at its setting.
The extra heating time lets the stone store enough energy for rapid bottom-crust browning. A brief warmup can leave the base pale and soft, forcing a longer bake while the cheese and toppings continue cooking.
What changes with stone thickness
Thin stones usually stabilize sooner. Heavy stones take longer to heat through, and their centers may remain cooler than their edges when the oven heats unevenly. Give the stone time, then verify its surface rather than treating the oven's signal as proof.
For practical guidance on positioning and handling, see this baking stone use guide. On a grill, follow the same cold-start principle when possible, keep the stone away from direct flame, and check the surface in more than one spot because hot zones develop quickly.
Why Your Stone Needs More Time Than Your Oven Indicates
Your oven's preheat signal answers one question: has the oven air reached its programmed setting? It doesn't answer the question that matters most for pizza, which is whether the stone can transfer enough heat into the dough at launch.
The stone has thermal mass. It absorbs heat gradually and releases it when the cooler dough touches the surface. Air has far less stored energy by comparison, so the cavity can reach its target while the stone is still charging.
That creates a common sequence. The oven beeps, the cook waits another few minutes, and the pizza goes in. The top receives intense radiant and circulating heat, but the underside meets a comparatively weak heat source. The cook then extends the bake, hoping the base catches up, while the toppings continue moving toward overdone.
Think of the stone as a thermal battery
A useful mental model is a battery with a slow charge. The oven supplies the energy, but the stone needs time to absorb and distribute it across its surface. A thicker stone has more material to heat, so its center and edges can take longer to approach the same working temperature.
This is why “oven hot” and “stone hot” aren't interchangeable. Baking guidance focused on heat transfer recommends matching the warmup to stone mass and checking the surface directly. Some thicker stones may need 60 to 90 minutes, while thinner stones often stabilize in 30 to 45 minutes, according to Baking Science's comparison of stones and baking sheets.
The practical consequences of loading early are predictable:
- The base browns weakly.
- The dough gets less lift at contact.
- The bake takes longer.
- Rotating the pizza becomes more tempting because one part of the crust hasn't developed evenly.
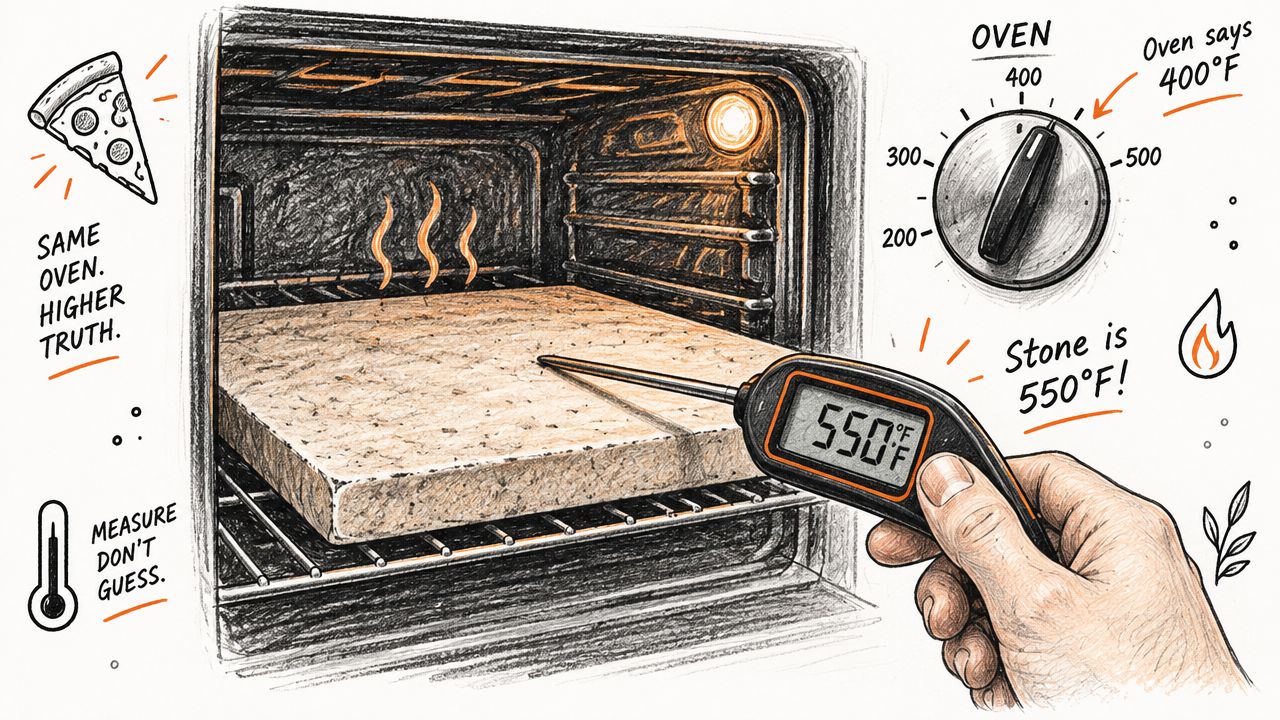
An infrared thermometer changes the routine from guessing to checking. Aim at the center of the stone, not the oven wall or surrounding air. A reading within about 5°C/9°F of your intended target indicates a more stable surface, though you should follow the temperature limits and instructions for your specific stone.
The oven's beep tells you the cavity is ready. The thermometer tells you whether the pizza's landing surface is ready.
That distinction matters most when you change variables. A different rack, a thicker stone, a larger oven, or a cold dough ball can all alter the result even if the dial remains unchanged. Measure the surface when consistency matters, then use your usual time as a shortcut once you've learned how your setup behaves.
Grill Versus Oven Preheating Strategies
A grill is not just an oven with the door removed. It introduces direct radiant heat, stronger hotspots, and sharper temperature changes, especially when burners or charcoal sit close to the stone. Indoor timing can therefore be a useful reference without becoming a rigid outdoor rule.
For one manufacturer's grill guidance, the stone goes onto the grill while cold and heats for at least 30 minutes at about 230°C, compared with the 45 to 60 minutes commonly recommended for ovens. The comparison appears in Tyrolit Life's pizza-stone preheating guidance.
| Setup | Starting point | Main concern |
|---|---|---|
| Indoor oven | Cold stone, maximum oven setting, 45 to 60 minutes as a practical standard | The air reaches temperature before the stone has fully charged |
| Outdoor grill | Cold stone, about 230°C, at least 30 minutes for the cited manufacturer guidance | Direct heat can create hotspots or stress one side |
| Thicker stone | Extend the warmup and verify the surface | Greater thermal mass takes longer to equalize |
Managing heat on a grill
Put the stone on the grill before ignition or before bringing the grill up to temperature. This avoids dropping a cold stone into an already fierce heat zone, a move that can create damaging thermal stress.
Use indirect or balanced heat when your grill allows it. If the burner sits directly beneath one small area of the stone, the underside can become much hotter than the center or opposite edge. A lid helps the top of the pizza cook, but it doesn't remove the need to monitor the stone's lower heat pattern.
Don't assume that extending the timer always improves the bake. A longer preheat can help the center catch up, but it can also intensify a hotspot under one section. The better target is a stable, evenly heated surface, checked with an infrared thermometer when possible.
Outdoor cooks will find more setup-specific details in this guide to cooking pizza on a grill with a pizza stone. Keep the stone in place while the grill changes temperature, avoid sudden exposure to cold air or liquid, and let the surface settle before launching the pie.
How to Know When Your Stone Is Actually Ready
The most reliable check is direct measurement. An infrared thermometer reads the stone's surface, so it gives you information the oven's indicator cannot provide.
Open the door only when you're ready to measure. Aim at the center of the stone, because the edge can heat differently from the area where the pizza will sit. Hold the thermometer at the distance specified by its instructions, and avoid measuring a shiny metal surface nearby, which can return a misleading reading.
A practical measurement routine
- Heat gradually: Start the stone in the cold oven or cold grill.
- Wait through the normal warmup: Use the oven's maximum setting and allow at least the established time for your setup.
- Check the center: Measure the area where the dough will land rather than an exposed corner.
- Compare the reading with your target: Guidance places useful stone-surface benchmarks in the 480°F to 550°F range, depending on the setup and the stone's limits. The discussion of surface temperature versus oven indication appears in this infrared thermometer pizza-stone guide.
- Give uneven readings time to settle: If the center is notably cooler than the rest, keep heating with the door closed and measure again later.
The thermometer isn't a substitute for judgment. A stone can show a high edge reading while the center remains undercharged, and a grill can produce a reading that reflects a local hotspot rather than an even cooking surface. Measure several areas if your setup heats unevenly, then use the center reading as the deciding signal.
If the stone surface isn't ready, the pizza isn't ready to launch.
Once your stone consistently reaches the working range and your crusts brown properly, you can build a dependable routine around the same rack, setting, and preheat period. Keep noting the results. Your dough hydration, topping load, and launch temperature will still affect the final bake, but surface heat gives you a stable foundation.
Fixing Common Preheat Mistakes and Avoiding Thermal Shock
A pizza stone can look ready while its cooking surface is still underheated. If the crust stays pale, check the center with an infrared thermometer rather than adding bake time and hoping the base catches up. Edges can be hotter than the landing zone, especially on a grill.
Cordierite tolerates thermal shock better than many ceramics, but it still benefits from gradual heating. Start the stone in a cold oven or grill, then bring it progressively to pizza temperature. On a grill, watch for a burner hotspot directly below the stone. Reposition the stone or adjust the burners if one area browns the underside before the toppings finish.
Use the symptom to choose the fix:
- Pale bottom: Extend the warmup and verify the center surface before launching.
- Burned underside with a pale top: Move the stone away from direct heat or lower the burner beneath it.
- Cracked stone: Replace it. A damaged surface can fail further under heat.
- Uneven grill bake: Measure several areas, then avoid the hottest section when positioning the dough.
- Temperature drop after opening: Prepare the peel, dough, and toppings before opening the door, and make one efficient loading movement.
Inspect the stone after it cools. Hairline cracks, chipped corners, or a raised section are reasons to stop using it. After baking, leave the stone in the closed oven until it cools completely. Do not rinse a hot stone or place it on a cold metal surface, since the sudden change can cause cracking.
The reliable shortcut is verification. Check the surface, not the oven beep, then record the rack position, heat setting, and warmup routine that produces an evenly browned crust.
Hans Grill offers cordierite pizza stones for ovens and BBQs, plus pizza steel and dough proofing boxes. Visit Hans Grill to compare equipment for your setup.


