

Baking Stone Use Made Simple for Crisp Pizza at Home
You've pulled a pizza from the oven, the cheese is bubbling, the edge has color, and then you lift the slice. The underside is pale, soft, and slightly damp. The usual reaction is to turn up the oven, add more flour, or blame the dough. Often, the problem is simpler: the pizza landed on a stone that looked hot but hadn't stored enough heat.
Good baking stone use is less about owning a thick slab and more about managing heat from the moment the stone enters the oven. Placement, preheating, loading speed, and cooling all matter. Once you treat the stone's temperature as the control variable, crisp pizza becomes much more repeatable.
Table of Contents
- Why Baking Stones Still Matter for Home Pizza
- Placing and Preheating Your Stone the Right Way
- Loading and Unloading Pizza Without Sticking or Burning
- Using Your Baking Stone on the BBQ and Grill
- Cleaning and Maintaining Your Stone for Long Life
- Your Next Pizza Night Made Easy
Why Baking Stones Still Matter for Home Pizza
A baking stone will not turn a weak oven into a pizza oven. It cannot correct overly wet dough, watery toppings, or an oven that never reaches a useful baking temperature. Its job is narrower and practical: hold heat at the point where the dough lands, then transfer that energy steadily instead of behaving like a thin tray that cools as soon as cold dough touches it.
That heat reserve explains why stones still matter. Ancient Roman cooks used heated stone slabs for bread and flatbreads, and the method later spread through Europe. Modern home pizza stones appeared much later, in the late twentieth century, as cooks tried to reproduce pizzeria-style baking in domestic ovens. The stone remains a compact version of that older heat-management method. Its mass stores heat, while its thermal stability supports a firmer underside and a more even bake. The history and heat-management role of baking stones becomes clearer when the stone is treated as a heat reservoir, not a hot surface.
What the stone actually changes
A properly heated stone gives raw dough firm, direct contact heat. The base sets sooner, spends less time absorbing moisture from sauce and toppings, and develops better browning underneath. The stored heat also helps reduce the temperature drop caused by opening the oven door. A cold or underheated stone removes those benefits, even if the oven display shows the intended setting.
Material changes the speed of that transfer. Cordierite, a common stone material, has thermal conductivity around 2.5 to 3 W/m·K, while cold-rolled carbon steel averages about 43 W/m·K, roughly 3.2 times higher, according to this comparison of pizza-baking surfaces. Steel drives heat into the dough more aggressively. Cordierite delivers gentler, steadier heating, but it still needs a full preheat.
For thin-crust pizza, a stone suits cooks who want a balanced base without steel's more forceful browning. It also gives beginners a forgiving surface for learning launches, rotation, and dough handling. Before buying, read this guide to what baking stones are made of to see why stone materials behave differently. The oven display is only a setting. The stone's stored temperature is the control variable.
Placing and Preheating Your Stone the Right Way
A stone can look ready while still producing a pale, soft base. The oven display measures the air around it, not the heat stored in the stone. Treat stone temperature as the control variable, especially after a cold start or a rushed preheat.
Start with both oven and stone cold.
- Place the stone before heating. Set it on the lower or bottom rack, leaving enough clearance to slide in a peel and retrieve the pizza safely. One manufacturer guide specifies rack position 1 and recommends extra heating after the oven signals readiness. Beginning cold also reduces the risk of exposing ceramic to a sudden temperature change.
- Preheat fully. Use the oven's highest suitable pizza setting, then keep heating the stone for another 10 to 15 minutes after the oven reaches temperature, following this baking-stone instruction document. For timing guidance, see should you preheat a pizza stone.
- Check the stone, not only the display. You want steady stored heat. When the door opens, the stone should radiate a consistent wave of heat, rather than feeling like a recently warmed tile surrounded by hot air.
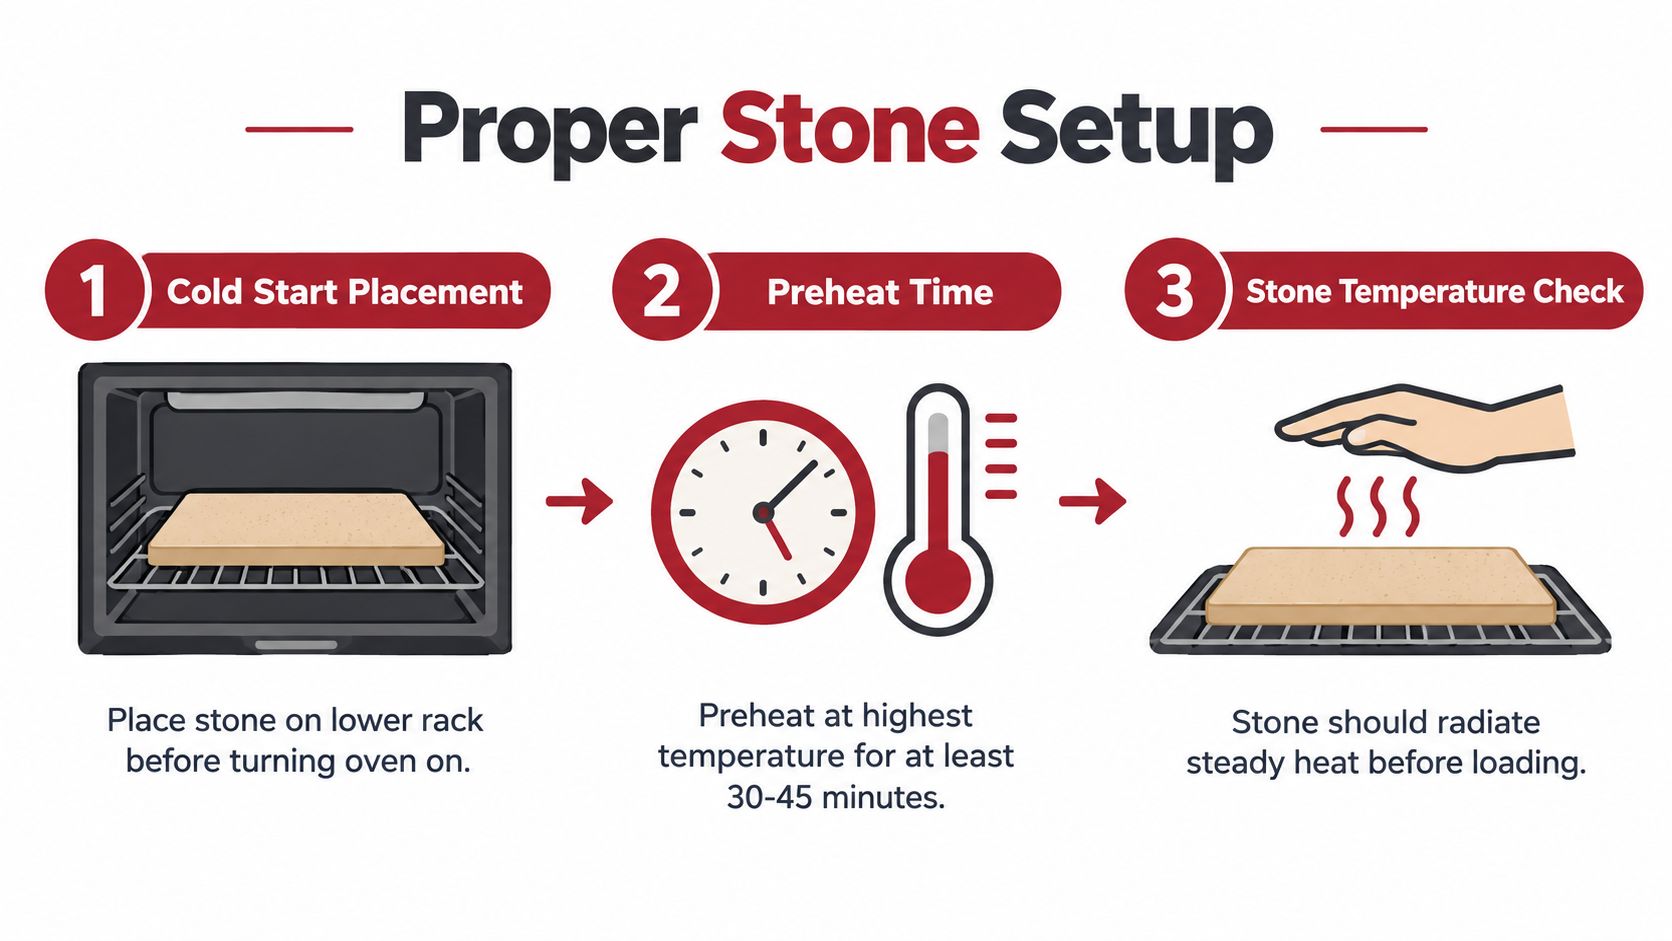
Why the extra wait prevents pale bottoms
Air responds quickly to the heating cycle. A dense stone warms slowly because heat must travel through its full body. A stone in a 550°F oven typically stabilizes around 500 to 525°F, so the oven setting and baking surface do not reach the same temperature. The stone controls how firmly the base sets.
Rack position changes the balance between top and bottom heat. A low rack places the stone closer to the lower heat source and usually gives the base more authority. If the underside burns before the top finishes, move the stone higher or reduce lower-heat intensity. If the crust stays blond and soft, the stone may be underheated, positioned too far from the lower element, or carrying an overly wet pizza.
Practical rule: The oven's readiness signal starts your final wait. It does not end it.
Cordierite also recovers more slowly than steel after a pizza leaves the surface. In practical tests, steel recovered to its target temperature in about 75 to 90 seconds, while cordierite often needed about 4 to 6 minutes. Steel therefore suits rapid back-to-back baking, while a stone rewards patience between launches.
Loading and Unloading Pizza Without Sticking or Burning
The launch begins before the pizza reaches the oven. Keep the peel lightly dusted with semolina or flour, but don't build a thick layer. Excess flour burns on the stone and creates bitter smoke, while too little leaves dough welded to the peel.
Stretch the dough, place it on the peel, and test the movement before adding toppings. A short, controlled shake should make the dough slide. If it grips, lift one edge and add a small amount of flour underneath. Don't keep shaking after the pizza is topped. Sauce and moisture start working into the dough immediately, and a pie that slides easily at the start can become sticky if it sits on the peel.
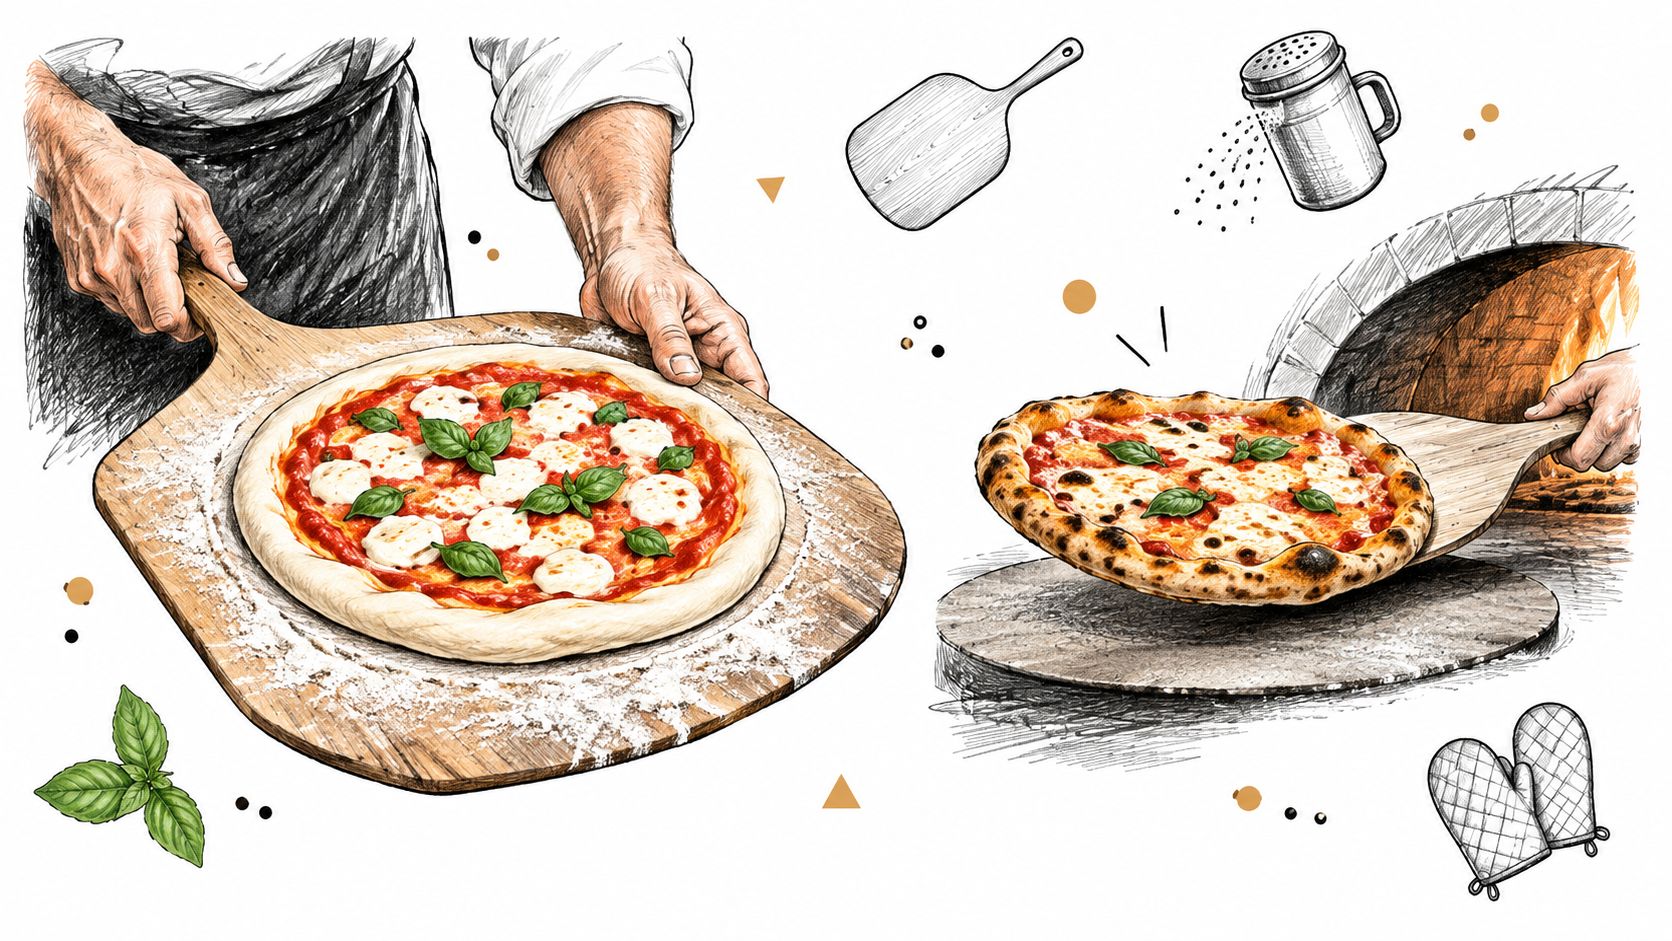
The launch sequence
Top quickly, then move with purpose. Open the oven, pull the rack only as far as needed, position the front edge of the peel near the stone, and use a firm forward-and-back motion to slide the dough free. A hesitant launch folds the leading edge, while an overpowered shake can distort the shape and scatter toppings.
For a small oven, turn the peel sideways if the door opening is narrow. For heavily topped pizza, reduce the amount of topping rather than trying to compensate with a longer launch. More weight makes the dough harder to release and can flatten the rim before the crust has a chance to rise.
Parchment can help during the learning stage. It gives you a reliable transfer surface, though exposed paper can darken or scorch at high heat, so remove it once the crust has set if your setup allows. A metal pizza screen or a lightly floured sheet pan can also make early practice less stressful, but direct contact with a hot stone usually gives the base a firmer bake.
A peel is the cleanest retrieval tool. Slide it under the pizza once the underside has released, supporting the center before lifting. If the pie has stuck, don't yank it. Work a thin metal spatula under the edge, loosen the contact points, and recover the pizza in sections.
Let the stone remain where it is while you unload. Its stored heat is useful, but its surface and nearby oven walls can burn skin quickly. This visual demonstration of pizza preparation and transfer reinforces the short, confident movement that makes launching easier.
Using Your Baking Stone on the BBQ and Grill
A grill can produce excellent pizza, but a cold stone, a rushed preheat, or the wrong rack position can ruin the crust before the dough has a chance to bake properly. The grill lid controls the air temperature, while burners and coals create concentrated hot zones. Treat the stone's surface temperature as the control variable, not the display on the lid or thermometer.
For a gas grill, start with indirect heat. Light the outer burners, place the stone away from the flame, close the lid, and allow the stone and cooking chamber to heat together. This reduces the chance of a pale base followed by a scorched underside. On charcoal, bank the coals to one side and set the stone over the cooler area. Keep the lid closed so heated air can cook the toppings while the stone develops an even baking surface.
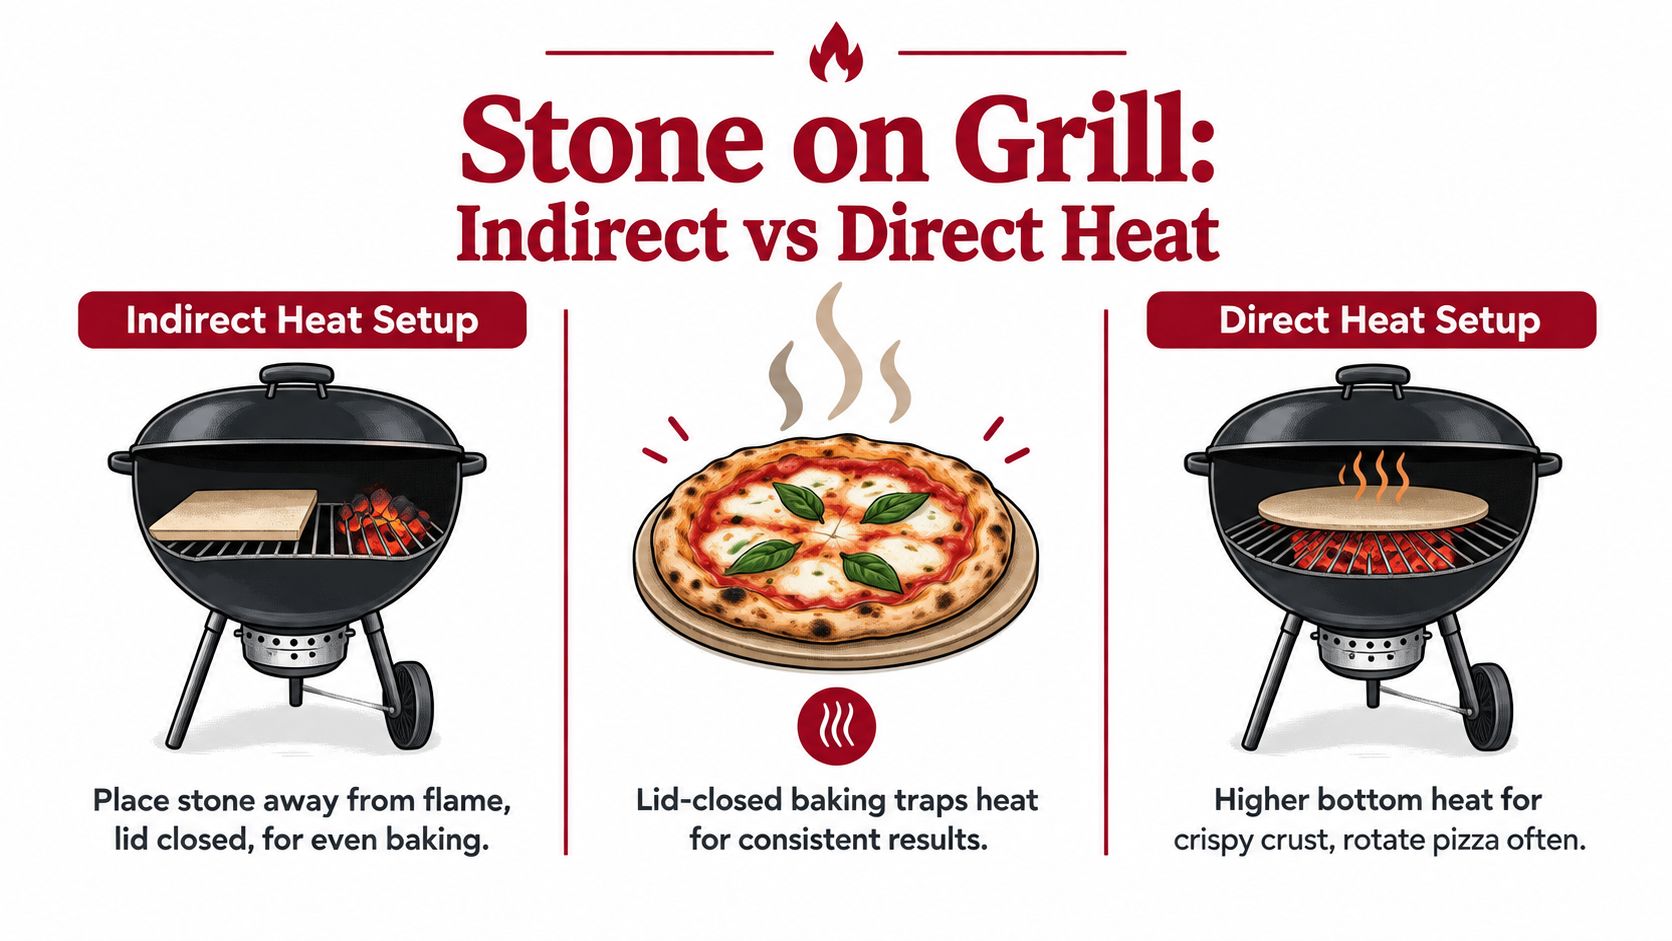
Indirect and direct heat compared
| Setup | Strength | Main risk | Useful approach |
|---|---|---|---|
| Indirect heat | More even baking and better top-to-bottom balance | The base may brown more slowly | Keep the lid closed and let the stone stabilize |
| Direct heat | Stronger bottom browning | Scorching, flare-ups, and uneven cooking | Watch closely and rotate the pizza when needed |
Direct heat suits a crisp, forcefully browned base, but it leaves little room for delay. Grease and toppings can cause flare-ups, and the area above the coals may be far hotter than the rest of the grill. If one side darkens first, rotate the pizza. A black underside indicates excessive heat, not a properly baked crust.
Check the stone before launching. If the grill has reached its air temperature but the stone is still cool, wait. A rushed preheat gives you weak browning and encourages the dough to remain soft against the surface. For practical setup variations, see this guide to using a baking stone on a BBQ.
Never place a cold stone on a hot grill, carry a hot stone indoors, or set it on a wet or cold surface. After the fire is off, leave it inside the closed grill and let it cool naturally. The same arrangement works for flatbreads and bread when the grill has enough headroom and the lid can hold steady ambient heat.
Cleaning and Maintaining Your Stone for Long Life
Most stains on a baking stone are cosmetic. Dark patches usually show where oil, sauce, and flour have baked into the porous surface. They don't automatically mean the stone is dirty in a way that affects performance.
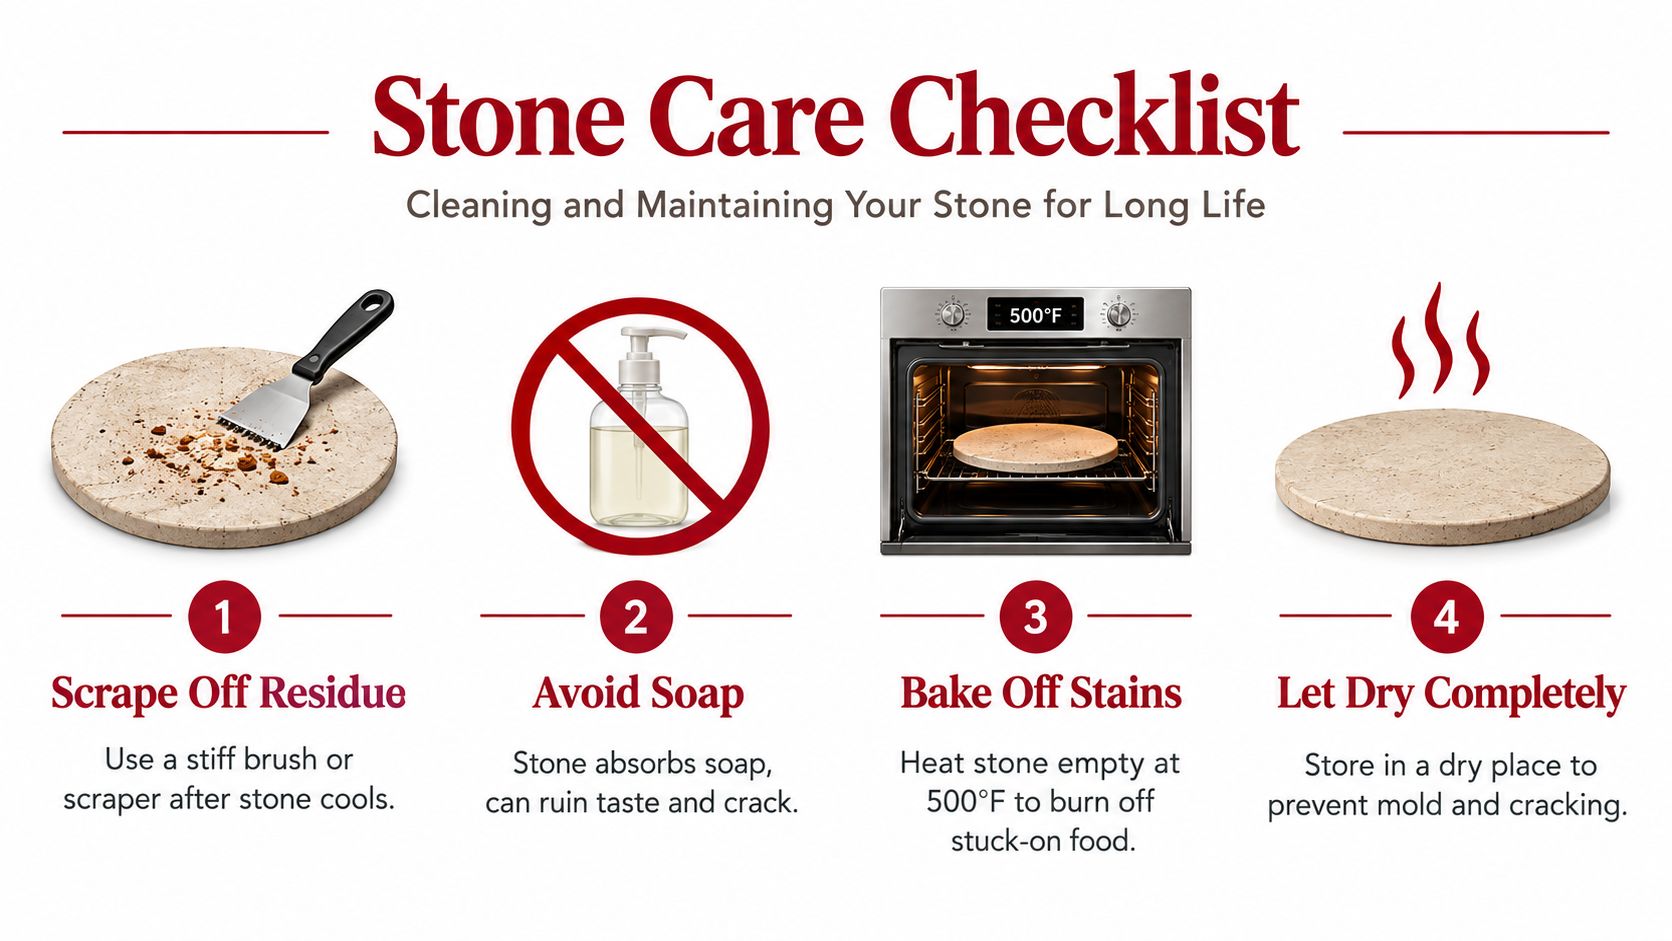
The safer routine is dry cleaning. Let the stone cool fully, then brush away loose flour and scrape off hardened cheese or dough with a stiff brush or scraper. Avoid oiling the surface. A porous cordierite stone absorbs liquids, and soap can remain inside the material or leave an unwanted residue.
When rinsing makes sense
Cleaning guidance is inconsistent because two risks compete. Dry cleaning leaves some discoloration, while rinsing can remove stubborn residue but introduce moisture into a porous body. A brief rinse may be reasonable for a small, isolated mess when dry scraping cannot remove it, but it should never happen while the stone is hot, and the stone must dry completely before heating again. Fibrament's use-and-care guidance also emphasizes gradual heating from room temperature and full cooling before handling.
Use this decision rule:
- Dry, dark staining: Leave it alone if the surface is flat, odor-free, and not shedding residue.
- Loose baked-on food: Scrape and brush after complete cooling.
- Sticky or strongly flavored residue: Consider a minimal rinse without soap, then allow thorough drying in a warm, dry place before the next bake.
- Cracks or deep fractures: Stop using the stone. A damaged stone can break further during heating.
A stain changes the appearance. Moisture and sudden temperature changes threaten the structure.
Don't pour water onto a hot stone, place it in a sink while it's still warm, or return it to a hot oven after rinsing. Thermal shock can crack ceramic, and trapped moisture can create problems during the next heating cycle. Store the stone flat or in a position where it won't fall, and keep it somewhere dry. If it develops a persistent smell, oily surface, or food residue that transfers onto dough, give it a careful dry scrape first and reassess before using liquids.
Your Next Pizza Night Made Easy
A reliable pizza routine doesn't need many moving parts. Put the stone in the cold oven on the lower rack, start the heat, and wait beyond the oven's readiness signal so the stone can catch up. While it preheats, prepare the dough and toppings, but don't top the pizza until the peel is ready and the oven door is close to opening.
Use a light layer of semolina or flour, test the slide before topping, and launch quickly. If the bottom is pale, don't immediately blame the dough. Check whether the stone had enough time to store heat, whether the rack is too high, and whether the pizza carried enough moisture to slow browning.
A repeatable bake-day checklist
- Set the stone cold. Give it a stable starting point and avoid sudden temperature changes.
- Heat the entire system. Complete the oven preheat, then allow the added 10 to 15 minutes recommended by the manufacturer guidance.
- Prepare for release. Keep the peel lightly dusted and top only when you're ready to launch.
- Bake with observation. Watch the rim, underside, and topping together. Rotate only when the bake is uneven.
- Cool before cleaning. Scrape and brush first. Treat rinsing as an occasional, carefully managed option rather than a default routine.
Once this sequence feels automatic, try the same heat-management principles on a covered grill. A rectangular stone gives you more usable peel space, while a steel surface offers faster heat transfer and recovery. For dough organization, a proofing box can keep portions covered and easier to handle during a busy pizza session.
The first few bakes are practice, not a verdict on your equipment. Adjust one variable at a time, keep notes on rack position and preheat timing, and rescue a pale base with a longer bake rather than an impulsive temperature jump. The stone rewards calm handling.
Hans Grill offers oven and BBQ pizza tools including the Rectangular Pizza Stone, Pizza Stone PRO XL Set, Pizza Steel PRO, and dough proofing boxes for cooks building a more consistent workflow. Visit Hans Grill to compare stone and steel options and prepare for your next crisp-crust bake.


