

Thin Crust Pizza Recipe No Yeast: Crisp Results Fast
You want pizza tonight, but the yeast packets are gone and nobody has time to wait for dough to rise. That doesn't mean settling for a soft, bready substitute. With flour, baking powder, salt, liquid, and olive oil, you can make a thin crust pizza recipe no yeast that's mixed, shaped, and baked in the same hour.
The result has a clear identity. It's crisp, relatively flat, and closer to a cracker-style or flatbread crust than to chewy, fermented pizza. This guide uses weighed ingredients, explains why the dough needs to move quickly, and treats the baking surface as part of the recipe rather than an afterthought. If you usually make fermented dough, compare this with a same-day pizza dough method, but expect a different texture and workflow here.
Table of Contents
- Pizza Tonight Without Yeast
- Why Baking Powder Replaces Yeast in This Crust
- Ingredients and Mixing the Dough
- Rolling Thin and Topping Light
- Baking on a Stone or Steel for Maximum Crisp
- Texture Expectations, Variations, and Troubleshooting
Pizza Tonight Without Yeast
A no-yeast dough works best when you decide what you want before you mix it. If the target is a thin, crisp base with firm edges and enough structure for a modest layer of toppings, baking powder is a useful shortcut. If you're expecting the elastic chew, fermented aroma, and airy rim of a yeast dough, this recipe will disappoint unless you adjust that expectation first.
The practical advantage is speed. You won't build the dough around a proofing schedule, and you won't need to wait for visible expansion. The short covered rest later in the process helps the flour hydrate and makes rolling easier, but it isn't fermentation.
The right promise: quick preparation, crisp texture, and controlled lift, not yeast-like oven spring.
I've found that most failures happen after the dough is already mixed. The base gets rolled too thick, sauce is spread edge to edge in a heavy layer, or the shaped pizza sits around while the oven heats. Each choice works against crispness. A thin dough has limited capacity for moisture, and chemical leavening starts reacting as soon as liquid reaches the baking powder.
This method handles the whole chain:
- Mixing: Weigh the ingredients and distribute the baking powder thoroughly.
- Shaping: Roll thin, dock the surface, and keep the topping load restrained.
- Baking: Use a thoroughly heated stone, steel, or heavy sheet so the underside sets quickly.
- Troubleshooting: Match cracks, shrinkage, toughness, and sogginess to the technique that caused them.
The recipe is forgiving if you treat it like a crisp flatbread rather than a miniature loaf. Keep the dough thin, work efficiently, and judge the finished pizza by its browned underside and firm edges.
Why Baking Powder Replaces Yeast in This Crust
If you need pizza tonight, baking powder gives the dough lift without fermentation. Yeast creates gas gradually as it ferments. Baking powder combines sodium bicarbonate with dry acids, then produces carbon dioxide, water, and salts once moistened and heated. Those gas pockets give a thin crust modest lift, as explained in this food science reference on chemical leavening.
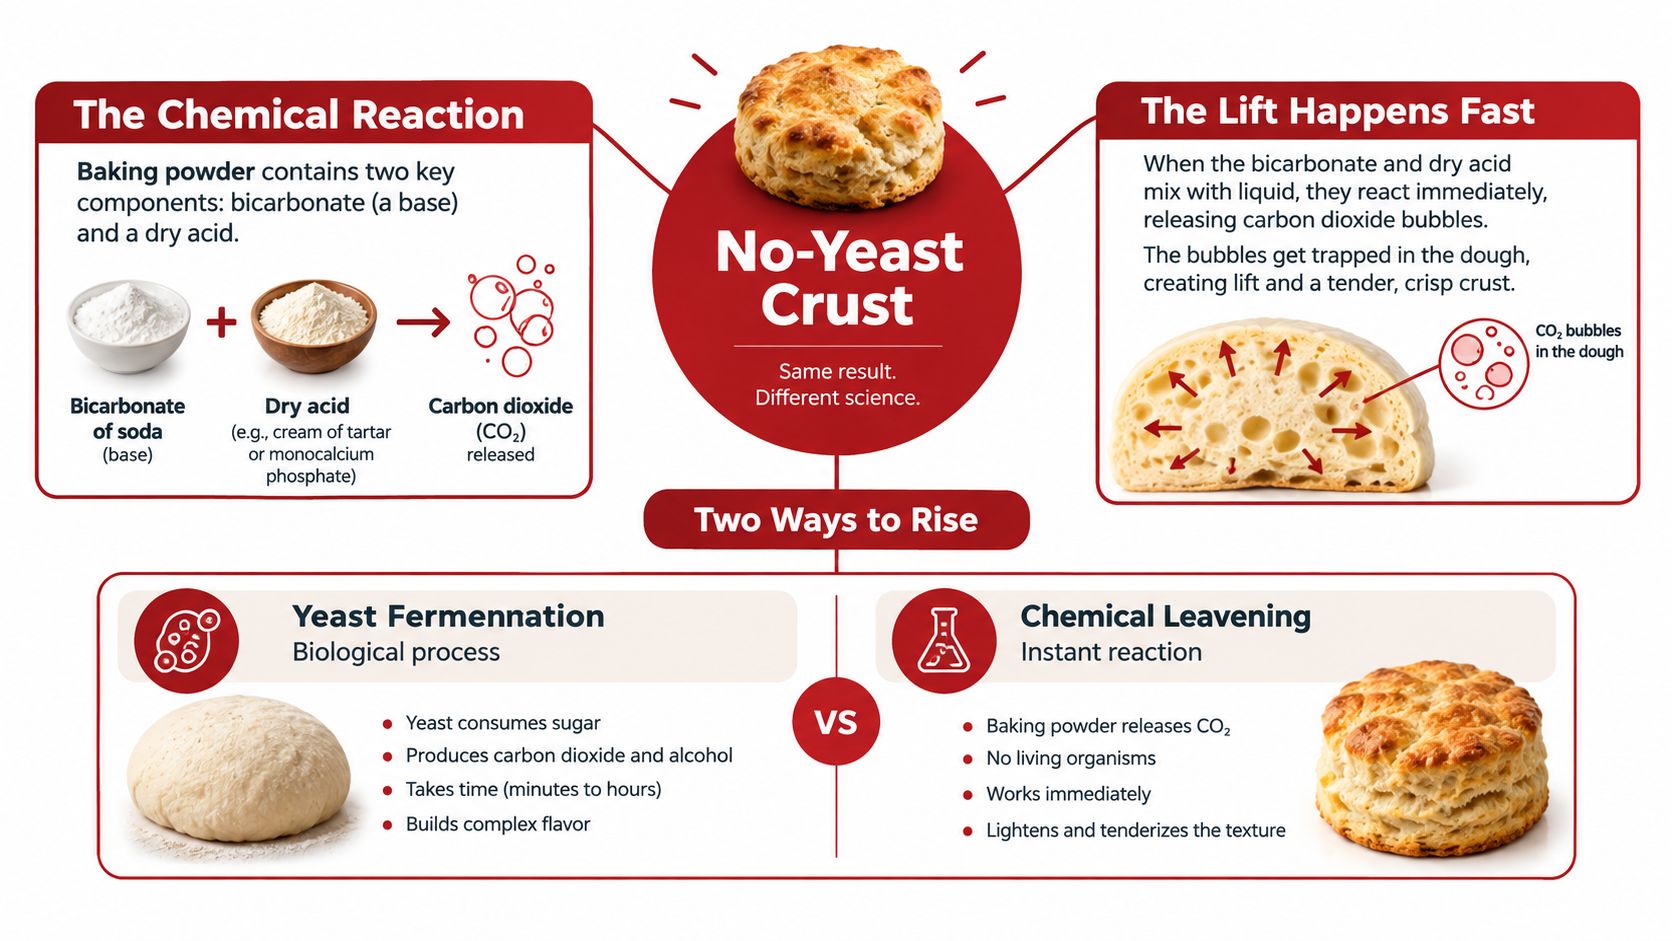
The formula works best with double-acting baking powder, which releases gas in two stages. Approximately 15% of the available carbon dioxide may form when liquid is added, while about 85% develops in the oven, beginning at roughly 105°F (41°C). That split is why timing matters more than it would in a dough built around yeast.
Mix the dough, roll it, top it lightly, and bake it promptly. A long wait gives some early gas time to escape before the crust firms. There is no need to wait for the dough to double, since this process develops neither biological fermentation nor yeast-driven flavor.
The oven supplies the structure. Starch gelatinization begins at approximately 140°F (60°C) and is largely complete around 167°F (75°C), helping the dough set as it bakes. Expect limited lift, a tighter bite, and a crisp, compact finish. Baking powder makes the dough fast and practical, but it cannot reproduce the extensibility, airy rim, or fermented aroma of yeast dough.
The method has a clear historical basis. The American Society of Baking's overview of baking powder identifies 1856 as the year Eben Norton Horsford patented the first modern baking powder, using monocalcium phosphate as its acid component. That advance made measured chemical leavening practical for home cooking.
Chemical leavening is a separate style of dough, built for speed, controlled lift, and a crisp texture.
Ingredients and Mixing the Dough
For a thin base that rolls evenly, weigh every ingredient. Small changes in flour or liquid can turn workable dough dry and cracked, especially when there is little thickness to hide mistakes.
The weighed formula
Use:
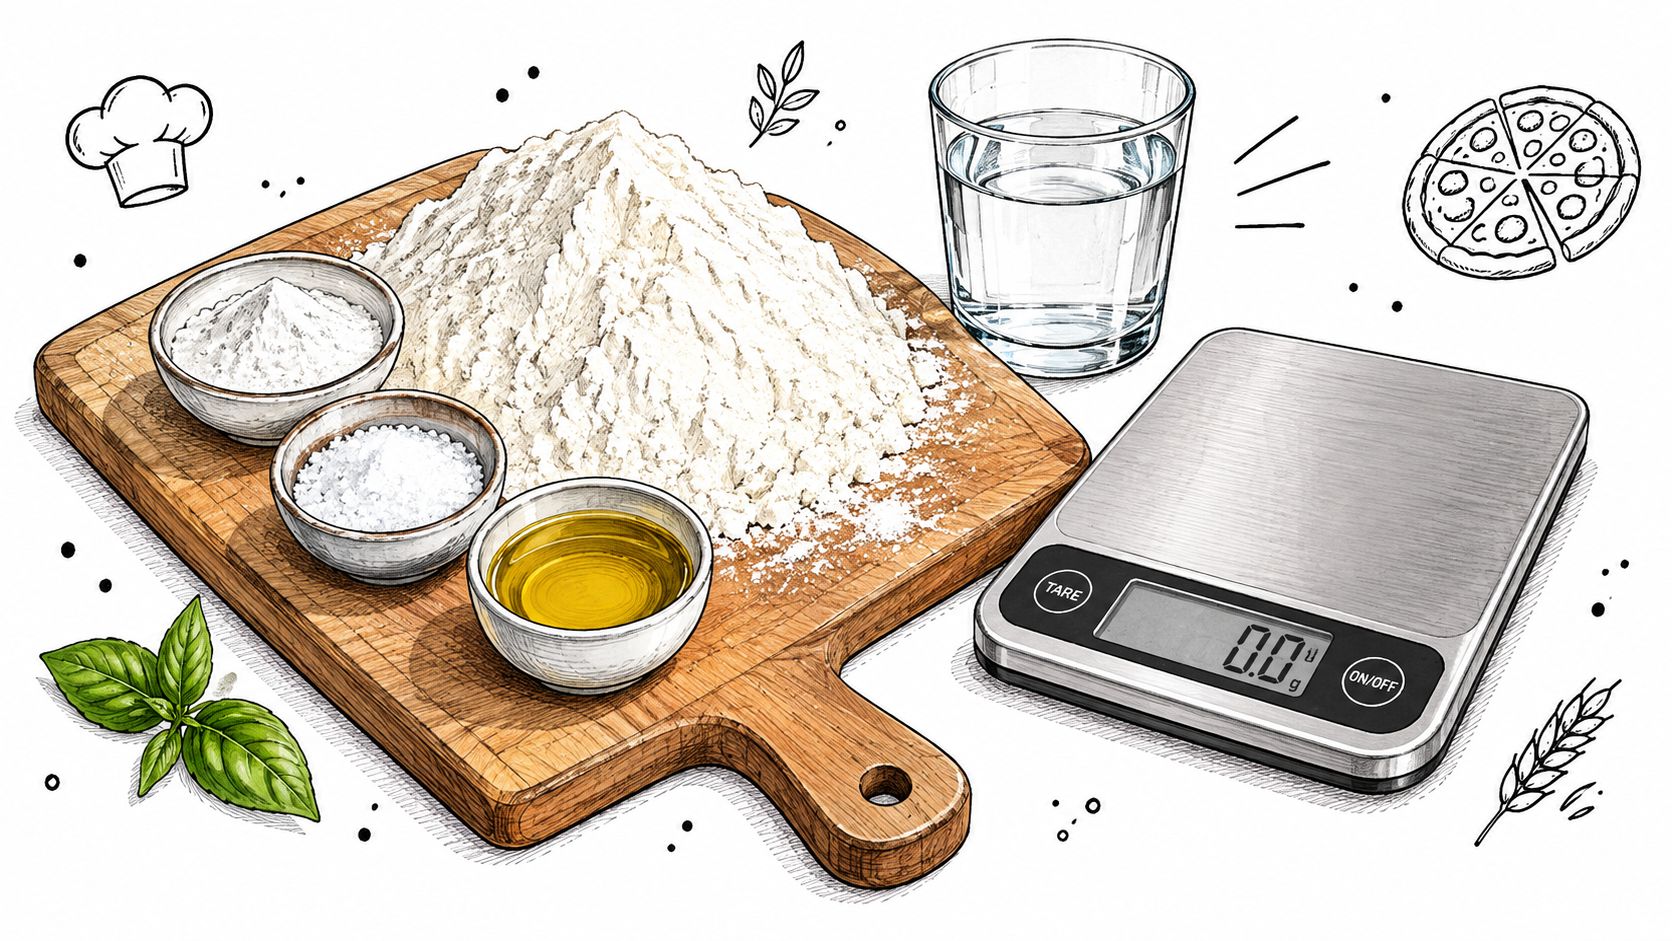
- 315 g all-purpose flour
- 14 g double-acting baking powder
- 6 g fine salt
- 200 ml water or milk
- 45 ml olive oil
These quantities, including the water-versus-milk option and oil guidance, come from this tested no-yeast pizza dough formula. Water produces a cleaner, crisper crust. Milk gives the baked base a slightly more tender feel, but it cannot supply the chew or fermented flavor of yeast dough.
Whisk the flour, baking powder, and salt together before adding liquid. Even distribution matters. Pockets of baking powder can leave bitter or soapy-tasting spots, while areas with too little may bake dense.
Mix just until the dough comes together
Pour in the water or milk and olive oil. Stir until the flour is moistened and the mixture forms a shaggy dough. Smoothness can wait. Overmixing now develops more gluten than this quick crust needs and can make rolling harder.
Turn the dough onto a lightly floured surface. Knead for 1–2 minutes, pressing and folding only until the loose pieces join. Longer kneading makes the dough more elastic, so it can pull back against the rolling pin instead of staying thin.
Shape it into a ball, cover it, and rest it for about 10 minutes. The rest hydrates the flour and relaxes the gluten. It is not fermentation. The dough should not puff, and a longer wait will not create yeast-style rise or flavor.
Mixing rule: Stop when the dough is cohesive, not when it looks like polished bread dough.
Dry dough needs patience before extra liquid. Let it sit briefly so the flour can finish absorbing moisture, then reassess. If it remains crumbly, add liquid sparingly. Sticky dough needs only a light dusting of flour. Too much flour makes the finished crust hard and dulls its crisp bite.
Rolling Thin and Topping Light
After the short rest, flatten the dough and roll it to approximately 6 mm, or 1/4 inch, or thinner. Thickness has more influence on the final texture than almost any other shaping choice. A thinner sheet gives moisture less distance to travel, so it bakes with a firmer, snappier bite. Go too thin, though, and the crust can become brittle under a heavy topping.
Roll from the center outward, turning the dough as needed to keep the sheet even. Leave the outer edge slightly thicker if you want a defined rim, but avoid building a large border. This dough has limited lift, so a broad rim takes space away from the crisp center without developing the airy chew of yeast dough.
If the dough springs back, stop forcing it. Cover it briefly, then roll again once the gluten has relaxed. Repeated aggressive rolling makes the sheet shrink and fight the pin. Rolling on parchment simplifies transfer, especially if you are new to handling a hot stone or steel. A wooden rolling pin offers more control than hand-pressing when you need consistent thickness. This guide to choosing and using a wood rolling pin explains the handling advantages in more detail.
Dock before the toppings go on
Prick the surface repeatedly with a fork. Docking gives expanding gas a controlled escape route and reduces large bubbles during baking. Leave the edge undocked if you want it to keep more definition.
Top with restraint:
- Sauce: Spread a thin smear instead of a wet blanket.
- Cheese: Add enough for coverage, not a thick insulating layer.
- Wet ingredients: Drain or pat them dry first.
- Heavy toppings: Use sparingly so the base can set before it becomes saturated.
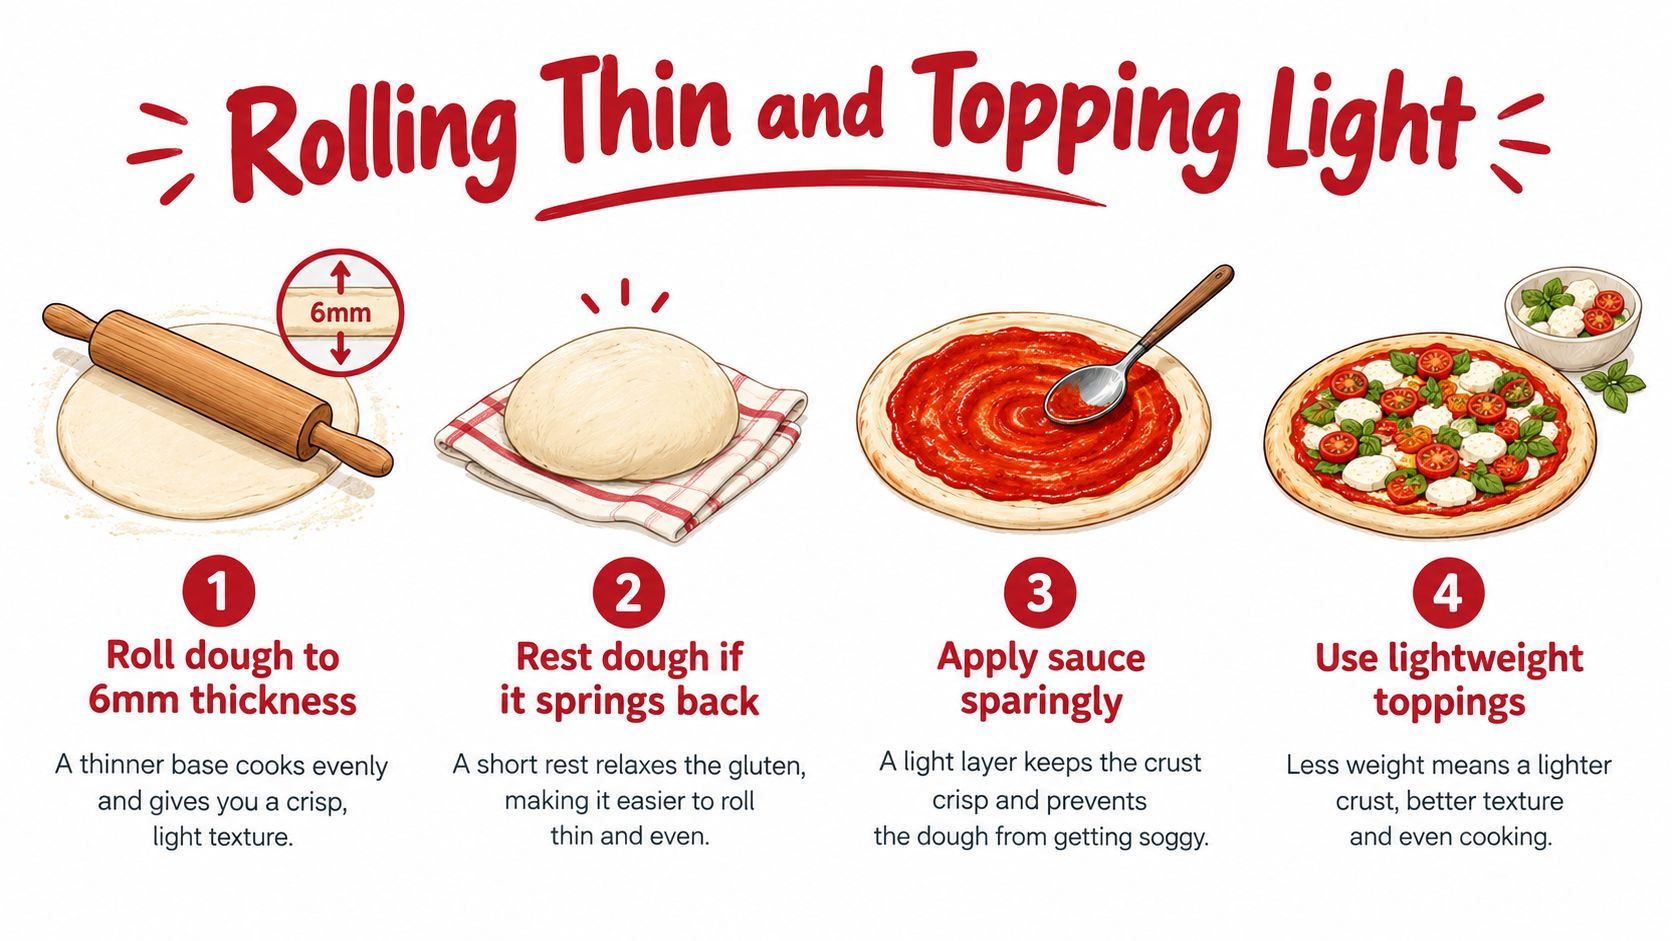
Every wet topping adds moisture that the crust must drive off before it turns crisp. Have the shaped pizza ready to bake promptly. Once baking powder is hydrated, its reaction has started, so leaving the topped dough on the counter can reduce the lift and weaken the structure you want.
Baking on a Stone or Steel for Maximum Crisp
A crisp base is decided before the pizza enters the oven. Heat the oven and baking surface to roughly 450–500°F (232–260°C), then preheat the stone, steel, or heavy sheet for at least 30–45 minutes, following this pizza baking process guidance.
A cold tray warms slowly beneath the dough, giving moisture more time to soak into the base before the structure firms. That is how a thinly rolled crust turns pale and soft underneath. A fully heated surface transfers energy immediately, helping the bottom brown while the toppings cook.
Use a fast transfer
Build the pizza on parchment if it makes launching safer. Once the oven and surface are hot, open the door, slide the topped dough onto the stone or steel, and close it quickly. A slow transfer can deform the dough, shift the toppings, and release too much oven heat.
A stone provides steady, even heat and suits home ovens or compatible barbecue setups. Steel reacts more aggressively and can brown the underside strongly, making it a good choice for cooks who want a direct heat response. This guide to using a pizza steel covers preheating and transfer in detail. A heavy sheet pan placed in the oven is a practical fallback when dedicated pizza equipment is unavailable.
Watch the launch and bake sequence here before you heat the surface.
Don't trust the timer alone. The underside tells you more than the clock.
Bake for about 8–15 minutes, adjusting for dough thickness, topping moisture, and the baking surface. Begin checking when the edges look firm and browned. Lift one side carefully with a spatula and inspect the underside. The target is a browned base, not just a dry-looking top.
The same method works on a backyard grill if it can maintain the required heat and accept the baking surface safely. Organize the parchment, peel, and toppings before opening the lid. Grills can lose heat quickly, so a prepared transfer helps maintain the bake.
For dedicated equipment, a rectangular stone offers useful surface area and makes it easier to shape a thin pizza without crowding the edges. Steel gives a faster, harder burst of heat beneath the dough. Either surface works when thoroughly preheated. Heat it fully, top lightly, transfer promptly, and judge doneness from the underside.
Let the pizza sit briefly after baking before slicing. The base firms as it cools, reducing the chance of crushing the center with the cutter.
Texture Expectations, Variations, and Troubleshooting
This crust should be judged as cracker-like or flatbread-style, not as a smaller version of fermented pizza. Baking-powder dough is ready without rising time, but it generally lacks the chewy, airy structure and fermented flavor created by yeast. Rolling thinner increases snap and crispness. It won't create more chew.
The choice is straightforward:
| If you want | Choose |
|---|---|
| Speed and a crisp, lightly lifted crust | Baking powder dough |
| An especially thin, snappy base | Unleavened flour-water-salt dough |
| Fermented flavor, extensibility, and airy structure | Yeast dough |
General pizza guidance places many doughs around 60–70% hydration, while lower hydration produces a firmer dough and tighter, snappier result, as discussed in this pizza dough troubleshooting guide. Gluten-free versions are a separate challenge. They may need about 80–100% hydration, plus a binder and resting time, to avoid crumbling. Don't substitute gluten-free flour one for one and expect the same handling.
Fix the failure, not just the symptom
- Cracks while rolling: The dough is likely too dry or hasn't hydrated evenly. Give it a covered rest before changing the formula, then roll with lighter pressure.
- Shrinking: The gluten has tightened. Pause, cover the dough, and let it relax before rolling again. Repeated force won't solve springback.
- Hard crust: Over-kneading can make the dough too elastic, while an underheated surface can leave it dry before it browns properly. Keep the knead brief and preheat thoroughly.
- Soggy center: Reduce sauce and wet toppings, roll thinner, and bake immediately after shaping. A cold tray makes the same problem worse.
- Large bubbles: Dock the center more thoroughly and keep the baking powder evenly dispersed through the flour.
Milk can replace water when you want a slightly more tender bite. You can also brush the edge lightly with olive oil or add dried herbs to the dough, but neither variation changes the basic trade-off. The recipe is built for a fast, crisp crust, and it performs best when you respect that design.
Hans Grill makes pizza tools for the part of this recipe that most often decides the result, especially the Rectangular Pizza Stone, Pizza Stone PRO XL Set, Pizza Steel PRO, and dough proofing boxes for oven or BBQ use. If you want a hotter, more repeatable baking surface for thin crust pizza, visit Hans Grill and explore the equipment and tested pizza techniques.


