

How Long to Cook Store Bought Pizza Dough (2026)
A practical benchmark for store-bought pizza dough is 8 to 15 minutes at 475–500°F. The surface you bake on determines exactly where in that range your pizza lands.
You've got the dough stretched, the sauce spread, and cheese sliding toward the edge of the crust. The oven says it's hot, but the last pizza came out with a browned top and a floppy center. That's usually not a timer problem alone. Thickness, baking surface, oven temperature, and moisture all decide when the dough is done.
Store-bought dough is convenient, but it still behaves like dough. Give it the wrong surface or bury it under wet toppings, and the clock becomes a poor judge. Use the right heat path, and a simple visual check will tell you when to pull the pizza.
Table of Contents
- How Long to Cook Store Bought Pizza Dough: The Practical Range
- Cook Times Based on Your Baking Surface
- Choosing Between Oven, Stone, Steel, and BBQ Methods
- When and How to Par-Bake Your Dough
- Signs of Doneness and Common Mistakes to Avoid
- Final Tips for Perfect Store-Bought Dough
How Long to Cook Store Bought Pizza Dough: The Practical Range
The crust is stretched, the toppings are on, and the timer is running. Then the top browns while the center stays soft. That failure usually comes from treating cooking time as fixed. A practical starting range is 8 to 15 minutes at 475–500°F, while broader home-oven guidance places the workable range around 7 to 15 minutes at 475–550°F, depending on the setup and dough thickness, as outlined in this store-bought pizza dough baking guide.
A thin round on a preheated steel may finish near the short end because the conductive surface drives heat quickly into the base. The same dough on a cool baking sheet receives less heat from below, so the crust needs longer to firm and brown. Thickness and moisture matter just as much. A thick center or wet toppings can keep the crumb soft after the rim looks ready.
Start with dough temperature
Cold dough makes shaping harder. It stretches unevenly, snaps back, and can leave a thicker center than you intended. Let the dough rest at room temperature for about 30 minutes before shaping so it relaxes.
That rest also gives you better control over thickness. A dense center holds more moisture and takes longer for the crumb to set. For thin crust, press or stretch the middle evenly rather than leaving a thick pad beneath the sauce.
Practical rule: Use the timer to tell you when to start checking, not when to remove the pizza automatically.
Set the baseline before baking
Use the hottest practical setting your oven can maintain, preheat the baking surface with the oven, and keep toppings restrained. Wet sauce, fresh cheese, and juicy vegetables can push the bake toward the longer end, even when the dough is thin.
Treat the first pizza as a calibration run. Check whether the bottom is pale, whether the center bends when lifted, and whether the cheese has melted fully. If the top finishes first, improve heat transfer or reduce moisture before adding more minutes. If the base is pale and firm, give it more time or use a hotter surface next time.
Cook Times Based on Your Baking Surface
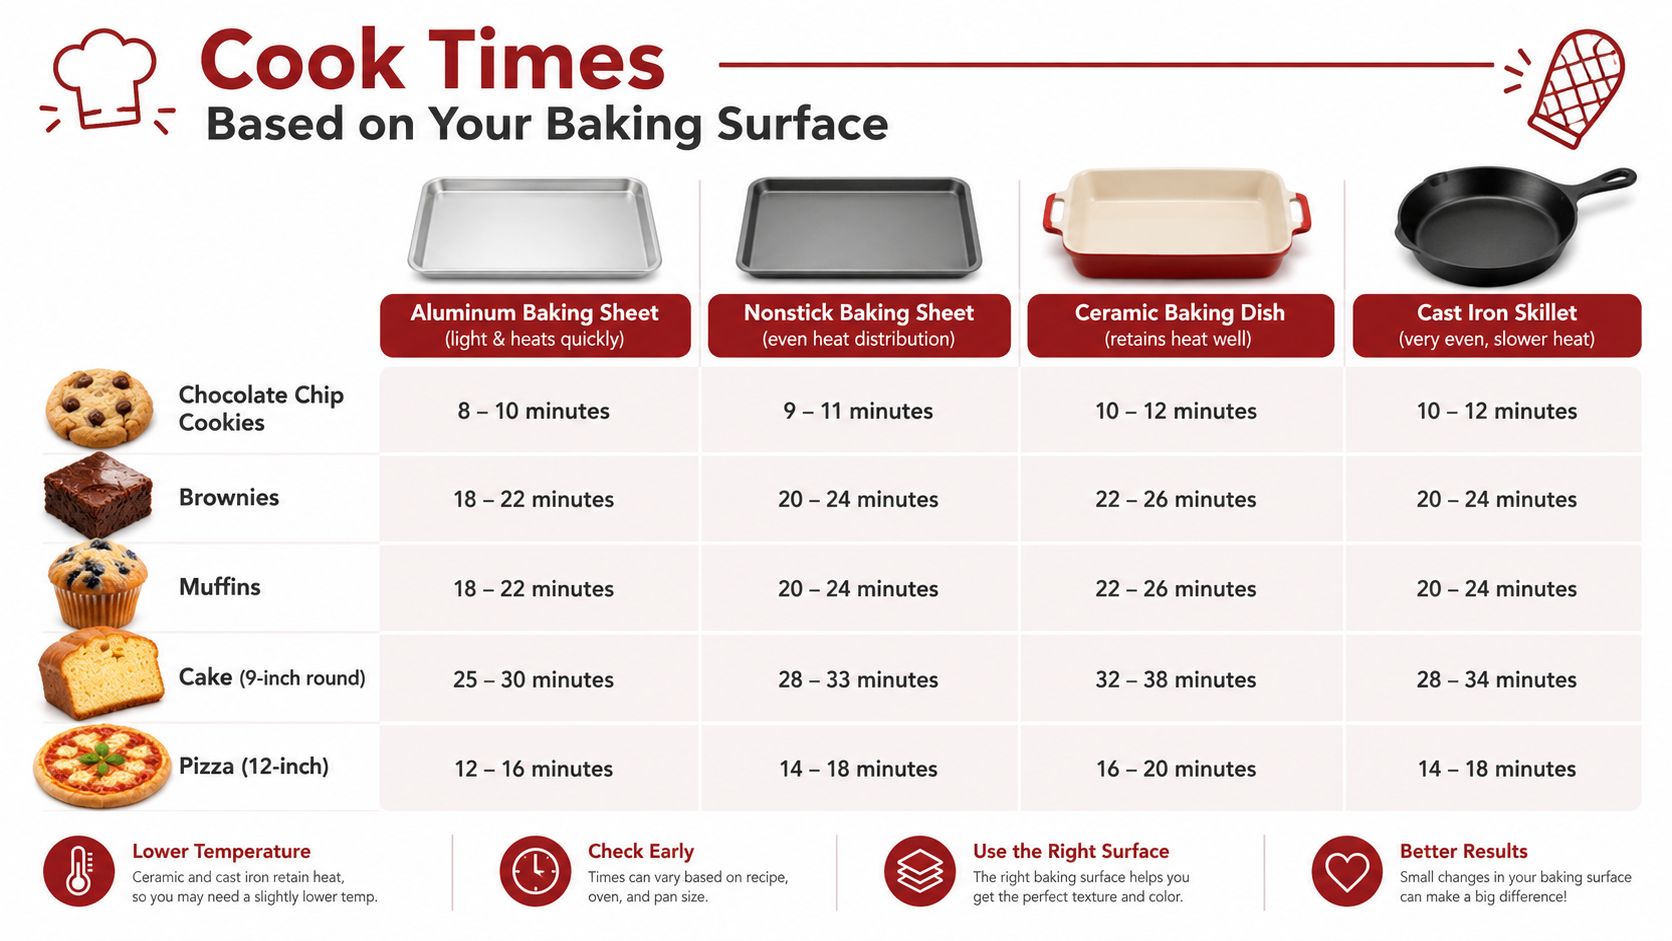
Your pizza may look ready on top while the center stays soft underneath. The baking surface controls how quickly the base sets, so cook time depends on conductivity, dough thickness, and how much moisture the toppings release.
At 500°F, use these as practical starting windows: 6–8 minutes on baking steel, 8–12 minutes on a pizza stone, and 12–15 minutes on a baking sheet. Start checking early, especially with thin dough or a well-preheated steel. A thick center, wet sauce, or generous toppings can push the bake toward the longer end.
Why the surface changes the clock
Steel moves heat into the dough quickly. That produces fast browning underneath, but a thin crust can scorch before the toppings finish if the oven runs hot. Stone transfers heat more gradually. It gives the base time to firm while still producing a crisp underside.
A sheet pan is easier to manage but usually browns the bottom more slowly. If the pan starts cold, part of the bake goes toward heating the metal rather than setting the dough. The top can then look finished while the middle remains pale, flexible, or damp.
| Baking surface | Practical result |
|---|---|
| Baking steel | Fastest bottom heat and the shortest typical bake window |
| Pizza stone | Strong, steady heat with a moderate bake window |
| Baking sheet | Slower base browning and a longer bake window |
This pizza steel temperature guide explains why steel performance depends on stored heat, not just the oven's displayed temperature. Preheat the surface fully before launching the dough. A lukewarm steel behaves much more like a heavy pan than a high-heat baking surface.
Match thickness to the surface
Thin dough works well on steel, but it leaves little margin for delay. Check the underside before the cheese turns dark. A thicker base on a sheet pan needs more time because the crumb contains more moisture and receives weaker bottom heat.
Heavy toppings create another delay. Sauce near the edge, fresh cheese, and juicy vegetables release steam that slows browning and keeps the center soft. If the bottom is pale, check the dough thickness, surface temperature, and topping load before raising the oven temperature. Those adjustments usually improve the crust more than just adding minutes.
Choosing Between Oven, Stone, Steel, and BBQ Methods
A standard oven is the most predictable option for a first attempt. It surrounds the pizza with steady heat, works with a baking sheet, and makes it easier to judge the relationship between crust color and topping doneness. Its limitation is the ceiling on heat and the weaker bottom heat from a basic pan.
A pizza stone improves the base without requiring a specialty oven. It stores heat during preheating and gives the dough a firm platform, which helps the center set instead of steaming against a cool sheet. The trade-off is that a stone needs careful handling and a proper preheat. Put cold dough on a barely warm stone, and you lose much of the benefit.
Steel for a sharper bottom crust
Steel is the more forceful option. It moves heat into the dough quickly, which suits thin pizzas and cooks who want a browned, crisp underside. That speed can punish heavy toppings, though. If the surface is hot and the pizza is loaded with wet ingredients, the base may darken before the top catches up.
Use a steel when you're prepared to check early. Keep the dough evenly thin, limit wet ingredients, and position the pizza so the top receives enough heat to finish at the same time as the bottom. If the underside colors too quickly, move the pizza higher in the oven for the final part of the bake.
BBQ baking for outdoor heat
A BBQ can deliver strong heat and a useful cooking environment for pizza, but it requires more active control. The lid needs to stay closed as much as possible so the top cooks while the bottom contacts the hot grate or baking surface. Direct exposure to a fierce flame can scorch one area before the dough has expanded.
A stone or steel creates a more stable platform inside the grill. The Hans Grill Rectangular Pizza Stone is one option designed for ovens and BBQs, while a high-mass steel suits cooks who want stronger underside heat. Choose the tool based on how quickly you need the base to brown, not only on the highest temperature printed on the dial.

For a side-by-side look at heat transfer and handling, this pizza steel versus stone comparison is useful before choosing equipment. Whichever method you use, watch the crust rather than chasing a fixed timer.
When and How to Par-Bake Your Dough
Par-baking is the fix for a specific problem: the toppings contain more moisture than the base can handle in one uninterrupted bake. It works especially well for thick dough, generous sauce, fresh vegetables, or cheese that releases water as it heats.
Start with plain dough on the preheated surface. One practical method uses 3–5 minutes of par-baking for a soggy-topping problem. Another two-stage approach bakes the dough for 7 minutes at 450°F, then adds the toppings and finishes for 7–10 minutes at 500°F, as described in this par-baking guide for store-bought pizza dough.
Use the two-stage method carefully
- Shape the dough evenly. Keep the center from becoming much thicker than the edges.
- Bake it plain. Look for a surface that has begun to firm, not a fully browned crust.
- Add controlled toppings. Pat wet cheese dry, drain vegetables, and spread sauce thinly.
- Finish the pizza. Return it to the hot surface until the cheese melts and the base develops color.
The point isn't to cook the dough twice until it becomes hard. The first stage creates a moisture barrier and gives the crumb a head start. The second stage finishes the crust while the toppings heat through.
A par-bake can go wrong in both directions. Leave the plain dough in too long and you'll get a dry, cracker-like base. Pull it too early and the center can still absorb sauce. Preheating the stone properly is part of the solution, and this pizza stone preheating guide covers the equipment side of that process.
Signs of Doneness and Common Mistakes to Avoid
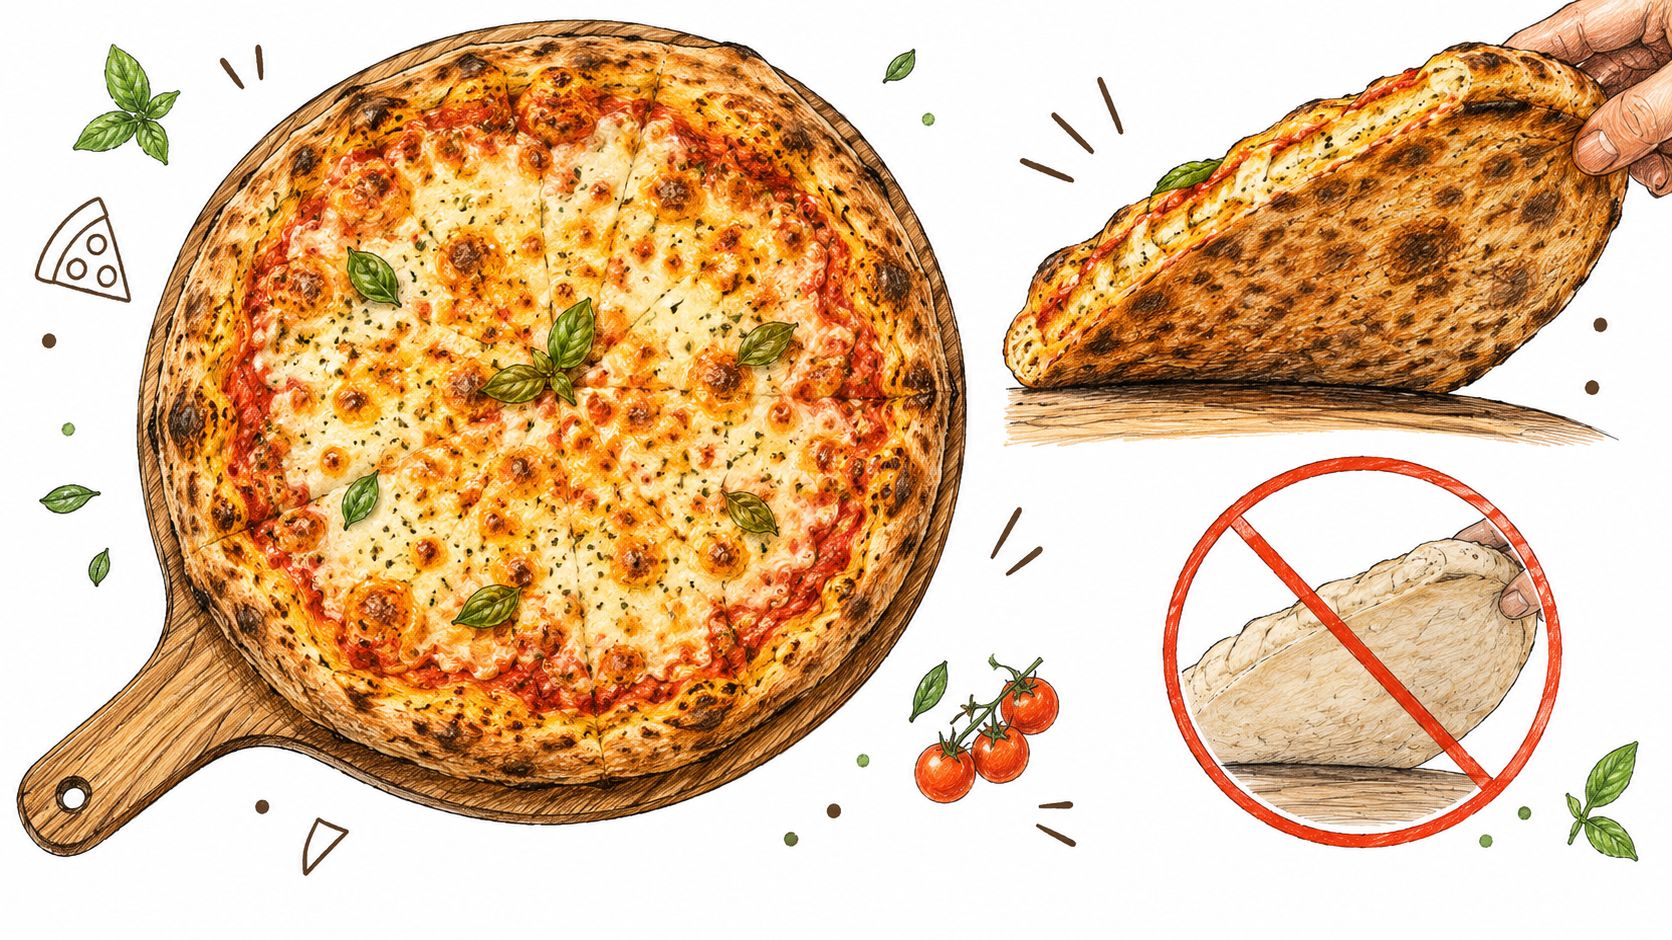
A finished pizza gives you several signals at once. The cheese should be fully melted and bubbly, the exposed crust should show golden-brown color, and the bottom should lift cleanly from the surface. If only one of those signs appears, keep evaluating instead of trusting the timer.
Lift an edge with a spatula and inspect the underside. A pale bottom usually points to insufficient contact heat, excessive thickness, or an underheated surface. A very dark bottom with a soft top suggests the surface is delivering heat faster than the oven can finish the toppings.
Read the pizza in this order
- Top first: The cheese should look melted and active, not merely warm around the edges.
- Crust next: The rim should have color and feel set rather than doughy.
- Bottom last: The base should release cleanly and show the level of browning your surface can produce.
Fix the failure, not just the symptom
Burned bottom, pale top: Move the pizza higher, reduce the surface intensity, or use lighter toppings. The problem is an imbalance between bottom heat and top heat.
Brown top, soft center: Thin the dough more evenly, reduce moisture, or use a par-bake. More time may darken the top without solving the wet middle.
Dry, hard crust: The dough was likely too thin, overbaked, or par-baked too aggressively. Use a shorter first stage and pull the finished pizza as soon as the bottom and cheese reach their completion cues.
Pale, limp crust: Check whether the baking surface was fully heated. A hot oven alone doesn't guarantee a hot pan or stone.
The best cooks use the timer, their eyes, and the underside of the pizza together. That three-part check is more reliable than any single minute mark.
Final Tips for Perfect Store-Bought Dough
Good pizza starts before the dough touches the oven. Let it relax, shape it evenly, and decide whether the toppings call for a straight bake or a par-bake. Store-bought dough saves preparation time, but it won't compensate for a cold surface or a waterlogged topping layer.
Use this short checklist before your next pizza night:
- Preheat the surface: A stone or steel needs to heat with the oven so the base receives immediate contact heat.
- Control the center thickness: A thick middle takes longer and is more likely to stay soft beneath the sauce.
- Keep wet toppings in check: Drain vegetables, pat fresh cheese dry, and use sauce lightly.
- Start checking early on steel: Fast-conducting surfaces can brown the underside before the top catches up.
- Use a sheet pan for simplicity: It gives you a slower, more forgiving bake when you're still learning the dough.
- Par-bake when the pie is loaded: Moisture control matters more than adding time to a single bake.
- Trust the underside: A clean lift and golden color tell you more than the timer alone.
- Rest briefly before slicing: Letting the crust settle reduces the chance of immediately crushing a soft center.
The answer to how long to cook store-bought pizza dough is therefore a range, not a promise. Start with the practical home-oven benchmark, then adjust for the surface, dough thickness, and moisture load. Once you know which variable caused the last failure, the next pizza becomes much easier to predict.
If you want a more reliable setup for crisp bases at home or on the BBQ, explore the pizza stones, steels, and dough-handling tools from Hans Grill. Choose the surface that matches your preferred crust, then use the visual checks above to turn store-bought dough into a better pizza.


